
The campaign begins with a violent revolt in the North and South, spreading fast like a bush fire. The North had been a powder keg for some time but it had been hoped any insurrection might be contained there. The insurrection actually began at Dongola, and spread North to Wadi Halfa which immediately succumbed and the Xth Sudanese Battalion garrisons in both locations were engulfed by the suddenness of the uprising. Even worse the revolt spread South through Berber and then Atbara fell to the rapidly growing Mahdist cause – it being suggested that most of the troops at Berber (from the 2nd Egyptian Cavalry Squadron) may have changed sides and joined the Ansar rather than fight them! All along the Lower Nile the lesser towns also fell to the Mahdists, and just the strongly held garrison town of Abu Hamed held out, surrounded by a countryside of seething revolt.
However Abu Hamed has only 3 turns of supplies on hand for its garrison so it may be in serious trouble even if it manages to hold out. As it stands Atbara will be a big loss to the forces of the Khedive and it will provide strong sustenance (victory points) to the Mahdist cause.
In the South, while the area around Khartoum seemed quiet, further up the White Nile the revolt spread quickly as it had in the North. El Dueim fell quickly, however not before the gunboat Bordein managed to slip out of the town and down river, heading for Khartoum just ahead of the Mahdist forces. Kosti also fell, it again being suggested many of the (2/5th Egyptian Company) garrison chose to change sides rather than fight, effectively cutting communications with Western Sudan. Meanwhile in the far South at the upper reaches of the White Nile the hapless 3/5th Egyptian Company, originally despatched to hunt slave traders and disarm their Bazingers, were totally unaware of the situation in the North until the local population rose up as one and massacred the unfortunate fellahin! Khartoum is now in some trouble, the unexpected revolt in the South has caught it unprepared and it has only 2 turns of supplies. While Bordein steams North to Khartoum’s support, due to her hasty departure she carries only the minimum of supplies, and is unlikely to be able to successfully forage for any more en route.
In the East & West things remained quiet and there were no immediate signs of insurrection, although word of events slowly spread into these territories.
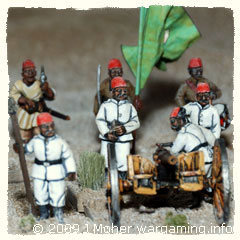
In the North & East the Anglo-Egyptian forces remain quiet – there is little they can do and as yet no forces have arrived from Egypt to begin building a relief column. In Southern Sudan Bordein is already in transit to Khartoum having fled El Dueim at the first indications of a region wide revolt, while Maizoub ‘John’ Pasha despatches Talahawiyeh (with her 9pdr Gun, Nordenfelt MG, & detachment of 6 armed Sailors) towing a Nuggar and transporting the 4/5th Egyptian Company (20 men), down river towards Abu Hamed – to discover the full situation and re-establish contact with the latter, and if possible, Cairo. The expedition is under the command of Captain Wahab El Zahra Agha, officer commanding the 4/5th Egyptian Rifle Company.
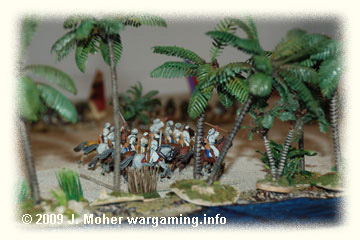
Talahawiyeh & her Nuggar reach Wad Hamed without incident. She successfully negotiates the 6th Cataract, before encountering a Dervish force while approaching Metemma. Talahawiyeh decides to put ashore and use her guns and accompanying troops to clear the village and obtain intelligence and supplies… Fire & Sword Battle 01: Skirmish before Metemma Battle Report…
Meanwhile in Western Sudan (Darfur) 4/XIIth Sudanese Battalion is ordered to send a detachment of 8 EM to El Fasher while the remainder of the Battalion remains to garrison Dara. At El Fasher the Commander of B Battery, Egyptian Artillery, awaits to oversee the arrival of the 4/XIIth Sudanese detachment to take over as garrison. The reason being that 2/XIIth Sudanese Battalion & 1/B Section, Egyptian Artillery, have departed El Fasher heading for El Obeid to join the latter’s garrison in preparation for a march on Khartoum. The latter arrive safely at Wad Banda, as does the 4/XIIth Sudanese detachment at El Fasher.
Meanwhile Bordein arrives at Khartoum – despite the hasty departure from El Dueim her captain has managed to accumulate some supplies (2 turns) in his short trip down river to Khartoum, which are gratefully received by the Khartoum Garrison.
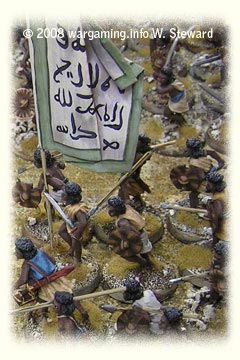
Back with Talahawiyeh the Dervishes outside Metemma turned out to be a small force of Beja Fuzzy-Wuzzies occupying a village outlying Metemma on the banks of the Nile, and who appeared to have had no artillery. Having successfully cleared the village and resupplied, Talahawiyeh now continues down river, encountering a larger Dervish force around Atbara. This force emerges from Atbara as they approach, consisting of a unit of Fuzzy-Wuzzy Infantry (with Spears & Swords) and 2 groups of mounted troops, one of Baggara Cavalry, and one of Fuzzy-Wuzzy Camelry, but Talahawiyeh shows no interest in coming close to shore. The Dervishes however have a single captured Krupp gun which sporadically and inaccurately shells the gunboat as it steams down the Nile, but its fire is to no effect and Talahawiyeh’s return fire with a couple of accurate rounds has more impact, deterring any further engagement just as she slips out of range downriver. By the end of the turn she is North of Atbara and halfway to her destination; Abu Hamed.
Uncharacteristically the Khedive & British Government react swiftly to the news of events – sending several reinforcements (benefit of rolling a 6)! At Aswan joining Sir Henry ‘Roundie’ Frotheringham’s command are:
- 1st/19th Yorkshire Rifle Company;
- 3rd Naval Brigade Rifle Company;
- HQ The Naval Brigade MG Battery;
- 2nd Naval Brigade MG Section (Gatling);
- 1/A Section, Egyptian Artillery (Krupp 6pdr).
Further troops arrive at Suakin reinforcing Akhtar ’Kieran’ Pasha’s garrison:
- HQ The Naval Brigade Rifle Battalion;
- 1st Naval Brigade Rifle Company;
- 4/Xth Sudanese Rifle Company.
Closing out the turn, the Revolt Indexes increase by 3 in both Northern & Southern Sudan, and by 1 in Eastern & Western Sudan. Although Talahawiyeh’s successful battle had a detrimental effect on the Revolt Index in the North it still achieved +4 which was sufficient to max it out at 10, meanwhile both the East & West increased due to the effect of the adjacent regions increasing. And lastly the Mahdist Forces accumulate 31 VPs towards their objective of 400.
This Turns Battles: Fire & Sword Battle 01: Skirmish before Metemma.
Read on to see Fire & Sword Turn 02: December 1883.
3 thoughts on “Fire & Sword Turn 01: November 1883”