Somewhere in Galicia in sight of the Carpathians, 1916 – the Brusilov offensive is in full swing and the Austro-Hungarian front line has temporarily collapsed – The Russian forces are pouring into and across Galicia rapidly and in huge numbers… Brusilov has achieved a stunning success (advancing up to 40 miles on a wide front in just a few weeks)… The Austro-Hungarians are in turmoil, and Archduke Josef Ferdinand has only just escaped Lutsk by the skin of his teeth as the speed of the Austro-Hungarian line’s disintegration meant Cossacks had already entered the city before the Austro-Hungarian Army Command realised the extent of the breakthrough!
Off to the North news has passed along the Brest-Litovsk rail line of the Russians rapid approach to Lutsk, and has reached a Commissariat Supply Train disabled before a small village a few miles north of the city. As the engineers work on repairing the engine and getting steam up, the local Austro-Hungarian Commander (Oberst Székely Boglárka) arrives on the scene, rallying what troops he has to form a new defence line West of Lutsk, and hopefully save the trainload of food & ammunition!
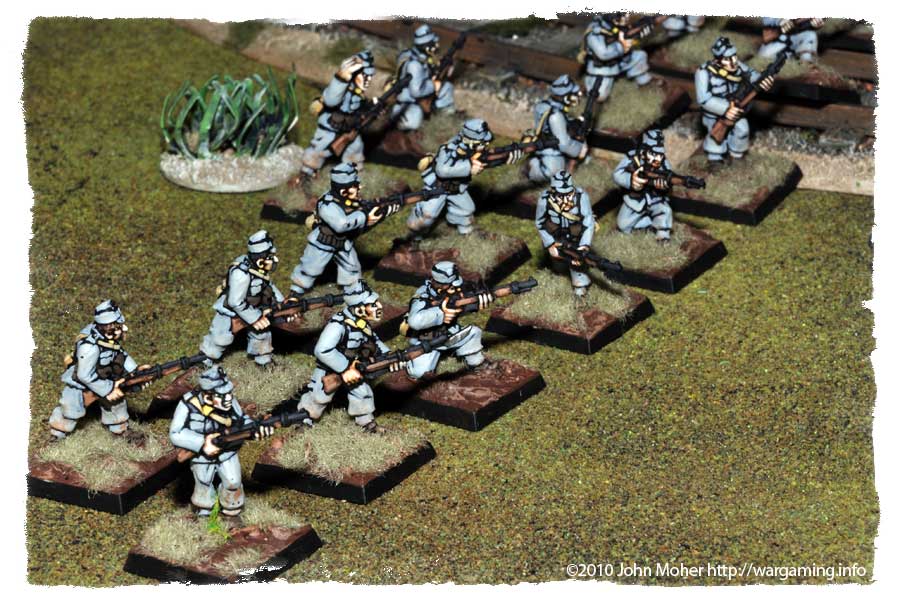
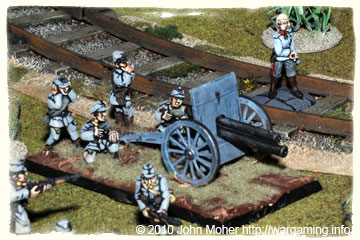
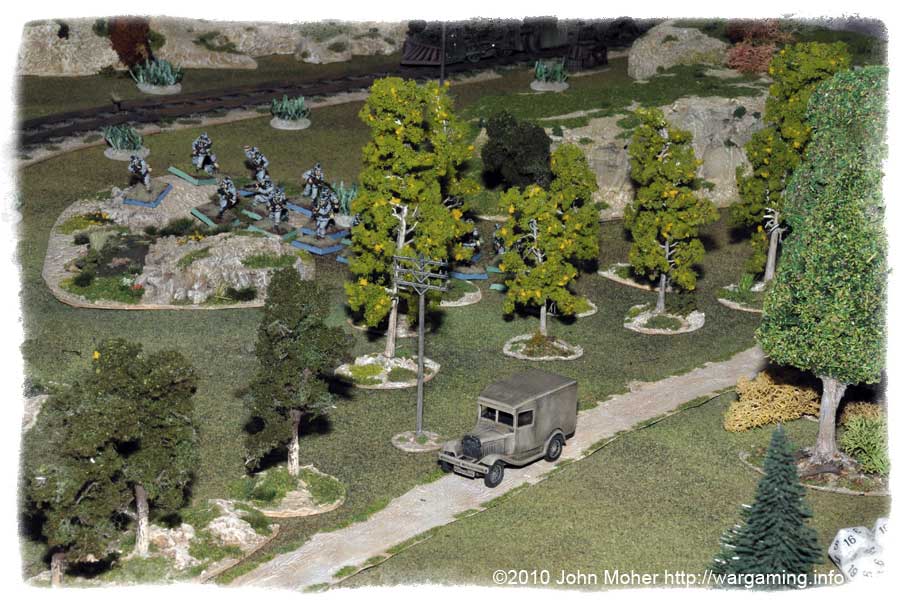
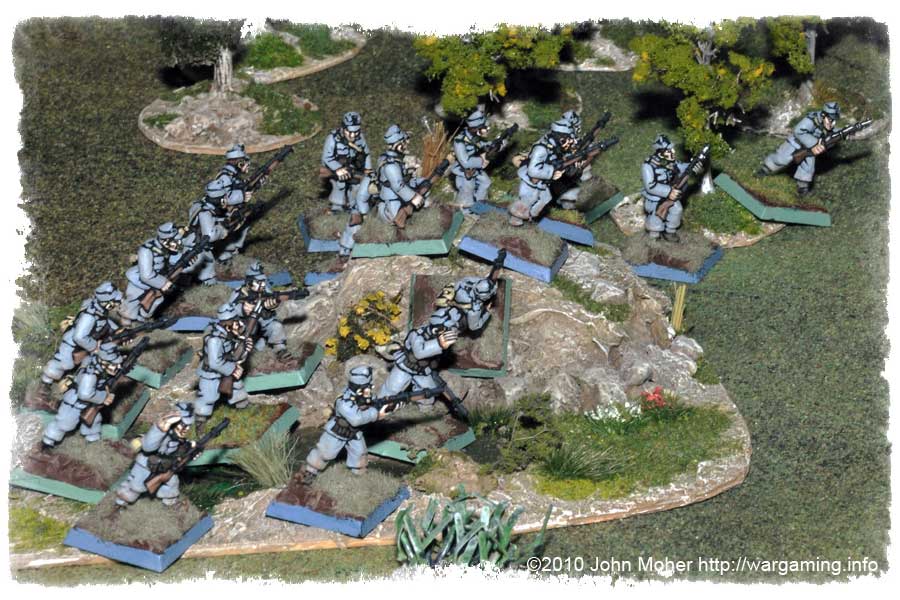
As Oberst Boglárka rallies more troops he immediately sends forth his two available companies of troops – on his left in some rough & wooded ground he deploys a composite company of Feldjäger; while on his right in the more open terrain covering the railway line and facing the nearby village of Kivertsi is a company of Infantry. Boglárka’s biggest boon is the arrival of a Skoda 8cm Field Gun Section, which he quickly deploys in the centre of his position. The balance of his battalion are arriving from the North-West, but the big question is will they arrive before the Russians – so he can extend his line, form a reserve, and hopefully get the damned train out of there!
Alas not the first, Russians are suddenly spotted amongst the Ukrainian Wheatfields, and the action will soon begin! Arriving with the leading elements of the Russian force is Polkovnik Sergey Khetagurov, a literal giant of a man at 6’6” tall! Not only that but hardened Siberian troops soon appear on the flank, threatening the Feldjäger’s exposed position, forcing them to advance their position to prevent being outflanked. Meanwhile more Russians arrive, along with a Putilov 7.62cm Field Artillery Section, which luckily for the Austro-Hungarians struggles to get forward amongst the wheatfields…
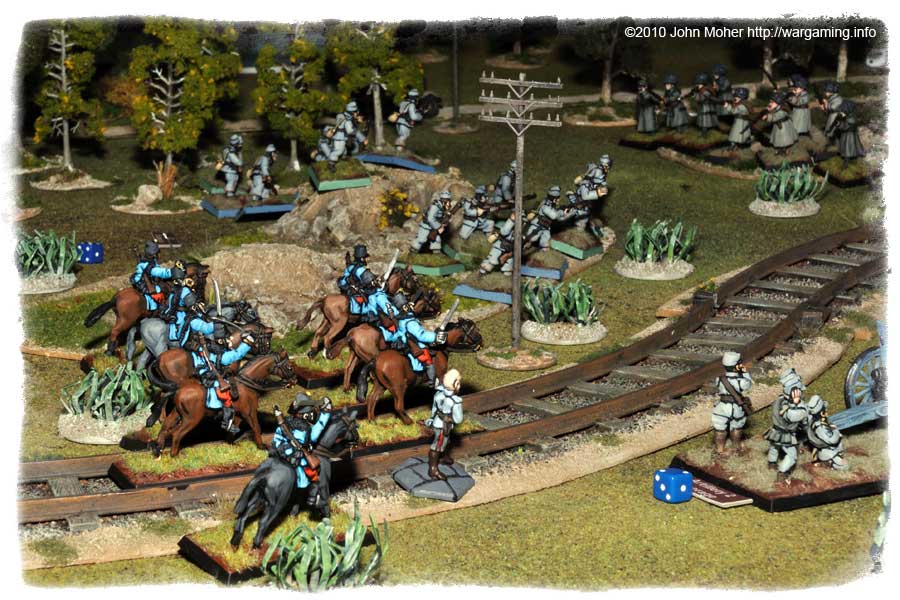
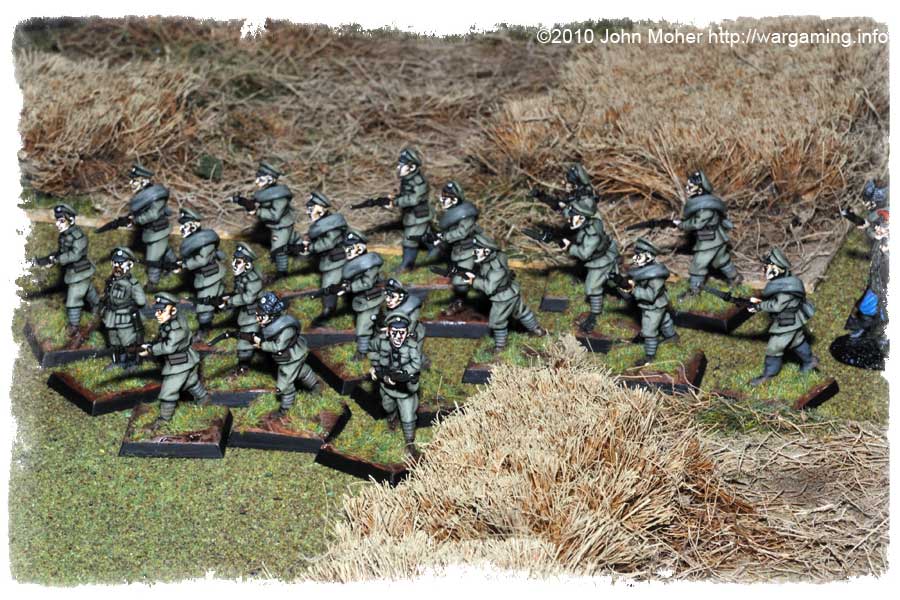
More Russians continue to pour onto the battlefield, including the leading elements of a Cossack Squadron. However Boglárka draws hope from the arrival of his first reinforcements, a Troop of Austrian Cavalry, some Hussars in smart blue uniforms – and they’ll see off those Cossacks he thinks. Meanwhile his artillery detachment has been in operation constantly, firing away furiously at the advancing Russian forces, albeit at varying levels of success. Soon though the Russian artillery is replying, however it does not waste it’s time firing on the Austrian artillery, instead it begins to bombard the Infantry Company deployed in the open ground, and very very ineffectually.
Soon the first wave of Russian Troops are closing in on the Austro-Hungarians, Siberians and Russian Infantry mass to overrun the Feldjäger, and the latter have been firing furiously at the approaching Russians, inflicting many casualties. However the Russians are soon pouring volleys of devastating rifle fire into the Austro-Hungarians at close range, and despite the cover of the rough ground the Feldjäger are rapidly being reduced, and have soon had 40% casualties! Where are the rest of the battalion cries Oberst Boglárka? Faced by the Russian Artillery Fire the Austro-Hungarian Infantry Company on the right moves forward into some wheatfields to endeavour to gain some cover from the fire.
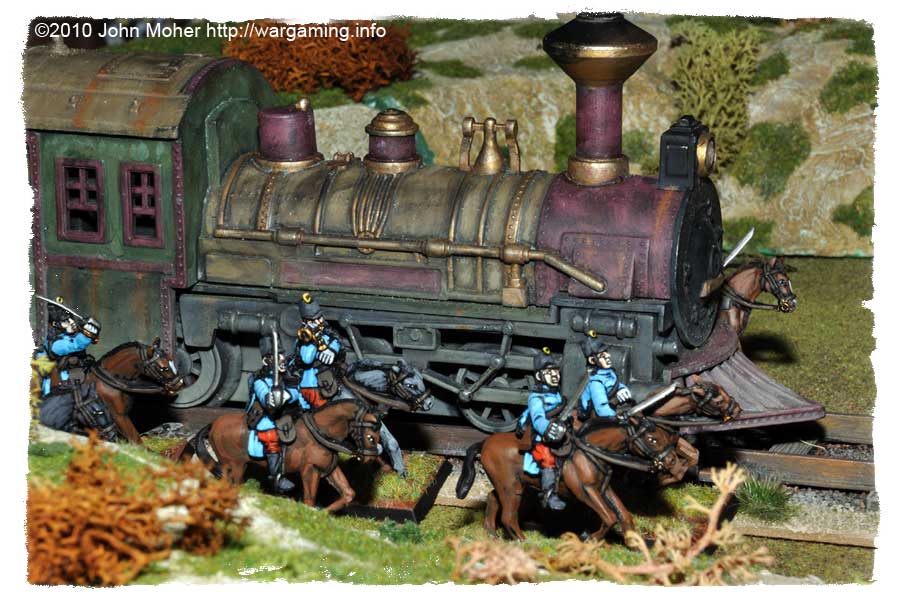
The Austrian Hussar Troop Commander confers with Boglárka, and then deploys his troop; Boglárka asks him to cover the gap between the artillery and Feldjäger and try to prevent the first wave of Russian Infantry from closing on the latter for fear of being charged. General Khetagurov meanwhile has left his Cossacks to their devices, and the troop has soon infiltrated right up to the Austrian Infantry on the other flank – the Russian Infantry is concentrated on the North side of the Railroad, so they are endeavouring to pin the Infantry Company South of it and prevent them aiding the Feldjäger. However the latter are not perturbed and head north towards the flank of the exposed Russian Infantry, right in front of the Cossacks!
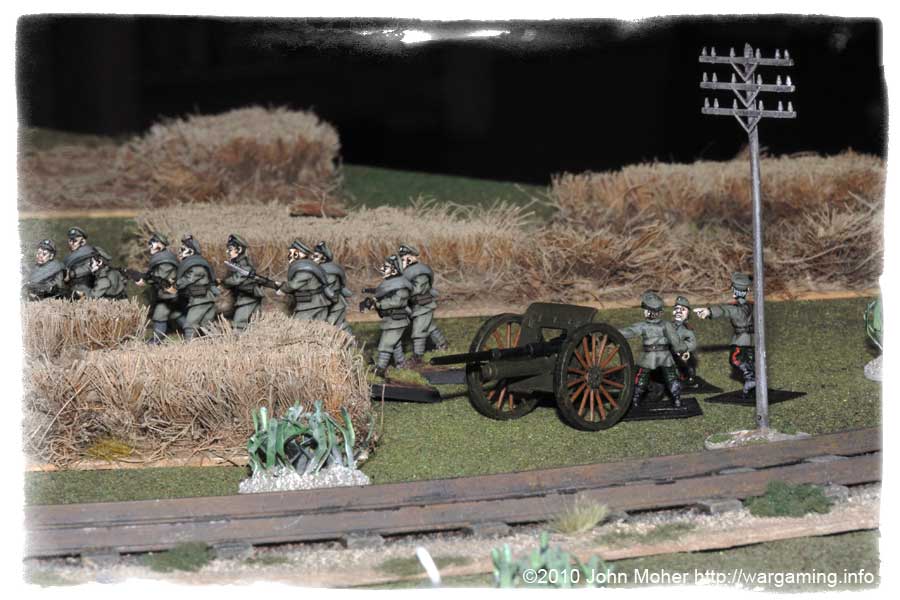
Finally more reinforcements start to arrive – Boglárka is very pleased to see his second Infantry Company appear advancing up the rail line. Meanwhile the Cossacks seize their moment and charge, smashing into the flank of the first infantry company (who have only detailed a handful of men to watch their flank), and it looks like they’ll overrun at least part of the company.

As if in unison the Austrian Hussar Troop Commander also can no longer resist the option and charges across the open ground at the flank of the leading Russian wave of Infantry – however unlike the Cossacks who had a covered approach he crosses right in front of the Russian Artillery, and the Hussars are decimated by a volley of well directed artillery fire, suffering 50% casualties before the survivors crash into the nearest Russian unit.

Meanwhile the Austrian Infantry hold their ground and do not break, and after a brief skirmish the Cossacks retire, both sides having suffered minimal casualties. The Austrian Hussars however suffer more casualties, the Russian Company putting up stern resistance despite having had heavy casualties from artillery and rifle fire, and they soon fell many of the Hussars, the remains of the Austrian Cavalry dispersing and ceasing to be an effective force.

The Russian artillery meanwhile moves forward to improve its field of fire, and the second wave of Russian troops are closing fast on the Austro-Hungarians…

Khetagurov prepares his first wave of Siberians and Russians to assault the Feldjäger, as he hurries his second wave of remaining Infantry Companies forward to exploit the success, he has seen the train and the potential booty it will offer his exhausted troops, at the end of their supply lines… With the demise of the Hussars Boglárka endeavours to rush his second Infantry Company into the line, while cursing where the rest of his battalion is. It’s going to be a close run thing to hold off the Russian hordes…
The Scenario
Austro-Hungarian OOB: Troops On Table
- Oberst Székely Boglárka C-in-C (Infantry Battalion C.O.)
- Composite Feldjäger Company (1 Officer, 1 NCO, 18 Riflemen)
- 1st Infantry Company (1 Officer, 1 NCO, 18 Riflemen)
- Field Artillery Section (1 8cm Skoda M5 Field Gun, 1 NCO & 3 Crewmen)
The Austro-Hungarian on table forces deploy anywhere up to 3’ from the point where the railway line leaves the table. The train is broken down on the first piece of track at the point (i.e. next to the table edge). We only modelled the Locomotive & Tender to avoid it being too long. Out table was 8′ x 5′ with rail line starting close to the corner of 1 short side (this is where the front of the train was deployed at the table edge).
Historical Note: the 8cm Skoda M5 Gun is actually 7.65cm calibre (the Austro-Hungarians always ’rounded up’ the calibre for their gun designations).
Austro-Hungarian OOB: Reinforcements
- Austrian Hussar Troop (1 Officer, 7 Troopers)
- 2nd Infantry Company (1 Officer, 1 NCO, 18 Riflemen)
- 3rd Infantry Company (1 Officer, 1 NCO, 18 Riflemen)
- Battalion MG Section (1 Schwarzlose MG, 1 NCO & 3 Crewmen)
The Austrian Reinforcements start arriving once the Austrian player has thrown equal or less than the turn number on a D6 (e.g. on Turn 3 he must throw 1-3 on a D6) at the start of the movement phase. Once the throw is successful one unit of the Austro-Hungarian Player’s choice arrives each turn within 6” of the railway line & train.
Russian Order Of Battle
- Polkovnik (1st Captain) Sergey Khetagurov (the 6’6” tall Battalion Commander)
- Cossack Cavalry Troop (1 Officer, 7 Troopers)
- Siberian “Shock” Company (1 Officer, 1 NCO, 18 Riflemen)
- 4 x Russian Infantry Companies (each 1 Officer, 1 NCO, 18 Riflemen)
- Field Artillery Section (1 7.62cm Putilov M/02 Field Gun, 1 NCO & 3 Crewmen)
The Russians start the game with up to half their units (rounded up) entering from the 1 short and ½ a long table edge furthest from the train. Their remaining units enter 1 per turn commencing turn 2 in the order chosen by the Russian player along the furthest away short table edge.
Objective
Austro-Hungarians must prevent the Russians getting into contact with the train; if a single Russian unit contacts any part of the train with 3+ figures, or the Austro-Hungarian force has more than 3 of its 6 ‘units’ (counting the gun and MG as ½ units for this purpose) either destroyed (removed from table), broken, or routing, then it is a Russian Victory.
Rules
This game was played with TSATF using a modified version of the WW1 Rules for Gallipoli found at the Side Shows of the Great War Yahoo Group. Unit Quality is determined randomly the first time it is required (e.g. the first time a unit needs to shoot or check morale). The Hussars, Cossacks, Feldjäger, and Siberians are all considered Best Quality and so have a fair chance of being Elite, otherwise Regular; all the remaining units are Average/Typical and will usually be Regular but have a small chance of being Elite, and a slightly higher chance of being Poor/Conscript. For more info on the modifications see the SSotGW Yahoo Group’s Files Section.
(I have further modified these modifications, to streamline and simplify them, and expand them outside of Gallipoli/Palestine – I hope to eventually to make my version available here at Wargaming.info).
More Game Photos


Great looking game John
Kind regards
Robin
Cheers Robin. Unfortunately I was bit of a dunce and had inadvertently knocked my camera onto full manual mode but didn’t notice for a while – so many of the photos I took came out badly exposed and I couldn’t use them…
Great looking game John
Kind regards
Robin
Cheers Robin. Unfortunately I was bit of a dunce and had inadvertently knocked my camera onto full manual mode but didn’t notice for a while – so many of the photos I took came out badly exposed and I couldn’t use them…
Amazing, may I ask what miniatures you use here, they are look great.
Hi Dylan, most are Battle Honors (now defunct) and Brigade Games if I recall correctly. And a few are Copplestone from their Back Of Beyond range…
Hi Dylan, some are Battle Honors and some Brigade Games. And a few are Copplestone from their Back Of Beyond range…