So a week after our first game Cam and I set about a second – the plan this time to start to try and be a bit more savvy and also Cam decided on a gimmicky “All Infantry” army to see how it’d do! Note that as I did with the previous game I’ll generally talk in terms of Maurice Lite (as that is what is currently published) but we were using aspects of the full game as referenced throughout the Maurice Lite rules (and I’ll note in the narrative where they occur). The game commenced with us determining a battle in the Tropics (this is a full game feature that determines type of terrain and how much can be selected, what type of troops aid scouting to gain the initiative, etc), Cam won the scouting (with the help of a special ‘Notable’ espionage card) and chose to Defend (another full game feature). Normally the players would then now determine and place the terrain but I had pre-determined it’s type and location randomly to save time prior to Cam’s arrival – so instead Cam chose which side he wanted. As Invader I then deployed first…

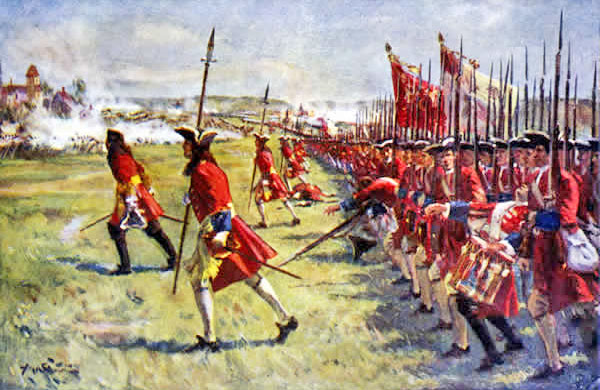
Once again we were using Napoleonic figures for the War of the Spanish Succession – I know Marlborough would be turning in his grave over such a thing – so please forgive and bear with us… The British Army deployed with 8 Battalions in 3 Lines (of 4, 3, and 1 respectively) supported by 1 Artillery on their left, and with 4 Cavalry Regiments split 3 on the left in 2 lines and 1 on the right as a flank guard and reserve. The defending French army meanwhile rolled out 14 Infantry Battalions in 2 Lines (8 & 6 respectively), although one battalion was of raw recruits (with no Cavalry or Artillery). Both sides featured a ‘Notable’ of some type serving as a sub-commander, each having their own unique personalities (Cam’s fellow was rather low-ranking and had little direct affect on things, while mine was a bit more higher ranking gentleman and had some beneficial ability on rallying my troops under his command and even more so the unit he was personally attached to). So now the battle was afoot…

As Invader for my first round I thought I’d try something a little funky – so using a special event card (“That’s Not On The Map” – see the Maurice Lite card deck) I slapped down a patch of previously undetected rough ground directly in front of the centre of Cam’s line; this was in theory a cunning attempt to force him to break his army into two wings, to move around the bad going (no one ever ever ever wants to go into rough terrain with Regular troops in Maurice), and thereby preventing him from using the force activation system to activate his entire army simultaneously – you can judge later how well this was achieved…

Cam responded by immediately activating his Infantry (as one entire force) advancing his right wing, but doing so in a way to maintain communications with the rest of the army – he also tried some fancy manoeuvring in the centre to work a way around the scrub, again while maintaining his communications. On the other flank (the French Left) the performed a wonderful series of pirouettes and turns, marching off in unison for the apparently sacred animal pens on the British right…

For my second round I responded by declining a volley phase (it was only going to allow Cam’s Infantry to shoot up my cavalry anyway), and then charging Cam’s Infantry that were threatening my Cavalry – his advance had brought him into musketry range (just) and my cavalry was likely to get decimated over the following 2-3 rounds by volley fire if it did not react… Due to his proximity it could not use it’s speed to try and evade off to the flank (and anyway doing so would have just exposed my entire line for Cam to roll up in short order). However I managed to manipulate a 2:1 on one of Cam’s units, and with the help of an Action Modifier card it at least giving me a hopeful 25% chance of outright destroying it if a rolled high (but at the cost of one of my units being similarly outnumbered)!

Combat Example: In combat every unit fights every other unit that is facing it. So you sometimes need to compare a units combat result with multiple enemy units, and as mentioned above it means you can potentially outnumber one enemy while also being outnumbered yourself. My cavalry charge was a fairly straight forward combat, as none of the units had yet suffered any damage (DISRs), and all units were equal quality so had a base value of 6, the other pertinent modifiers were one unit on each side was effectively outnumbered (i.e. contacted or faced by 2 opposing units – the negative modifier is the number of units facing you within 1BW or directly contacting you) so suffered -2 each, my two cavalry received +2 from a charge modifier card, and all units added the result of a die roll for the variable component. You can see the results in the photo above (the 2 dice are used for each unit to show the total reached after die roll & modifiers).
So now we needed to determine the results – Cam is the defender so the French go first – the unit on the French left (8) is beaten but not doubled by one opponent (9) and tied with the other (8), so it suffers the beaten but not doubled result of 2 DISRs (Disruptions – a unit is destroyed when they exceed the number of bases), this is the unit I had 2:1 on and had hoped to get lucky and double it. The French unit on their right (9) was equal or greater than it’s sole attacker (8) so only suffers 1 DISR (all units involved in combat always suffer at least 1 DISR). As a result neither French unit is destroyed (either by doubling or accumulated DISRs reaching 5).
On the British side the right hand unit (9) is greater than it’s sole opponent (8) so suffers 1 DISR, while the left hand unit (8) has drawn with one opponent (8) and been beaten by the other (9), in either case it suffers 2 DISR as it failed to beat both the enemy. As their opponents have not been destroyed the cavalry must now full back 2BW, before initiative passes back to the French…
Correction: We misread the fine print of the Outnumbered Rule – it states that “if a unit engages multiple enemies, then it gets a -1 for each unit that engages only it“, the last two words being the key bit – so in our combats above we should of only had a -1 each on the outnumbered units, and therefore all 4 units would have scored ‘9’ and all combats would have been drawn. So we should have finished with both French Infantry on 1 DISR (for Defenders who are equal to or greater than their attackers), and both British Cavalry on 2 DISR (for Attackers who are equal to or less than the defenders).
Needless to say Cam immediately followed up with a Volley Fire phase inflicting a third DISR on the left British unit, as well as one on the neighbouring artillery, However the right hand British cavalry unit escaped without further harm (this time) – he also had his C-in-C relocate his headquarters forward to a point behind the scrub…

Cam followed up his firing (my response had been the lonely bark of my Artillery unit) by endeavouring to Rally his left flank infantry, something he wasn’t overly successful at – but it did mean he was able to draw fresh cards into his hand to replenish it (what I did not know at this time was Cam was holding a fistful of very good cards and was desperately trying to avoid using any unnecessarily)!

My next round started with again skipping the volley fire phase (I needed to avoid any opportunity for Cam to shoot up my cavalry before I could rally it and get out of his musketry range), and like Cam I opted to rally my troops, alas my card draw immediately brought about a Mandatory Event – which resulted in the loss of 1 Morale for the British (this card is not part of Maurice Lite). However my rallying was extremely successful – thanks to a ‘National Advantage’ (an army trait card not present in Maurice Lite that can give an army a unique characteristic or characteristics) which made my army very good at rally attempts – and all 4 DISRs were rallied off my 2 Cavalry (see below – note I could not rally the Artillery unit nearby because it was not part of the cavalry ‘force’ I activated).

The next couple of rounds consisted of Cam volley firing on my cavalry while I rallied to remove the next lot of inflicted damage and then the next round manoeuvred my cavalry (essentially the supporting 3rd unit and the right front unit retired via retrograde leaving the remaining unit to redeploy from Mass – i.e. echeloned squadrons – to Line); by getting into line it became a harder target to hit by volley fire (both our armies had a +1 to firing as a ‘National Characteristic’ so with the bonus for shooting at a Dense Target that Mass provided Cam he was hitting my Cavalry on anything but a ‘1’), and could cover both the other units from any continuing volley fire. While I was doing this Cam used his rounds to attempt to rally the remaining DISRs off his right flank infantry opposite my cavalry, and to endeavour to sort out his centre behind the scrub. My next round (my sixth) finally saw the British Infantry lurch forward – my cavalry had finally survived a round of Volley Fire from Cam that didn’t need immediate rallying, thanks in part to getting into line formation (see below)…

Cam’s response was to rapidly get his troops back into a firing line on his left (where you recall they had been somewhat mesmerised by the animal stalls), while on his right his infantry began to aggressively advance on the British cavalry, and ion the centre some new fancy manoeuvres were attempted to try and bring the 4 battalions there into the action (see below).

So finally I figured I’d get a chance to inflict some damage on the French – with a devastating Volley of British fire – however Cam had been patiently waiting with a fistful of cards for just this moment, while my hand was almost depleted and lacked anything to modify firing – first he hit me with “First Fire”, grabbing the chance to fire first, and inflicted numerous DISRs on my troops, then when I returned fire he hit me with “Thick Smoke” disadvantaging my firing (which was further disadvantaged for the units he had already inflicted 2+ DISRs on, as multiple disruptions on a unit cause a -1 to its firing) – so while he had hit me on 3+ this round I was only hitting on 4+ or often only 5+! Needless to say the British firing was rather underwhelming!
 - before the Volley Fire phase")
The Action Phase of the turn was then consumed rallying the badly shot up infantry – who had got the worst of things. With Cam’s next round (his seventh, so effectively turn 14 of the game) there was more deadly Volley Fire, if I recall correctly Cam played yet another fire modifier card for his shooting, and having the initiative he shot first again too – decimating the British troops who were left with 2 battalions and a cavalry regiment all on 4 DISRs, and another battalion on 2, while the worst the French had was 1 battalion on 2 DISRs. Cam promptly followed this up with a charge on the French far left, hitting 2 British battalions on 2 and 4 DISRs respectively – the latter unit effectively being automatically destroyed (as you always suffer 1 DISR in combat regardless, and 5 DISR break a unit) although it did get to attempt to fight back for what it was worth. The other British battalion did much better repelling the charging French battalion (see below) – but the rot had started on the British right and both Cam and I were conscious of how a seemingly small advantage in Maurice can snowball quickly…

Next round I took the risk of initiating more Volley Fire – as I hoped to get accumulated effects on a couple of Cam’s units – but came off second best, destroying 1 French Battalion for the loss of 1 British battalion and 1 British cavalry regiment. My remaining activity was more rallying to try and shore up the surviving units and replenish my hand with more cards.

More volley firing initiated by Cam saw both sides have units heavily hit with DISRs – lacking my ‘National Advantage’ for rallying Cam had found it harder to rally these off his troops as the game progressed and this was probably all that was keeping the British in the game at this point. Some lucky firing from the British however wiped out the damaged French battalion that had won the previous charge combat – bringing the casualties to British 3, French 2, although I also had the -1 Morale from the Mandatory Event Card (effectively making it actually 4 to 2). Cam followed up his firing with more movement, his 2nd line on his left advancing to fill the place of the just destroyed battalion (see below).

In the next pair of rounds 2 more British battalions (both on the right) and the artillery were destroyed versus 1 more French battalion – making the losses 6 British (7 with the Event Card) versus 3 French. My primary action was rallying to stave off the complete collapse of the infantry, thereby preventing me from taking any action to have my cavalry try to intervene – they stood by and watched as the infantry were crumbled away. The game was now almost over as the British Morale was almost depleted and the French still had about half of theirs. It was just a case of Cam finding the right place to make the final attack to break the British (see below).

The next pair of rounds saw some desperate Volley Fire and British initiated charges – somehow the British hung on and managed to destroy another French battalion.

It was only a moment before another British battalion on the right was destroyed (and yet another was on 4 DISR about to collapse), and the British morale finally gave out and the army was broken. The French had won – final casualties being British: 5/8 battalions, 1/4 cavalry regiments, 1/1 gun, and the dreaded -1 Event Card; versus French: 4/14 battalions. The game had lasted about 10 (or perhaps 11) rounds each (i.e. 20 or so ‘turns’ in total).

Conclusion
Was playing the ‘magic scrub’ in front of Cam on round one a good idea? Cam didn’t think so and chastised me for not holding it for a key moment when he charged or such like – as once declared a charge must proceed even if into rough ground/bad going (the latter inflicts 1 DISR on a Regular unit every time it moves in such terrain plus reduces it’s firing & combat effectiveness – you normally do not want to ever voluntarily enter rough with regulars in Maurice, which is a good effect for 18th Century troops) – however my plan had been to disrupt Cam and break up his ‘one force’ army – in some ways it worked (4 of his battalions never participated in the battle), but in others it failed (it never actually broke up his army so it had to be activated as 2 or more forces – so probably was a wasted use of a very strong card).
Having Cam’s infantry almost chasing my cavalry was a bit strange – however it wasn’t so much that they were pursuing them but rather advancing generally on their position – albeit in Cam’s strange oblique way – and that caused me problems, as there was just no easy way to get the cavalry out of that position even before he advanced, once you are in musketry range it’s pretty hard work for the cavalry to do anything but retire via retrograde in the face of the infantry… And its the cavalry that’s proving the challenge to get on top of.
Once again it was an exciting tense fun game – even when Cam had me more or less on the ropes the challenge was for him to maintain it – and there was one small slim chance late in the game I might have dealt him a blow that would have evened the odds, and given us another neck-n-neck nail-biter finish like the previous game… Note also that we are using a play-test version of the card decks – so obviously the final versions Sam releases might vary from anything I’ve described here (and hence I’ve generally tried to not be too specific about individual items).

Further Thoughts
Maurice is definitely a game that creates a snowball like effect as I mentioned above – if you can gain a small advantage and keep the pressure on the advantage grows, once your opponent is on the back foot (as I was in the latter part of this game) they will have no opportunity to perform decisive actions without sacrificing something elsewhere – in this game I spent my last 4 rounds simply conducting Volley Fire and then Rallying (other than one round where I did do a desperate charge due to Cam having several units with lots of DISRs that were vulnerable) – as to do anything else would have risked several units being destroyed in Cam’s next round – which helps create the sense of being under pressure when the enemy has his boot on your throat. Conversely it’ll also create the reverse effect of letting the enemy off the hook if players relent and decide to have some passive rounds while they rally and draw extra cards – how often did the fate of a battle swing on someone not pushing the advantage that one last step and letting a near broken enemy recover or counter-attack…?

We haven’t quite got our heads around Cavalry as yet – it is very 18th Century like (i.e. a bit toothless and stodgy near enemy) but it’s getting the right way to operate it in Maurice that is the challenge. Putting equal forces on either flank is sometimes going to be necessary (to counter enemy cavalry) and anytime you can get onto the flank or rear of the enemy you will be able to roll up their line fairly promptly (as charge combat rewards this), but once your cavalry is split that way it’s unlikely you’ll be able to activate both forces regularly, if at all – and until we get a couple more games under our belt we aren’t sure if that’s any sort of issue or just an idiosyncrasy of the rules to get used to (for example this game we started to use our C-in-C’s a little more dynamically, as we slowly discover it’s sometimes worth sacrificing a card to relocate your C-in-C close to the key scene of the action).
We have yet to try anything significant with Artillery, or to try placing large Cavalry forces on the outer flanks to try turning attempts. Overall we are both enjoying the game – even Cam, who has never been a huge student of the 18th Century, is starting to enjoy them and is even planning to purchase some Wargames Factory WSS figures!

Next Up
A scaled down historical refight of either Blenheim or Ramillies with Maurice – hopefully in a couple of weeks! And in a few days I’ll finally start assembling the first of my Wargames Factory plastic WSS figures, ready for painting up as the first units of my 28mm Maurice Grand Alliance & Franco-Bavarian armies. I hope to post a few initial pics soon…

Post Script: Read about our subsequent ‘refight’ game Blenheim 1704: A Maurice Historical Refight.
Great report again and interesting to see some ‘non-lite’ aspects being introduced. The ‘Not on Map’ card is very interesting. Looking forward to next installment of your excellent playtesting
Cheers Gary. Yes we used pretty much a full version of Maurice – for example for the National Characteristics Cam chose bonuses to his Volley Fire & Infantry Charges for the French, and I choose Volley Fire also, with Infantry Defender Bonus and the Rallying Bonus I mentioned above. So we both had deadly shot Cam’s Charge & my Defense bonus cancelled out (but made outright destruction – i.e. being doubled by Cam – slightly less likely for me), so my Rally benefit was the key difference. There are multiple ways these benefits can be modeled (e.g. +1 on dice, ignore negative modifiers, re-rolls, effect on the opponent’s action, etc) so some effects can be subtle and may have more or less effect than they appear on first glance… 🙂
I think you are doing Outnumbered wrong…its -1 for each enemy that engages only it..so you would only take a -1 in the above example…subtle difference.
We too find Cavalry toothless at the moment….merely mobile infantry that cant shoot. Sam said they are different in the non-lite version but doesnt seem so from your report. We are thinking of playing the Thunderous charge card as a -2 on the inf instead of +2 on the Cav to give them more teeth.
Hi Zel,
I think you are doing Outnumbered wrong…its -1 for each enemy that engages only it..so you would only take a -1 in the above example…subtle difference.
Yes – Sam has just pointed this out to me. I blame Cam – I was only doing what he said!
;-p
I will add an addendum to the post pointing the error out.
Hi again Zel – yes Cavalry is a dilemma however I think Maurice has them almost right. There are several things to consider:
We too find Cavalry toothless at the moment….merely mobile infantry that cant shoot.
I’m not sure how your 18th Century knowledge is – I’ll admit mine’s very general for the WAS & SYW and later periods (other than the F&IW and American Revolution which I’ve read up on a bit many years ago). However WSS has always been a bit of an attraction for me (partly due to John Churchill, Duke of Marlborough being without doubt one of the greatest military commanders ever, and when you consider he had such an amazing trust & relationship with Eugéne (who himself was of near identical calibre to Churchill), and how much professional armies were in their infancy, it’s a pretty special period. So I make the following remarks with the understanding I’m specifically referring to the WSS and I’m assuming you haven’t already done your own extensive reading (so please bear with me):
Cavalry were very numerous (the French Army was about 40% Cavalry and almost all other Nations were 30% or more, this is around double the percentage that would be present in Napoleonic times) but the Cavalry was not “Shock Cavalry” as we know it. It had emerged into the post-TYW & ECW era as principally a tool for protecting an army’s flanks and countering the opposing army’s cavalry (there’s a touch of irony in that). While English/British & Dutch Cavalry generally followed the Dutch style (or Cromwell’s Ironsides if you will) with the controlled charge at a fast trot with sword in hand hoping the enemy would waver whence they’d gallop into the disorganised target at the last moment (and Pistols were only used as last resorts or when not charging), the other major nations still followed the older style of tactics involving discharging pistols and such – as I understand the Imperial/Austrian Cavalry were the next best, while they charged similarly to the English & Dutch they relied on doing so slower so as to discharge pistols (potentially with multiple ranks moving to the front to do so), making their charges (at least against infantry) less likely to cause a dramatic breakthrough. The Prussians and smaller German States were even more sedate – they still primarily used variations of the old German Reiter style, relying on wheeling or caracoling ranks of cavalry discharging pistols at a near standstill in front of (or across the front of) the opposition. The French were even worse and apparently still used very archaic drill & tactics that may have been 50 years or so old, their cavalry almost all relied on firepower with no real charge, although I’m unclear if some of the elite units didn’t charge uncontrollably at the gallop (ala Rupert’s Cavaliers in the ECW) to be spent after just a few minutes in action…
Anyway the net result is cavalry was historically stodgy and indecisive. Cavalry v. Cavalry fights were literally “yawn fests” – in the sense that they took a long long time to get any significant result. And cavalry literally never broke infantry until one side or the other had collapsed somewhere or had its flank turned and the cavalry was in the rear of the infantry (not too dissimilar to the ECW and parts of the TYW really). The Dutch were pretty much the tactical and doctrinal leaders, accompanied by the British who had adopted the Dutch style. So you can imagine how a Cavalry fight between Germans and French went – you’d sit there for an hour watching them ride up to each other and discharge their pistols repeatedly before anyone did anything… This is an era when Volley Fire by Infantry is the deciding weapon on the battlefield – everything else is just there to support and assist them.
In Maurice Cavalry vs. Cavalry is very indecisive (basically both sides grind themselves down via attrition) and this feels right – we evidenced this in our first game – and don’t have any issue with that. Cavalry will very much struggle against sound infantry, which is as it should be, however our one concern is whether, if 1 Infantry unit faces 1 Cavalry unit with no direct supports nearby, whether Cavalry should not get some form of benefit to represent their ability to simply ‘ride round the flanks’ of the infantry (something you obviously can’t replicate on the table per se so needs abstracting) – as this would be the one case you might get a Napoleonic Style breaking of a battalion.
To use Cavalry effectively they need to either operate on the flanks or be passed through a gap you’ve created (or found) in the enemy line – Sam’s emphasis is on the cavalry having to actually attack the flank or rear of the infantry units to be able to decisively defeat them which is fine, except it also means they are the hardest to command due to the large span which forces you to have make a conscious decision to do something with them. Basically if you want to do decisive actions with the cavalry you need to put them on your extreme flanks (especially if you deploy second in the full game) and spend the card to move your C-in-C over there ASAP to make activation fast and easy, once the flank is turned your C-in-C can move to a new focus point of your army, as the Cavalry will be easy to manoeuvre from a distance once the enemy line is turned or they are partially behind it (i.e. you’ll typically just be charging straight ahead into the enemy flanks rather than manoeuvring).
The consideration Cam and I are musing over is whether this is reasonable (or realistic) and whether the cost of activating units on your extreme flanks is a viable option in games – due to the effect on the rest of the army. The jury is out on that and we need to play a couple more games with reasonable cavalry forces to try it out and test different tactics to see if Cavalry is fine and its just our learning curve that needs some time…
Ultimately firepower is the infantry’s big tool – so you really just need to march them up into musketry range and then you can leave them to Volley Fire away to their hearts content – by being more adventurous with your C-in-C you can then move to a flank for a while and drive a decisive cavalry action to turn a line or overwhelm an enemy cavalry force…
Sam said they are different in the non-lite version but doesnt seem so from your report.
They are but some of that relates to playing the “Succession Wars Campaign” that will be part of the full rulebook; e.g. Cavalry give benefits at set up & deployment time and they increase the victory result (ala Lasalle’s Pursuit) in the game, and in the campaign they can affect things with units post-game. So they have several benefits not directly related to combat power on table.
We are thinking of playing the Thunderous charge card as a -2 on the inf instead of +2 on the Cav to give them more teeth
That would probably be a mistake – it’s effectively a +4 to the Cavalry and will make them too like Napoleonic Cavalry – the chance of doubling (and hence destroying) a defending infantry unit should be low unless they have the flank or rear or numbers. Cam and I discussed something like this over the last week or so but it’s not viable. If your cavalry can ride up to an enemy Infantry unit in the line, suffer DISR from Volley Fire, and then Charge and destroy the Infantry that’s not 18th Century for the reasons I’ve outlined above…
I hope that makes some sort of sense…?
🙂
Great battle report. I am enjoying reading them and the details of the mechanics. I look forward to trying my own game of Maurice with my 15mm AWI figures.
Dale
http://daleswargames.blogspot.com
Thanks Dale – appreciate your support and look forward to what you and Gary and Zel, and others find with your first outings with Maurice! Ramillies or Blenheim will be here soon! 🙂
Hi John thanks for comments.
You are correct that I come primarily from Napoleonics and
so was expecting more Cavalry shock however
I do read/game SYW where there was some shock (ie Bayreuth Dragoons) and
I have played M&R where cav is not so toothless. So I guess I’m concentrating
at later 18th C rather than the WSS period you allude to. Here I
defer to your expertise on the lameness of Cav
My issue is perhaps not so much the lack of shock of Cav in
Maurice but it is totally worthlessness. By restricting moves to 4BW near
enemy Cav seem never be able to exploit any opportunity…
As an example say a Cav in the 2nd
line sees an enemy Inf with 4 DISR…it
must move 4BW stop then charge the following round…
Meanwhile the Inf can Volley…then Rally…If you do the math
the Cav end up going in at almost evens with Inf( 4DISR-2 rallies vs Cavs 1DISR from Volley..assume it’s a massed target ).NB recall an equal result is a win
for the defender….
Invariably the Cav then recoils just in time to get another
volley…Cav not only have no shock currently they are a liability and why would you take them
Cam has obviously worked out the worth of Cav by taking an
all infantry force….
Look at your own game
you had 2 Cav on one +suffering No Volleys+a special card …probably the best you can do with Cav….and it still did nothin
and the Cav probably got well volleyed next
bound.
Furthermore you currently also have the silly option of Cav
moving upto charge range….being volleyed then the volleyers step back 2BW and
do it again if the cav move forward…as the Cav can not charge ,,,as out of 4BW!!!
The 4BW restriction also means you cant exploit an open flank
as your opponent will always have an opportunity to react to somehow refuse the
flank (retreat,wheel etc)
I understand the 4BW charge
is there to ensure Cav get volleyed before charging but it has the effect of stifling Cav. I think Cav should
be able to charge say 8BW… however frontally contacted inf get in a final volley( hardly a revolutionary mechanism). That way Cav is committed
before seeing the volley yet Inf units can be hit before they have rallied off their hits. This will tip the balance back to Cavalry , restoring some of their threat
… yet it will still make Infantry able to stand up to Cav all things being even
————–
We are thinking of playing the Thunderous charge card as
a -2 on the inf instead of +2 on the Cav to give them more teeth
NB It remains +2 difference to the Cav….by
swapping the +2 to a negative on the Inf
there is more chance of achieving a doubled result. Perhaps a period rule for later
18thC when shock was beginning to be
more the norm
———–
Ultimately 18thC armies contained Cav… at the moment Like Cam I would prefer to take an all infantry force and cant see its benefit…. perhaps there is more in the full version to change my mind. Heres hoping.
rgds
Zel
apologies for formatting…copied in from a draft email ..went skewwiff
No worries Zel – I have fixed up formatting. 🙂 Will respond to some of your points as soon as I can… 🙂
Hi Zel,
Sorry to take a while replying – its been hectic – okay here’s some responses to some of your comments (more later hopefully):
You are correct that I come primarily from Napoleonics and so was expecting more Cavalry shock however I do read/game SYW where there was some shock (ie Bayreuth Dragoons) and I have played M&R where cav is not so toothless. So I guess I’m concentrating at later 18th C rather than the WSS period you allude to. Here I defer to your expertise on the lameness of Cav
Sam maintains that Cavalry in Maurice is not that dissimilar to M&R (Might & Reason) – as he has used a variant of the M&R combat system, etc. And yes in SYW there was some true shock action, more so that in the WSS, GNW, etc. However it was still in it’s infancy and only some cavalry did it (i.e. it was still rare compared to Napoleonics when it was common every-day thing).
I also think it’s just fundamentally hard for Napoleonic’s players who aren’t also extensively familiar with or players of WSS, GNW, WAS, or SYW to get their head around it – quite literally cavalry tactics underwent a fundamental change around 1800 or so – only then did full shock doctrine become the norm, and this coincided with the first mass armies who were much more vulnerable to cavalry as well (hence the adoption of the square formation). Back 50-00 years earlier however formed Infantry in supported lines were near invulnerable who cavalry who did not operate with shock as their primary doctrine – and that’s a big difference. I’m not a big Napoleonic’s player – I’ve dabbled over the years but only Lasalle has really got me excited (although in some ways I’d prefer to be playing Shako II for improved historical accuracy) – so I don’t have preconceived expectations, or rather years of experience, of a particular outcome. For the 18th Century you need to compare Cavalry to later Renaissance (ECW, TYW, etc) not Napoleonics.
Invariably the Cav then recoils just in time to get another volley…Cav not only have no shock currently they are a liability and why would you take them
Well ‘no shock’ is not necessarily unhistorical (as I’ve said previously) and you can’t expect to charge steady fresh 18th Century infantry with cavalry and expect the cavalry to do anything other than die – or at least end up in a horrible disordered mess. However cavalry should have some ability to ‘finish off’ badly damaged units without them selves going from fresh to near destroyed in a single action (basically anyone reduced to 3 DISR will usually be destroyed in combat, and anyone down to 4 DISR in combat are destroyed regardless – cavalry should be able to hit these units to destroy them and only suffer 1-2 DISRs, rather than 3-4 that will usually ensue if Volley Firing occurs first).
Cam has obviously worked out the worth of Cav by taking an all infantry force….
Well it was principally an experiment in a cheezy army to just test whether it would work or not – to be fair IF if we had deployed in reverse sequence (me second) it would have radically changed how my army deployed. I would have either (a) put the bulk of my cavalry on an extreme flank with Infantry support to try and turn his line, or (b) simply hid my Cavalry in a Second or Third Line and tried to have a straight out shooting contest up the centre… Option ‘a’ would have been the interesting one – if I could have pinned his flank infantry unit with my infantry my Cav should have been able to ride right around him (or at worst done so once his end Infantry unit was destroyed…
Look at your own game you had 2 Cav on one +suffering No Volleys+a special card …probably the best you can do with Cav….and it still did nothin and the Cav probably got well volleyed next bound.
That’s okay though – I didn’t expect to destroy him – but had hoped to inflict 2 DISRs to put pressure on him having to rally them off with my Cav hopefully only on 1-2 DISR themselves so able to charge a second time. The big huge all the army in one force thing was what did the most damage – Cam managed to maintain all his units within 2BW of each other until almost the end. This battle also doesn’t’ look overly historic for 18th Century – while Maurice pertains to be variable abstract scale, and while it ‘looks’ like Battalion level the reality is it’s really a more abstract army level large battle system at heart (see our Blenheim Refight which felt much better as a game, although still quirky).
Also we haven’t yet tried any significant numbers of artillery – if you have arty supporting your cav on their flanks (at least initially) you may be able to inflict significant retaliation on enemy infantry before the Cavalry charge in to finish them off – at Volley range 3 Artillery units would get 6 Dice – so would typically inflict about 2 DISRs each Volley Phase.
…This will tip the balance back to Cavalry , restoring some of their threat… yet it will still make Infantry able to stand up to Cav all things being even
The thing is cavalry shouldn’t be a ‘threat’, at least opt steady fresh infantry – there should not be any incentive to charge infantry frontally with cavalry other than desperation – after all this isn’t Napoleonics… 🙂
@Zel: We are thinking of playing the Thunderous charge card as a -2 on the inf instead of +2 on the Cav to give them more teeth
@John: That would probably be a mistake – it’s effectively a +4 to the Cavalry and will make them too like Napoleonic Cavalry – the chance of doubling (and hence destroying) a defending infantry unit should be low unless they have the flank or rear or numbers
@Zel: NB It remains +2 difference to the Cav….by swapping the +2 to a negative on the Inf there is more chance of achieving a doubled result. Perhaps a period rule for later 18thC when shock was beginning to be more the norm
Yes it is still a ‘difference’ of 2 but it’s actually a relative modifier of +4 – effectively you are increasing the Cavalry’s chance to double the Infantry by 2 so the net benefit is +4 to the Cavalry. There is a dynamic in Maurice where 3 DISR is the critical number – any unit reduced to this is effectively toast – so anything that reduces a units factor in charge combat is a huge impact, because if the unit has 3 DISR it doesn’t need to b e doubled, just beaten, to be destroyed if the defender…
Cavalry certainly isn’t quite right – but it’s not necessarily the combat factors that are an issue – but I guess as long as you have an expectation that it should be anything, even vaguely, like Napoleonic Cavalry it’s not going to meet that – and I just am not convinced historically even late SYW that there is enough consistent shock doctrine (AND ability to implement) in the first 60 years of the 18th Century – it’s more something that has become the preferred tactic right at the end in the 1780-1790 era leading into the Revolutionary & Napoleonic Wars (which is getting outside Maurice’s scope)…
🙂
More later…