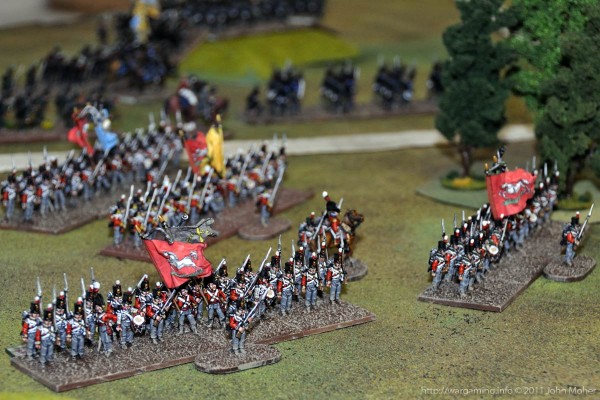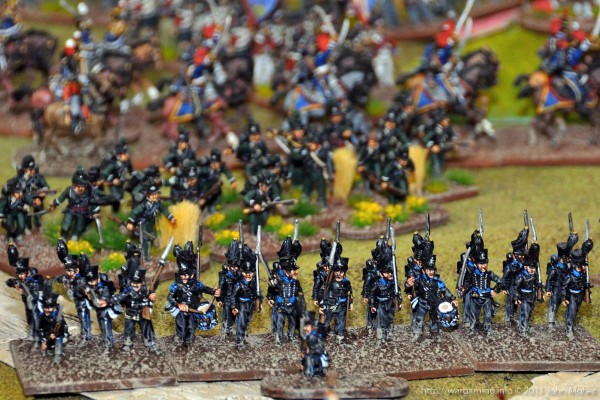
- Frederick William, Herzog von Braunschweig-Wolfenbüttel-Oels (Duke of Brunswick), leads his forces in the action at ‘The Crossroads’.
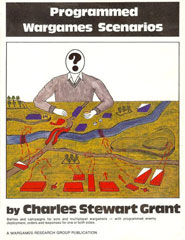
Today we played a Lasalle ‘Big Battle’ with over a Division of troops a side and had a very successful game – our first true large game with Lasalle. The scenario was based on “The Crossroads” from C. S. Grant’s “Programmed Wargames Scenarios” (Wargames Research Group Publications 1983 – Pages 79-81) modified to suit Lasalle (most especially the game turn limit and our forces). Both Cam and I did the mad panic thing during the preceding week getting extra troops and such either painted and/or based for our ‘big bash’ which allowed us to field 31 Infantry Battalions (14 French & 17 Allied) supported by 4 Batteries (2 each) and 5 Cavalry Regiments (3 small Allied and 2 large French – we had more cavalry available but did not deploy them to avoid a too ‘cavalry heavy’ game.

The Scenario
Based on the scenario “The Crossroads” as mentioned above, the terrain layout was generated randomly using the C. S. Grant’s scenario (i.e there are 3 alternative layouts for the left, centre, and right of the table and each one is rolled for randomly). We modified these slightly to suit our 8′ by 6′ table and the fact we planned to play across rather than down the table; and would use slightly larger forces than the original envisaged. Other aspects of the scenario were also modified to suit Lasalle (including random order of march, whether each side used one or both roads to enter the battlefield, and the forces arriving automatically in order of march one brigade per turn on each road).
Red (Allied) Forces briefing: The enemy is on the move, they have crossed the border at multiple locations and are advancing on both our centre of communications (and the local capital) and the areas between our scattered forces. It is imperative that we have sufficient time to (a) gather our allied forces together, and (b) co-ordinate with our the neighbouring allied army to concentrate against the enemy. Initial reports are that the latter have been driven back from the frontier and as a result we must not allow the crossroads in your vicinity to fall to the enemy as they will provide them a mean to concentrate their forces and to either or both (a) advance on our communications hub and (b) drive a wedge between our still concentrating allied army and the neighbouring allies’ army. You must hold the Crossroads and if possible defeat the enemy advanced forces.
Blue (French) Forces briefing: We have crossed the border at several points and the enemy is retreating before us abandoning many river crossing points intact. While our main force advances on one of the Allies’ armies your Division with additional supports is to concentrate at the Crossroads before you and drive off the various other Allies’ forces that may present – capture of the Crossroads is essential to provide your Corps the ability to advance further to threaten the enemy’s rear areas and isolate those forces in front of you, or to move laterally to our main force’s support if required should a major engagement develop; thereby putting the enemy in two minds and preventing the concentration of both their armies. If you can also defeat the enemy forces in the area this will greatly assist our continuing advance! Vive le Empereur!
Victory: A Decisive Victory will be deemed to occur if either side has undisputed control of the Crossroads when the opposing force breaks (fails an Army Morale Check); A Marginal Victory if the opposing force breaks (fails the Army Morale Check) but the winning force does not have undisputed control of the Crossroads at that moment; or it will be deemed a Winning Draw if either side has undisputed control of the Crossroads and the opposing force has reached it’s Army Break Point but has not as yet failed an Army Morale Check. Any other result is an indecisive draw.
The Game
Fate had resulted in the Allied force being gradually congested together onto a single road in their attempt to reach the Crossroads. What’s more Colonel Best’s Hanoverian Landwehr were leading the approach, followed by the Black Duke (Duke of Brunswick) and his Brunswickers. Kempt & Pack’s Brigades were caught behind this throng of enthusiastic but inexperienced Germans, while the 5th Cavalry Brigade were at the rear, rapidly catching up from further afield! Meanwhile unbeknownst to them the French were converging on the Crossroads from 2 routes, with Sebastien’s 9th Division approaching from one direction (supported by Blancard’s Heavy Cavalry), and Soye’s Brigade (from the 6th Division) approaching separately by the alternate route, with the leading Artillery in support. Colonel Best’s Landwehr were marching for the Crossroads themselves, when Soye appeared on the British Right, this caused Best to have to deviate his entire Brigade to deploy opposite Soye and deny him the nearby high ground.
Meanwhile the Black Duke’s Brunswick Contingent rapidly marched past Colonel Best, to take up station on the left of the line and secure the Crossroads and Farm as well… This was especially urgent as Marbais’ Brigade had appeared down the road on that flank, and the dust clouds indicated more were French following! As both sides marched rapidly forward and shook out ready to deploy the Black Duke sent off his Leibgarde Bataillon to secure the Crossroads, while continuing to the far left. More reinforcements continued to arrive for both sides, Kempt’s 8th Brigade for the British who detached the 95th Rifles to head to the Crossroads and support the Brunswick Leibgarde Bataillon while the rest of the Brigade headed to the far right to support Best’s Landwehr, and fro the French Jamin’s Brigade followed Marbais’.

Soye’s troops were first into action, Tacon’s Foot Battery deploying to bombard the Hanoverian Landwehr columns as the 1st & 2nd Ligne Regiments shook out ready to deploy into attack columns and lines. The balance of the 9th Division were also approaching rapidly and the Black Duke was concerned his troops may not get to their positions in time to deploy – but Picton reassured him to make much haste, as he headed off to personally oversee the Leibgarde Bataillon and 95th Rifles deployment to defend the Crossroads. By now more troops arrived, Pack’s 9th Brigade for the Allies – heading to the left to support the Black Duke – and Blancard’s Heavy Cavalry Brigade for the French, Sebastien personally leading the 2nd Cuirassiers off to the French right to support Marbais & Jamin while Blancard took the 1st Carabiniers and Lebeau’s Horse Battery to the centre to support Soye.
Best’s Landwehr deployed into line as the French artillery bombardment began, with two battalions in the front line and the other two in support further back, as Kempt’s Brigade rapidly moved up on their right to secure the small ridge. Soye responded by rapidly deploying his troops into line, in preparation for an advance eon the Hanoverian Landwehr. Elsewhere both forces were marching hurriedly to their battle positions as the Light Cavalry of Colquhoun Grant’s Brigade finally arrived to Picton’s relief… Soon Kempt’s Brigade was also deploying for combat – and the Brunswickers’ just made it to the Crossroads and the left of the Farm ahead of the French, but not by much! By now heavy bickering was underway between Best’s Landwehr and Soye’s 2nd Ligne Regiment and Tacon’s Artillery, with both sides giving and taking damage. By this stage the British centre was getting pretty cramped, and confused, as Pack’s Brigade tried to follow the tail of the Brunswickers, the 95th Rifles deployed in support of the Brunswick Leibgarde Bataillon, and Colquhoun Grant led two of his Regiments through the midst of the Infantry to try and reach the left flank of the Brunswickers! Picton meanwhile requested the 15th King’s Hussars remain in the centre, to provide a reserve to cover the Hanoverians and British right against Blancard’s Carabiniers.

The Brunswickers however couldn’t deploy fast enough to secure the Farm, and eventually two of Marbais’ battalions were ensconced within – constantly sniping and bickering with the Brunswick troops from within the security of the farm’s barn walls. Back on the Allied right Soye was finally pushing home some attacks, the 1st Ligne Regiment charging up the ridge in the face of Rogers’ 9pdr RFA Company, and the 2nd Ligne threatening to close on Best’s Hanoverians, the latter however having taken a pounding and starting to look precarious – however they hung on and continued to give back volley for volley with the 2nd Ligne – But Blancard was fast approaching with the Carabiniers and Horse Guns! As the Brunswickers frantically deployed on the right and were hit by the first wave of Marbais’ & Jamin’s troops, the Leibgarde Bataillon in the centre just made it onto the Crossroads, while on the Allied right the first Landwehr Battalion finally succumbed, dispersing to the rear after a relentless artillery bombardment (from Tacon) and an unequal musketry duel with the French 2nd Ligne.
…okay well sorry – I never got around to finishing the write up of this game… but below are the OOBs, scenario outline, and the game as it progressed in photos! And note both the Brunswickers & Hanoverian Landwehr served admirably against superior opposition, although the game ended in a marginal French victory…
The Forces
All units are Small (4 bases) in Lasalle unless specifically noted as large (which are 6 bases).
Blue: The French 9th Division
- Général de Division Comte Maximilien Sebastien Foy (Napoleon*)
- 1st Infantry Brigade
- Maréchal de Camp Marbais (0/0 – Ney*)
- 2 Bataillons 92nd Regiment d’infanterie de ligne
- 3 Bataillons 93rd Regiment d’infanterie de ligne
- 2nd Infantry Brigade
- Maréchal de Camp Baron Jamin (0/0 – Eugene*)
- 3 Bataillons 100th Regiment d’infanterie de ligne
- 1 Bataillon 4th Regiment d’infanterie de Légère
- 2nd Infantry Brigade, 6th Division (attached to 9th Division)
- Maréchal de Camp Baron Soye (+1/0)
- 2 Bataillons 1st Regiment d’infanterie de ligne
- 3 Bataillons 2nd Regiment d’infanterie de ligne
- Capitaine Tacon’s 1st Battery, 6th Foot Artillery Regiment (6pdr – Medium/4)
- Composite Brigade, 12th Cavalry Division (from III Cavalry Corps)
- Maréchal de Camp Baron Blancard (+1/0 – Murat*)
- 1st Carabiniers â Cheval Regiment (large)
- 2nd Cuirassier Regiment (large)
- Capitaine Lebau’s 2nd Battery, 2nd Horse Artillery Regiment (6pdr – Medium/3)
All French Infantry were the standard Reliable/Experienced/SK2 Veterans and the Heavy Cavalry Valiant/Experienced/Shock.
* Identity of figure representing this Brigade Commander on table (i.e. in the photos).
Red: The British 5th Division
- Lieutenant-General Sir Thomas Picton
- 8th British Infantry Brigade
- Major-General Sir James Kempt (0/+1)
- 1/28th (North Gloucestershire) Regiment of Foot
- 1/32nd (Cornwall) Regiment of Foot
- 1/79th (Cameron Highlanders) Regiment of Foot
- 1/95th (Rifles) Regiment of Foot
- Major Rogers’ Foot Company, RA (9pdr – Medium/3)
- 9th British Infantry Brigade
- Major-General Sir Dennis Pack (0/+1)
- 3/1st (The Royal Scots) Regiment of Foot
- 42nd (Royal Highland) Regiment of Foot – the Black Watch
- 92nd (Gordon Highlanders) Regiment of Foot
- 2/44th (East Essex) Regiment of Foot
- Captain von Rettberg’s Hanoverian Foot Brigade (9pdr – Medium/3)
- 4th Hanoverian Infantry Brigade
- Colonel Charles Best (0/+1)
- Landwehr Bataillon Lüneberg
- Landwehr Bataillon Munden
- Landwehr Bataillon Osterode
- Landwehr Bataillon Verden
- Elements of the Brunswick Corps (Division)
- Frederick William, Herzog von Braunschweig-Wolfenbüttel-Oels (+1/0)
- Brunswick Leibgarde Bataillon
- Brunswick 1st Leichte Bataillon
- Brunswick 3rd Leichte Bataillon
- Brunswick 1st Linie Bataillon
- Brunswick 2nd Linie Bataillon
- 5th British (Cavalry) Brigade
- Major General Sir Colquhoun Grant (0/0)
- 7th (Queen’s Own) Hussars
- 13th Light Dragoons
- 15th (King’s) Hussars
The Allied Troops were rated as follows:
- 1/95th Rifles Battalion: Valiant/Experienced/Linear/Rifles/SK3*
- Seven British Line Battalions: Valiant/Experience/Linear/SK1*
- Four Hanoverian Landwehr Battalions: Shaky/Amateur/Linear/SK1
- Brunswick Leib-Garde Bataillon: Reliable/Amateur/SK1
- Four Brunswick Light & Line Bataillons: Unpredictable/Amateur/SK1
- Three British Light Cavalry Regiments: Reliable/Experienced/Pursuit
- Note: Colonel Best commanding the Hanoverian Landwehr Brigade was treated as British for determining abilities.
* These are suggested alternate British stats for Lasalle from another New Zealand wargamer.
Incidentally after 2 games with the above alternative stats both Cam and I tend to agree the Valiant works, Linear sort of works, but the SK1 is too big a change (in conjunction with Linear Tactics) as it allows the French to stand-off and win a musketry duel (in columns no less) thereby negating the Valiant rating – due to the difficulty of getting into actual close combat without being out-numbered while in line.
This was (inadvertently) a very Quatre Bras style scenario – I wonder if C. S. Grant was actually inspired by Quatre Bras for the original in the book?
The Figures & Terrain
The British, Hanoverian, Brunswick, and Soye’s French Brigade are from my collection (primarily metal & plastic Perry Miniatures with the Hanoverians & 2nd Ligne being from Wargames Foundry) and the balance of the French are from the collection of Campbell Millar (principally old-style 25mm metal Hinchliffe and Minifigs figures, except the Medium Foot Battery which was 1/72nd plastic Zvezda figures and the Légère battalion who were 28mm HäT plastics). Terrain was all from my collection although we were a bit minimalist with the scenery, which was in keeping with the maps in the PWS book (which are somewhat ‘old school wargaming’ in style very in keeping with C.S. Grant’s Table-Top Teaser maps and his father Charles Grant’s in books such as The Wargame, Battle, etc) .
About The Game
Played using Lasalle, other than the special scenario considerations this was a hybrid Attack-Defence game (with the Allies nominally defending but only just arriving a short time before the French). Blue (The French) had the usual nominal attack bonus as in standard Lasalle games (i.e. equivalent fo 2 Veteran Line Battalions), however due to the size of game we used Cam’s suggested points system to balance the forces (see the AWC Website for details); the French totalling 197 and the Allies 177 points. As described above in the initial briefing the objective was the crossroads – essential to both sides for different reasons (Red Force – the Allies – wish to block Blue from getting beyond them until their army is concentrated as it opens up two routes of advance; Blue – the French – conversely need them to continue their strategic aims and to advance so as to separate the different Allied contingents from each other). The game officially ended after the 20th turn with a winning draw to Blue (the French) – they secured the Crossroads but failed to totally defeat Red (the Allies). At the end of play Allied casualty points were 14/42 and French casualties 2/36 and the Allied force was not in the best condition (thanks to the Hanoverians & Brunswickers doing much of the fighting plus the British Light Cavalry getting decimated). However we partially played one more turn (as the combination of a large 8′ x 6′ table and the Scenario design meant it took longer to get troops into action than a normal game and I will modify scenario to reflect this), and the Allies did lose 2-3 more units (including the last of their Cavalry) and also currently had about a further 3 more infantry battalions teetering on 1 DISR (Disruption) short of being broken as well – so were close to 50% of their force dispersed – as it was Turn 21 and they had lost the objective it was highly unlikely they would have passed their Army Morale Check with just 4 dice…
For those interested the game took just over 5 hours to play including set-up and pack away, a quick lunch-break, and a bit of a chat with observers periodically – so could have probably been completed in about 4½ hours by two experienced players and played non-stop with no distractions.


Wow again a great pictorial review. Love those Perry Brunswick, will have to do them sometime in the future.
John
Thanks John – yes them and the Nassau boys are my favourites – My Nassau chaps are itching to get on the table, along with the balance of my Brunswickers! The most frustrating thing is trying to get the right artillery pieces for the Brunswickers – as the Perry’s used British Guns and they almost certainly aren’t right. Looks to be each battery had 6 x ex-French/Westphalian 6pdr Guns and 2 x ex-French (previously ex-Prussian/Austrian) 7pdr Howitzers – all with grey gun carriages. The Dutch Jaeger also look really nice – my unit’s another Perry’s Figures force itching to get ‘on table’! 🙂
Well done Sirs! Splendid looking game.
Thanks MCM – was suitably inspired by your concept of playing this scenario 3 times in completely different eras and with different twists to the details… Great Stuff!