Our (winning) Draw (if you can call it that) in the third round put us on 54 VPs and in 2nd place; 5 VPs behind the new leaders (Ivan & Andrew; whom we had played in the first round) and 8 VPs ahead of 3rd place (Brett & Lawrence whom we had just played). As a result our final opponents were John Calnan & Lance Knighton, who were currently in 4th place with 44 VPs; and were running a force of Sassanid’s with lots of Cavalry(S) and (O), Elephants(O), and Knights(X).
Caesennius had not managed to leave home before the Sassanid’s had wandered into the Eastern regions of the Empire!
 However Caesennius did manage to encamp on the fringe of a nice clear plain, forcing the Sassanid’s to encamp & deploy in a marshy area that was also bordered on by a low rolling hill, and was further restricted in the form of a vineyard at the foot of that hill – the vineyard ironically on the one flank that wasn’t marshy – now this was more like Caesennius’ preferred campsite! However there was a reasonable area of open space to the flank of the vineyard should the opposing cavalry wish to play… The Roman plan was simple – attack in strength on the left into the main part of the marsh with half the foot; while screening the centre and right with the balance in a cautious advance supported by artillery moved up from the Cavalry Reserve. The Armenians were in the rear on the right to provide flank support for foot against the expected Cv(S) attack on this flank (due to it having the largest area of GGo – Good Going), and the balance of the cavalry to the rear in the left-centre ready to move to exploit the foot’s efforts or assist on the open flank.
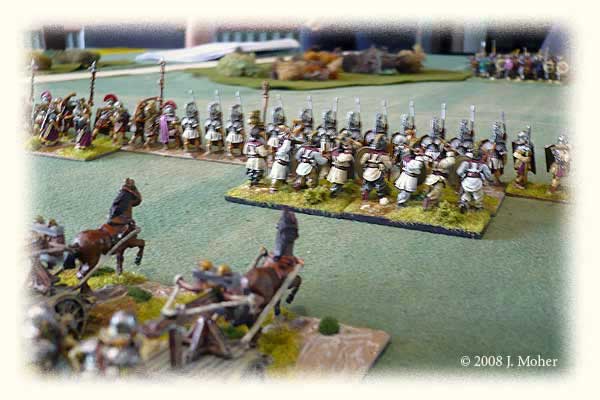
The Sassanid deployment saw the Roman left opposed by some skirmishers in the Marsh, and a large body of Knights(S) and Cavalry on the road running through the Marsh. A small force of Auxilia were also present in reserve, and some Hunnic (Sabir) Light Cavalry. In the centre, between the central Marsh and the Vineyard was deployed the balance of the Sabir Hunnic Command, foot warriors, Wb(O). These were supported by some El(O) and Cv(O) on the hill behind them, and then opposite the Roman right were more skirmishers (to screen the Vineyard) and a large force of Cv(S) & (O), and LH(F), supported by more Elephants! The Romans duly advanced, with the whole line moving forward almost to the edge of the Vineyard & Marsh. The centre halted, having pushed Ax(S) with Ps(O) support to the front, while the left proceed to commence it’s attack on the left.
The Sassanid’s meanwhile were pulling off some pretty fancy manoeuvres. The Knight (X) on the road on the left did an about face and proceeded to move around the rear of the hill towards the Roman right and the open ground. The Hunnic LH(S) went spontaneous and rushed around the edge of the Marsh onto the road and immediately charged the advancing Roman left – due to the Hun Commander being busy keeping control of his impetuous foot warriors. On the Roman right the LH(F) moved in to harass and engage the Roman flank foot, while the Cv(S) proceed to attempt to march around the extreme end of the Roman line, followed by the Elephants, and then a force of Cv(O).
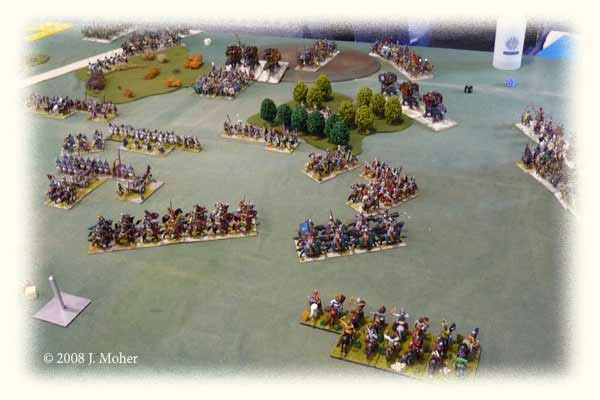
On the left a tussle developed between the Legionaries and Auxilia primarily against the Impetuous Hunnic Light Horse, while in the centre both sides eyeballed each other as the Roman Artillery began to take pot shots at the Wb(O) and supporting El(O). Over the course of a few bounds 2-3 Wb elements were destroyed by the Roman Art(F). The front line of Roman Auxilia & supports advanced a short distance to partially close the gap with the Hunnic foot, but remained well outside charge range of them to avoid pre-empting combat and obstructing the fire of the Artillery. On the right was where everything was starting to happen however (read: unravel) – the Sassanid Cv(S) easily got outside the Romans and started turning the line, the Legionaries and Armenian Cataphracts not being able to react fast enough to counter the move. In fact even attempting to was a mistake and took the Romans to near disaster…
The Sassanid Psiloi in the Vineyard were sufficiently of a threat to distract the Auxilia, and then prevent these effectively deploying to counter the rapidly advancing Elephants! By this stage the Armenians were rushing to oppose the Sassanid cavalry, despite being heavily out numbered, but then Caesennius had one of his ‘better’ classic moments of inertness, depriving the Armenians of any PIPs and giving the rest of the entire Roman army only about 4 PIPs in total between the 3 commands! Not that it really mattered as the Sassanid’s had effectively broken out from a messy deployment amongst poor terrain and all but turned the Roman right flank ‘on-table’. Reasonable supplies of PIPs in the early part of the battle had lulled the Romans into a false sense of security (well at least one of them)!
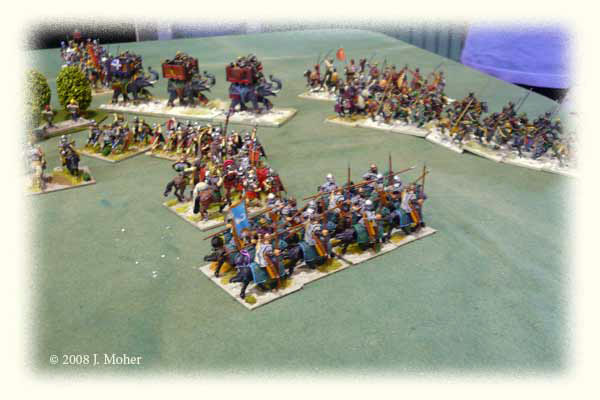
By now the bulk of the Roman Cavalry had also rushed to the right flank, to support the Armenians and Legionaries – but Caesennius was little concerned and had no sense of urgency about the matter (and in fact this may well have been the time to risk 3 PIPs to do a re-allocation of PIP dice priorities even if it meant having virtually no PIPs next bound). Needless to say the Romans stuttered forward, and with poor judgment, extending too far to the right and breaking up their line, and then trying to fight for positions that were lost or had been turned. They (we) had been comprehensively out manoeuvred by the Sassanid’s even to the point of their LH(F), in 2 ranks, going toe-to-toe with the Legionaries for about 3 bounds before they finally ran out of ammo and became spent, melting away to the rear of the battle! By now the Elephants were coming into action, trampling some brave Auxilia who tried to stop one, and smashing into some Legionaries with the other two. With a sudden unexpected burst of momentum the Armenians launched their, until now passive, LH(F) at two of the stampeding Elephants, assisted by the remaining Legionaries and an Auxilia in an attempt to stem the rot, even as the Sassanid Cv(S) was threatening to engage the Armenian Cataphracts. The third Elephant was engaged by some Roman Equites Sagittarii – LH(F) – and a lucky break in the first action saw that Elephant element dispatched by the Roman Horse as the Armenians prepared to engage the other two – but that was to be the high point of the battle, for the Armenians at least!
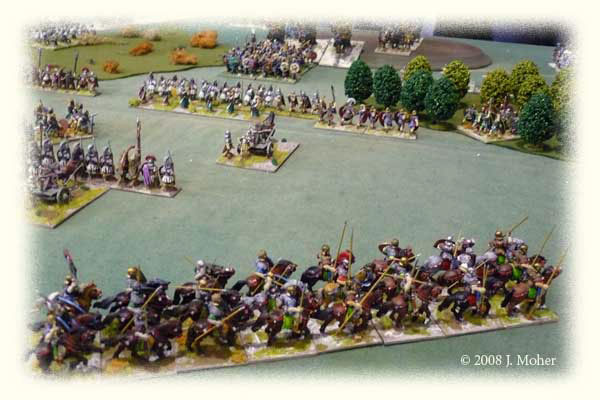
The photo below is taken at this moment, one Elephant has been dispatched by the Equites Sagittarii near the Vineyard, and Sassanid Cv(O) have moved in to fill the gap and engage the Romans there, the Armenian Horse Archers are attempting to deal with the other two Elephants that have broken into the Roman lines (one of which had already smashed an Armenian Cataphract element in a preceding bound, the other a couple of Bd(S) Legionary elements). On the far right the Sassanid Asavaran Cavalry (S) is about to wheel into line and engage the Armenian Kn(X). The Roman Cavalry has arrived and is moving up in two groups to plug the gaps and form a second line. By this stage the Roman centre and Hun Foot were clashing in the area between the Vineyard and Marsh – instigated by the Romans to try and take pressure off their right Flank – and a grinding fight between Wb(O) and Ax(S) with Ps(O) support began. On the Roman left intermittent fighting continued with neither side giving ground, and the Sassanid mounted troops doing enough to keep the Romans occupied without being forced to fully commit.
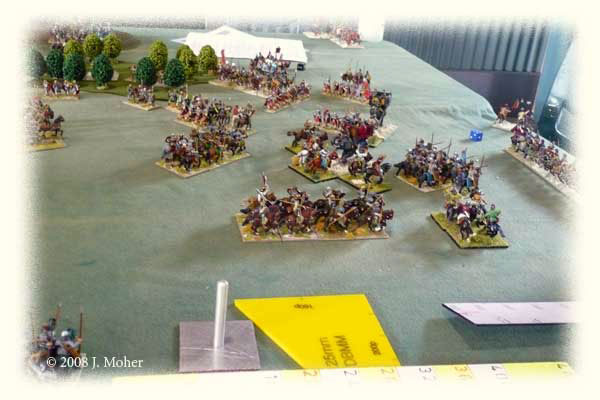
The Elephants then steamrolled the Armenian Horse Archers, disheartening the command, as the Asavaran Cv(S) engaged the Cataphracts Kn(X). In the centre the Romans had minor success against the Hun Wb(O), but this only resulted in an element of Elephants coming forward to join the battle there. The Armenians suffered more casualties from the Asavarans, and the command broke, while the Elephants smashed into the Roman Reserve Cavalry, creating minor chaos! While things weren’t a total disaster for the Romans, they certainly weren’t peachy and the Sassanid’s clearly had the upper hand on the open flank.
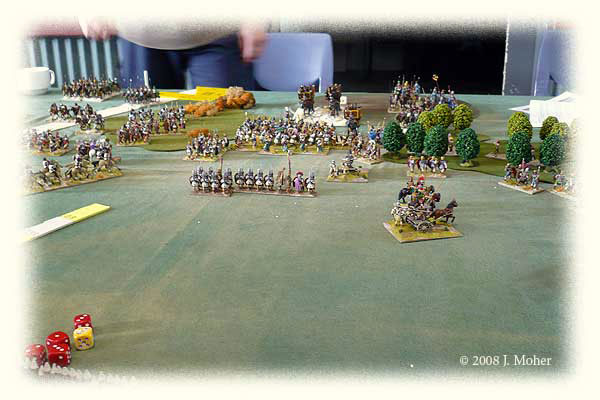
And then it was time! Although not in complete disarray the Romans were on the back foot and had lost the initiative on their right Flank, and were likely to eventually be overwhelmed. John & Lance had done well fighting out of a difficult deployment area, and successfully out manoeuvred the Romans on the open flank, suggesting perhaps that the Romans had been too smart for their own good with placing the large areas of Marsh in the Sassanid deployment zones. In fact the inertness of Caesennius may have been just as much to blame, the loss of 4 PIPs per turn from the army just being too much when the force was spread out over such a large area with a progressively broken up formation and rapid manoeuvring was of the essence?
The final score was Romans 10, Sassanids 15; the Romans having 1 Broken Command and about 27% casualties vs. about 9% casualties for the Sassanid’s (although they also had about another 5% of their force Spent). A little luck and a couple more Sassanid casualties and the Romans might have clawed an 11-14 Draw instead – but we probably should be thankful just for the draw, regardless of the points split!
Continue to BC’08 Conclusion: Results & Aftermath.

One thought on “BC’08 Round 4: Sassanid Persian with Sabir Hun Allies 463AD”