
Continuing from Revolt in the Sudan’s Turn 01: November 1883, the Anglo-Egyptians get a lucky break, the Khedive is relieved to hear the revolt hasn’t spread to Darfur & Kordofan, the breadbasket of the Sudan. Meanwhile in Khartoum the available supplies have actually increased thanks to Bordein’s unexpected, albeit hasty, arrival. However Abu Hamed is not looking so lucky – it has only 2 turns of supplies and the only possible help that might reach them is plucky Talahawiyeh, who, if very very lucky, may reach the garrison by the end of this turn, if she doesn’t they may have to gamble on sallying out to try and drive off the Dervishes long-enough to forage for supplies.
In Northern Sudan the garrison of Abu Hammed can do nothing but sit still – hoping supplies and news will reach them before the end of next turn. At Aswan, Sir Henry gathers up what troops he has (2 Infantry Companies & 2 Guns), and resolves to make for Wadi Halfa. The march south along the Nile and through Korosko passes quickly and peaceably – soon they are approaching the Egyptian-Sudan border, and Wadi Halfa…
Meanwhile Talahawiyeh continues down river, Atbara is soon behind her and she is deep into enemy territory.
In the east Akhtar Pasha opts to also march on Northern Sudan with his full force, eventually arriving at Sinkat with all available troops (having left only the HQ of the Naval Brigade in Suakin, to await the arrival of further reinforcements). At Trinkitat he abandons the garrison having sent the 2/1 Egyptian Company orders to march to Tokar, en route to Suakin. Down in the south-east the 4/1 Egyptian Company initialy continues to carry out its routine garrison orders at Kassala on the Eritrean border.
At Khartoum, Bordein’s Captain makes ready to head out – he has agreed with Maizoub Pasha to return to El Dueim and see what awaits, if possible he may be able to use Bordein’s guns and armed Sailors to regain control of the town, if not, and other circumstances are favourable, he will try and slip further upriver to investigate Kosti. Out in Darfur the 2/XIIth Sudanese and 1st Section, B Egyptian Battery, continue their peaceful, but somewhat isolated journey East, safely reaching Foga by the end of the turn – soon they will be entering Kordofan and El Obeid will not be so distant. Meanwhile at El Fasher the commander of B Egyptian Battery sends a request to the commander of 4/XIIth – to concentrate at El Fasher as he has an ill feeling and Darfur is a remote place to be caught alone and in small groups should a revolt occur. The commander of the Sudanese Company is swayed by the argument, and accompanied by a large baggage train, they depart Dara, reuniting with the balance of the Company at El Fasher by the end of the turn. The commander of B Battery is most relieved to see the additional troops arrive at his location!
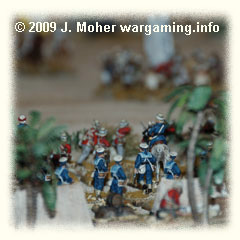
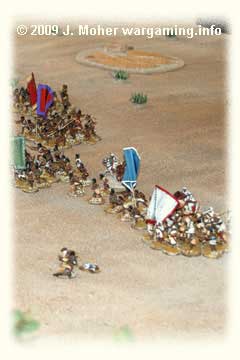
Up north Sir Henry’s column approaches Wadi Halfa, which is soon found to be occupied by large numbers of Dervishes. They sally forth to meet the Anglo-Egyptian Column, attacking them in their encampment at first light, and so the battle of the March on Wadi Halfa takes place on the plains North of that city. Fire & Sword Battle 02: The March to Wadi Halfa.
About 300 miles away Talahawiyeh approaches Berber, she has encamped for the night on the shore of the Nile when, in the early hours of the morning, the camp pickets come fleeing in screaming they are all about to die… Thanks to some incredibly forward thinking by her Captain and the force commander Captain Wahab El Zahra Agha she is not caught unawares despite the panic of the pickets. With the vast bulk of the stores collected already securely on board and the majority of the 4/5 Egyptian fellahin also sleeping on deck (or beside the beached Nuggar on the shoreline), the picket line is able to successfully depart the shore in the Nuggar, albeit hastily, under cover of the 9pdr & Nordenfelt on Talahawiyeh plus the rifles of their comrades. It is a close call but she slips away with just 2 lightly wounded Egyptian fellahin from sporadic Dervish rifle fire, and who quickly recover in the next few days. She’s narrowly avoided battle with 9 Dervish units!
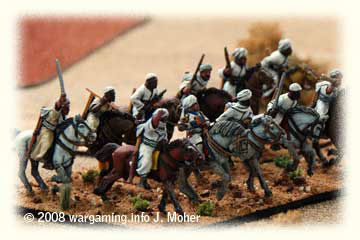
Way way down South Bordein cautiously makes her way back up the White Nile, when suddenly she comes under fire from Ansar Riflemen at close range – she has been caught unawares as she approaches El Dueim – and one of her Sailors is wounded (a Riflemen, but he quickly recovers after the action) – her guns quickly drive off the Riflemen as she passes hurriedly out of range but as she gets closer to El Dueim the presence of Baggara Cavalry and a group of Ansar Infantry (thankfully not rifle armed) puts paid to any hope of occupying the town, and she quickly paddles her way past, continuing up river towards Kosti. As she approaches Kosti she encounters another reasonable force of Dervishes, this time all Infantry, including more Riflemen (2 units of Fuzzy-Wuzzies, 1 of Ansar, and 1 of Riflemen – possibly Jihadiyya), and again is taken by surprise by their appearance, suffering much incoming fire before being able to back out of range, come-about and slip away back down river the way she came… In the encounter 4 more crewmen are wounded (not to mention her smoke stack badly perforated) – 1 Stoker/Sailor, 1 Gunner, and 2 more Armed Sailor Riflemen! Bordein is turning into a hospital ship! One of the Armed Sailors’ dies from his wounds, and the Gunner will require time to recover, however the other 2 wounded are (luckily) quickly back on duty. Bordein has been incredibly lucky in not running into any Dervish Artillery as yet, although incredibly unlucky in running into significant Mahdist forces at every turn.
Finally Bordein, after an excitement filled and tense escapade up river, arrives back at El Dueim, and expecting it to be teeming with Dervishes, is instead met by just a small force of Fuzzy-Wuzzies & Ansar, who have emerged from El Dueim to try and engage the boat while close to shore, there being no sign of the Riflemen & Cavalry encountered a week or so earlier on her way up river… Her Captain is faced with the envious decision of whether to try to drive off these (relatively small numbers of) troops, thereby allowing an attempt to enter El Dueim, or slip quietly past for Khartoum… Realising his crew is well below strength due to casualties and that Bordein needs repairs he elects to carry on down river, ignoring El Dueim, and returning to the Safety of Khartoum. By the end of the month she is back at the Sudanese Capital – rather the worst for wear, but she has at least bought in a small amount of supplies (2 turns) – so Khartoum gets a small respite for the future…
In the North, having successfully won the ferocious battle of Wadi Halfa – dubbed ‘the battle of the smoking zeribas‘ by the troops, Sir Henry marches triumphantly into Wadi Halfa – the remaining Dervishes have fled, and the column is soon greeted by ex-Merchants and other Arab notables who were persecuted or incarcerated for the last two months by the local Mahdist Amir… Back with Talahawiyeh she continues her intrepid expedition north, successfully negotiating the 5th Cataract fairly easily, and soon approaches Bashtinab. The area is clearly seething with Fuzzy-Wuzzies, large numbers being seen around the town, and a body of ‘Fuzzy’ Camelry shadowing Talahawiyeh downriver for the next day or so – however she is soon well beyond them and almost to her objective – Abu Hamed!
As she gets closer to her destination its clear Abu Hamed is in dire straights – its surrounded by absolute hordes of Dervishes, and she is soon under fire by masses of Riflemen and several artillery guns! As she approaches Abu Hamed a brisk artillery duel begins – Talahawiyeh’s main gun lands an accurate round in the middle of the first of 3 Mahdist gun positions, killing the gun crew leader and wounding 2 of the 3 gunners – one gun silenced! The other 2 Dervish guns retaliate, both scoring hits on the plucky Paddle Steamer, one wounding a sailor, while the other is more serious – causing some hull damage, while her Nordenfelt MG has little effect. As she draws past the Dervish Guns her crew again gets off the first shots, her main gun again scores a decisive hit, taking out the entire crew of one Mahdist Gun (1 dead, 3 wounded), while her Nordenfelt gets the final gun in sight and inflicts 3 casualties on it (2 dead & 1 wounded). However she is now in range of literally masses of Dervish Riflemen (40 figs), and both the Steamer’s Captain, and the NCO from her Gun Crews are wounded. As she passes her Armed Sailors (5) and about half the Egyptians (8) in the Nuggar fire on the Dervishes – but only inflict 1 wound on them as she paddles into the little harbour at Abu Hamed – she’s made it! While the Captain will shortly recover, the wounded NCO from the Gun Crews and the Sailor are not so lucky and remain in the infirmary recovering. But for now Abu Hamed is saved, Talahawiyeh has brought 6 turns of supplies plus the 4/5th Egyptians to bolster the garrison – its a big morale boost for the town.
In Cairo and Alexandria the Khedive and British Authority continue to move quickly (another high throw, this time 5 resulting in 4 reinforcements), with more troops arriving at Aswan:
- HQ Egyptian Cavalry Regiment;
- 1st Egyptian Cavalry Squadron;
- 2nd Rifle Company, Yorkshire Regiment;
- 1st Naval Brigade MG Section (Gardner).
And the following at Suakin:
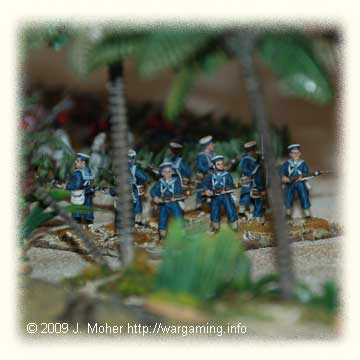
- 2nd Naval Brigade Rifle Company.
Meanwhile in Khartoum the defenders have been busy getting their last Paddle Steamer into operation as a Gunboat with improvised armour and armament, El Safieh is impressive however, being larger than the other two she carries a heavier armament and more armed sailors, confidence increases in Khartoum with her (re)launch.
As the turn concludes, the Revolt Index decreased by 1 in Northern Sudan (due to Sir Henry’s victory), but otherwise elsewhere it was unchanged. The Mahdist Forces meanwhile accumulated another 30 VPs giving them 61 to date towards their target of 400.
This Turn’s Battles: Fire & Sword Battle 02: The March to Wadi Halfa.
Continue on to Fire & Sword Turn 03: January 1884.
2 thoughts on “Fire & Sword Turn 02: December 1883”