Down at the AWC Kieran and a few others have been playing Chain of Command. I finally had a chance to get down to the club so played an introductory game with Kieran… Using the basic ‘Patrol’ scenario (essentially the traditional ‘encounter’ game – although probably never the best scenario type for an impromptu wargame, especially first taste of a rule set) we set up a village crossroads ‘somewhere in Normandy, 1944’.

The forces on either side were essentially full strength platoons from opposing non-motorised infantry formations, with their subsequent force strength calculated as below:
German Platoon (John) – Force Morale 8
- 2 Senior Leaders (Lieutenant and Platoon Sergeant)
- Platoon Panzerjäger Team (2 Men with Panzerschreck)
- 3 Infantry Sections, each:
- 1 Junior Leader (Section Corporal)
- 3 Man MG Team (with MG42 and 2 men & 1 Rifleman)
- 6 Man Rifle Team (with Karabiner 98K’s and 1 Panzerfaust)
U.S. Platoon (Kieran) – Force Morale 11
- 2 Senior Leaders (Lieutenant and Platoon Sergeant)
- Platoon Anti-Tank Team (2 Men with Bazooka)
- Company Medic (1 Man unarmed medic)
- 3 Infantry Squads, each:
- 1 Junior Leader (Section Corporal)
- 3 Man MG Team (with BAR and 2 men & 1 Rifleman)
- 8 Man Rifle Team (with M1 Garands)
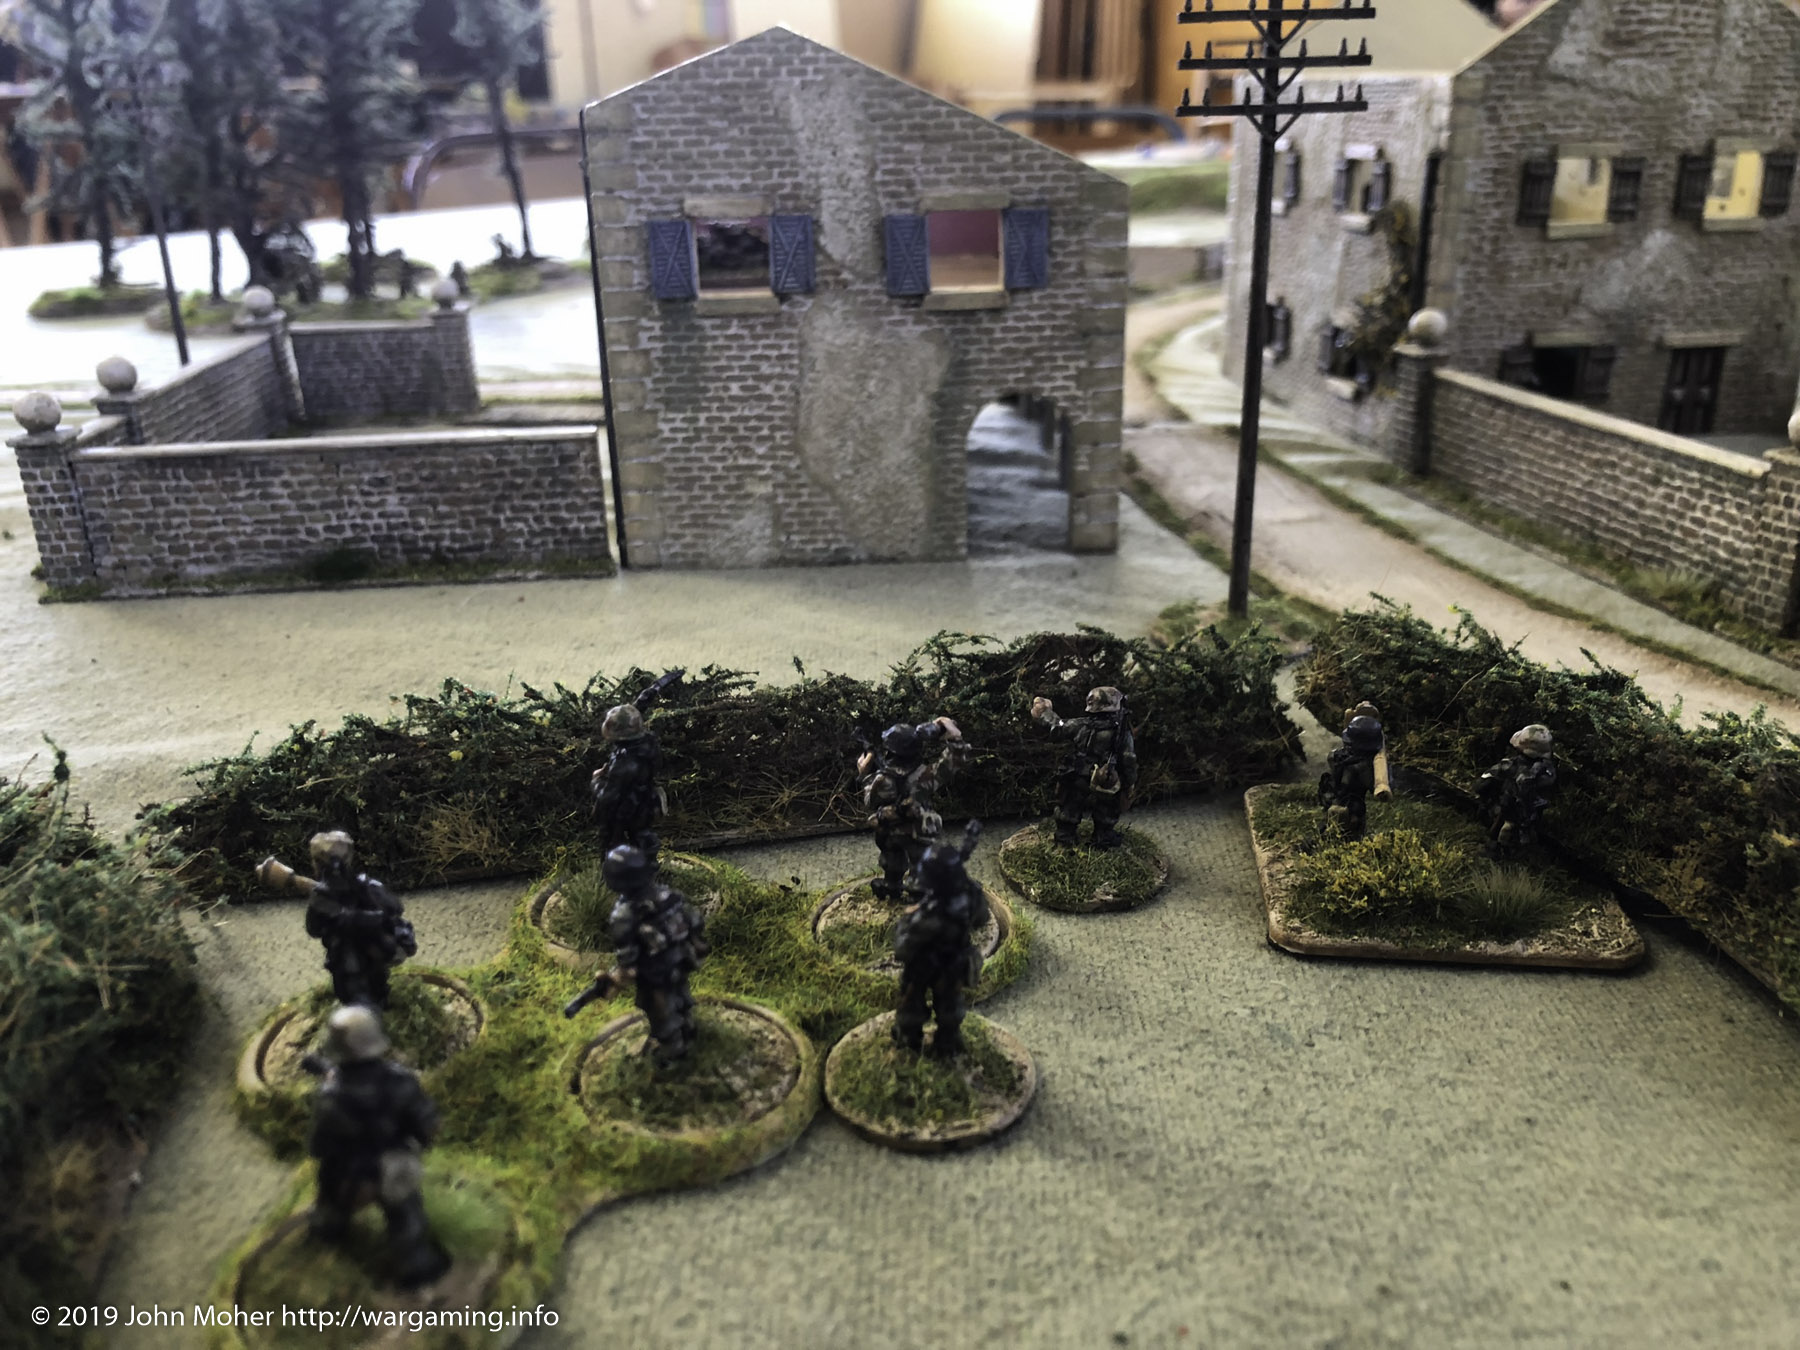
The table was laid out as shown in the photo above – which is at the end of the initial reconnaissance (or patrolling) phase – the markers for this can be seen (4 per side). Jumping off points for where troops deploy are then placed anywhere 6″ behind the markers (relative to the enemy’s markers).

Both sides were advancing from diagonally opposite ends of the long sides of the table (5′ x 4′) and while the German’s got the better of the initial reconnaissance (gaining the 2 buildings at the centre of the village) the U.S. were in the end able to extend further gaining the high ground opposite the German right.
Jumping off points were then placed (3 per side) from where troops would deploy, and force morale determined. Kieran’s Americans got a good boost here, scoring maximum morale of 11 versus my German’s somewhat average 8.

The game saw both sides pushing aggressively in the centre; the German’s to occupy the central village buildings (with the entire 2nd section, and the MG team from 1st Section) and also put the Rifle team from 1st Section out to cover the left flank (it was subsequently reinforced by the platoon’s Panzerschreck team). On the American side Kieran pushed his first Squad through the central hedged field accompanied by his Platoon Lieutenant (senior leader) and later joined by the Medic. The 2nd Squad followed slightly to the American right, into the small wood or copse alongside the field.

While Kieran’s U.S. force focussed mainly on establishing itself in strength in the centre, and there were prolonged fire fights between them and the central German sections and M.G.’s the remaining German Section I sent on an out flanking manoeuvre around the right hand low hill in an attempt to establish fire positions behind the U.S. Platoon.

Ongoing fire fights continued in the centre and on the U.S. right (German left), eroding both sides in what became a battle of attrition, and the U.S. right flank force did start to bring effective fire into the German positions in the centre.

Conversely the U.S. squad and Platoon HQ in the central field & hedgerow were taking heavy fire from the majority of the German troops, including all the MG teams, and this was starting to really grind them down.

Due tot he time it was taking for the rifle section to pull off the outflanking manoeuvre it was necessary to cut the corner an bit and they crested over the centre of the low hill, rather than skirting around the back (see below).

With the imminent flanking move arriving from the Germans, Kieran also attempt to push a decisive move on the opposing flank, the U.S. right, to get behind the German centre (my previous moves on this flank had been stalled in the German rear, due to the U.S. forces occupying the best terrain early in the game).

As the attrition continued both sides morale had dropped significantly, but the U.S. forces were worse, and we deemed it a likely (albeit nominal) German victory, only by a hair’s breadth; as one more turn would have definitely seen the U.S. collapse, and the German Platoon only possibly avoiding a similar fate (50/50).

First Impressions and Debrief
Overall it’s and interesting set of rules with some interesting ideas, however there’s also clearly a lot of Crossfire influence in them and also a nod to those other people who like to roll buckets of dice.
What Worked Well
- Really nice attempt at pregame manoeuvre (patrols, FDLs, etc) with the reconnaissance rules to help provide variety and some uncertainty around deployments.
- Command Dice – to a degree… Nice way to introduce some friction and prevent the dreaded ‘everyone gets to do everything every phase issue’. And a nice effect with the random chance of the turn ending and you get a second sequential phase (move) – very ‘Crossfire like’ but more random.
- Range & Movement Measurements – sort of… It provided some ability to manoeuvre when distant from the enemy by restricting fire, and for movement across open areas to take multiple phases, but didn’t necessarily mean much except you could have less terrain on the table.
What Didn’t
- Too much ‘every man gets to fire’ – the way the firepower is determined it essentially means every man not manning a crew served weapon gets a die, so Germans with 10 men get 8 dice for the MG42, plus 7 dice for the other riflemen, plus potentially 1 die for the NCO if he’s in SMG range, etc. That’s 15-16 dice for a full strength section. In real life the MG42 team did 95% of the firing in the German section and most if not all riflemen never fired a shot, except in self defence at the last minute or in very special circumstances. So this level of detail for the firepower, while it may work for game play and balance, possibly doesn’t really reflect anything like what actually happened.
- Command Dice – to a degree… While there are positives to the mechanic it also makes things rather random (i.e. the dice rather than what’s happening ‘on the battlefield’ determines who can do what) and for well lead forces (number of leaders) a reasonable likelihood of doing pretty much everything you want most of the time.
- Range & Movement Measurements – sort of… I felt it didn’t really add anything (other than possibly unnecessary variability in firing calculations), and in fact it implied a table ground scale far more larger than Crossfire’s abstract (line-of-sight) one; ironically it meant you could have less terrain on the table at a time when the table is nominally a much larger area so should have more features (e.g. our table was probably nominally 2,000+m by 1,200+m based on game firing ranges, assuming effective ranges, and an equivalent Crossfire table would be less and have about twice the nominal troops per side – i.e. 2 companies) albeit larger more generalised ones (which is kind of the reverse of what you expect given the troop scale is smaller and a more detailed 1:1 ratio).
Final Thoughts
Interesting rule set and good enough to possibly try some more games – but first impressions to me are it doesn’t offer a lot over Crossfire and while it’s admittedly aimed at a slightly different level of game (i.e. a Platoon to Company at most, vs. Crossfire’s typically one or more Companies up to occasional Battalion sized games), it adds quite a bit of detail at a level I don’t think necessarily makes for a better game.
For those older school players who like fixed move distances, pre-determined ranges, and some micro detail it’s certainly got a lot to recommend it, and does have some interesting mechanics that differentiate it from traditional skirmish level games (although with a risk to some things in the game being too random).
