WW2 Gallery
Introduction
This page contains some photos of my WW2 land forces. I'm not sure the direction this section will take as although WW2 is one of my favourite wargames periods, I haven't found a rule I like for this scale and I don't know how much information I can add that isn't already available on the web.
The first army I have started on is a WW2 Normandy British army, based on the Guards Armoured Division. This is an interesting formation and it happened to match my figure collection pretty well. The majority of the figures are GHQ with some CNC and a few Heroics and Ros vehicles. I went with Mainforce (Hallmark) for the infantry as I like the prone look and they are durable and easy to paint. Unfortunately they dont make artillery and vehicle crew so I went with GHQ for those, but they are very puny in comparsion and wouldn't mix well on the same base. For air support please refer to the Air Gaming section of this site.
I'm still deciding on a set of rules so the bases are different sizes and are there so I can store them in boxes with magnetic sheet. The decals are all from GHQ and are nice. I went for the Guards Armoured Division and went a bit crazy painting adding Guards Div markings, yellow weight indicators and Arms of Service.
The vehicles were all painted using the following steps:-
Undercoat using grey or white (I use a brushed on Tamiya grey undercoat).
Airbrush the base colour a mix of 50/50 of Tamiya Dark Earth and XF26 Green which I added some Tamiya Buff to, to allow for the smaller scale (using a formula from a well known modeller Mike Starmer).
Then I gave the whole model a VERY light Vallejo Stone drybrush. I don't drybrush a lot anymore for 6mm models, but it works well with these colour combinations and picks out the details very well.
Then paint the black bits, I used Vallejo German Grey as Black is too strong in this scale in my opinion.
Next the tires are painted with XF50 Field blue which gives the tires a nice blueish-grey tinge.
Pick out any other details such as Gun barrels, tools stowage etc, again with colours brighter than normal.
Next apply any decals and paint on any markings by hand.
Next I spray a light coat of gloss varnish on the model with a spraycan (Tamiya or Testors depending on local supplies).
Next I pick out the details with a thin black pin wash of oil paint. (I created a wash of oil paint and turps for all my pin washes).
Pick out extra bits where you want it to look slightly dirty with a burnt umber brown wash. I don't wash this everywhere on the model and mostly add it to the wheels, around the engine and exhausts. It come down to how weathered and rusty you want the vehicle to look.
Finally I also used a light earthy coloured wash (mixed from oil paints and halfway in between Tamiya Dark earth and Buff in colour) and brushed that over the lower parts and wiped off any excess with a cloth. I used to give the models a light Tamiya buff spray with the airbrush over the lower parts and wiped off the excess with a cloth before it dried, but I found that it is very hard to control where it sprays. Now I use a oil wash in a very simlar colour to Buff and go over the vehicle with that.
Finally spray with Matt varnish on the model in a few light coats.
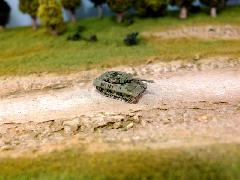
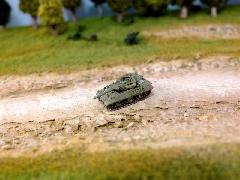
GHQ Challenger Tank
GHQ Cromwell variants


The first picture shows the Cormwell CS tank with a 95mm gun. The thicker shorter barrel is noticeable close up but I doubt it is on a wargames table. The other photos show a comparsion of the 3 different variants of the Cromwell tank - the standard MkIV, CS version and a Challenger with a longer hull and larger turret.
GHQ M10 Achilles


This is the British version of the M10 with the 17pdr replacing the US gun. The main noticeable difference is the barrel with its fume extracter/muzzle brake. It could really do with some crew and extra stowage to finish it off but that doesn't detract from it being a lovely model.


