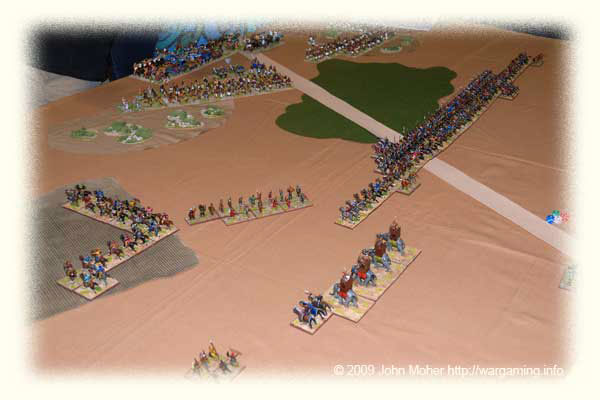
Sunday afternoon saw us facing the Kushite Egyptians of Philip Abela and Andrew Hunter. For deployment we placed two very large open fields and 2 roads to try and restrict their terrain placement (see the green & brown areas in the photos below) and force them to deploy in the open. However they were able to get two patches of scrub into their deployment zone and consequently corner sat with their force crammed into less than half the width of the table on the Kushan right. They also had a command off-table which we expected to flank march on on the Kushan right (see photo below) to support that deployment. The Kushite’s also pulled out a Guides Stratagem (again) and placed a hidden track through the scrub on the Kushan extreme right.
 For the first time in the tournament we didn’t put the C-in-C and the Elephants in the centre, instead putting them on the left which was all open terrain, while in the centre & right we concentrated our Cataphracts. We were confident we could deal with any foot in the army and most of the mounted with the Cataphracts, just the few Kn(O) chariots being the main concern, so we were just looking for a place to concentrate a decisive blow early. The game started with the whole Kushan army advancing aggressively across the battlefield, with my C-in-C’s Chionites doing a virtual on table flank march by virtue of their being no opposition (see photo below).
The Kushite’s showed little interest in moving and apart from some minor redeploying of reserve chariots simply watched our approach. Soon we faced a dilemma – having closed on the enemy, and out-flanked them on our left, how do we close? The presence of both patches of rough ground concerned us, and as we went through a period of very low PiP availability we were unable to do any significant manoeuvring with the Cataphracts, and keep the Chionites in check. As a result we were stalemated for a couple of bounds or so when we should have started to get our Cataphracts into combat in the centre of the enemy line ASAP.
On the left the C-in-C’s Auxilia and Psiloi were slowly approaching the Nubian Bowmen in the scrub, their job to engage them and thereby cover the mounted troops who would attack either side in the open. The C-in-C’s Chionites were faced with a bit of a dilemma, with no one to fight they needed to turn right and attack down the battlefield into the Kushite flank, or stand back soaking PiPs doing nothing… I had intended a compromise, doing the latter but wheeling 2-3 elements into the Kushite flank to go spontaneous and draw some of his mounted out to fight, but with the low PiPs and the potential stalemate in the centre, I wheeled the entire block of 10 Chionites for a run into the Kushite flank, despite some being in the rough and having to fight bowmen there (see photo below). Things were getting ready for a (hopefully decisive) action on the Kushan left.
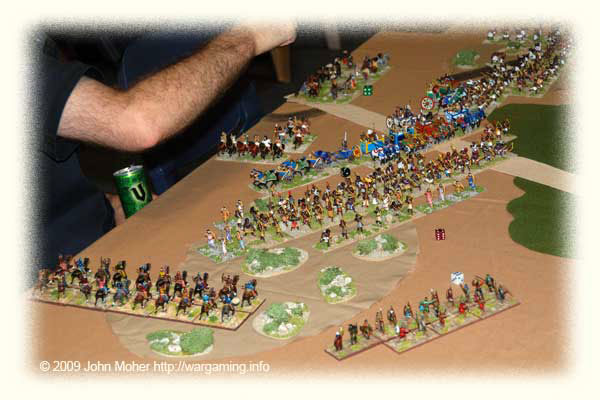
Despite the scrub the Chionites could still ride down the bowmen and with a few PiPs the Lh(S) and Auxilia should be into the Nubian bowmen with abandon! Well that was the plan anyway – however the Kushites pulled a cunning rabbit out of the hat and their flank march turned out to be a delayed command! Oops! As can be seen in the photo below the C-in-C’s Chionites got mugged and were in a spot of bother! This was a bit of a defining moment in the game – and Cam says the thing he will remember the whole tournament for (i.e. my Lh(S) getting sandbagged by the Kushite Delayed Command). It looked like curtains and both Cam and I expected to have a command rapidly broken and the game effectively over as we’d be forced into a defensive damage control posture (see photo below)…
In fact while things were dire, they were by no means irretrievable, and surprising a couple of Lh(S) did survive the first round of combat! We determined to immediately activate feigned flight to get our Chionites out of there as fast as possible, but I got confused forgetting that it was the C-in-C’s command (so could supply the 3 PiPs to itself) and thinking I needed 3 PiPs from the centre command – which only got 2 PiPs for the bound! Needless to say this resulted in the Chionites staying and trying to fight it out for an extra pair of bounds that we hadn’t intended… However it did force us to commit and in the centre we endeavoured to throw everything we had into the action, allowing most of the Chionites in both Sub-Generals’ commands to go spontaneous.
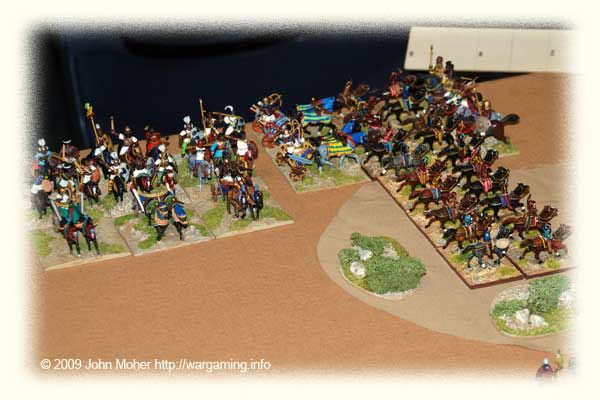
By this stage the C-in-C’s command was halfway to breaking having lost about 5 Chionites! We did manage to trigger feigned flight however and the C-in-C’s remaining Chionites and the Auxilia attacking the bowmen promptly fled from the enemy… In the centre and on Cam’s right our forces slowly trickled into combat, the rushed attack resulting in the Cataphracts going in in dribs and drabs with odd Chionites turning up spontaneously alongside them… The photo below gives a indication of the mess our forces were in by this stage. Ironically we weren’t doing that bad – yes the C-in-C’s command had taken a heavy knock, but elsewhere we were slowly killing a few elements and not losing much in return, and there was a glimmer we could fight our way out of it and actually win a reasonable victory.
On the Kushan left the Feigned flight had had a small benefit, drawing some of the Kushite Mounted forward into the open in spontaneous pursuit, unfortunately the C-in-C’s Elephants were too far back to exploit this – but we repeated the feigned flight the following bound to ensure the C-in-C’s troops were well clear of the pursuers before turning about and reforming…. And to make things just that bit more challenging my brain started doing the old “I don’t want to work anymore” trick again.
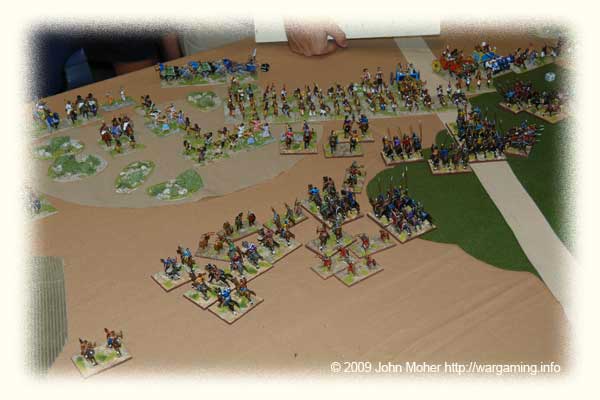
The battle was simply a total mess – we ground away in various places, and both sides had moments of success and defeat. On the whole we did reasonably well on a 1:1 basis as we had expected but the weakened C-in-C’s command left us always looking over our shoulders. Campbell’s right flank had a fairly decisive period of combat smashing through part of the enemy force of Kn(O) Chariots in the centre but then losing quite a few Chionites to the enemy infantry on the far right – the photo below showing the central fight prior to the break through.
Finally a reasonable break through was made in the centre, the combined weight of the Cataphracts from both Sub-General’s commands was too much – but it was messy. Cam’s right flank command had done a lot of fighting and was hammered, having lost many of it’s Chionites, but it had almost reached the Kushite Baggage (which was trying to move away despite being hemmed in) – two more bounds and the Cataphracts probably would have been ploughing through it. On the left the C-in-C’s command was also just hanging on – but had managed to get 1 or 2 of the pursuing Kushite mounted troops. Both armies had taken quite a few casualties and had commands dangerously close to demoralising or worse.
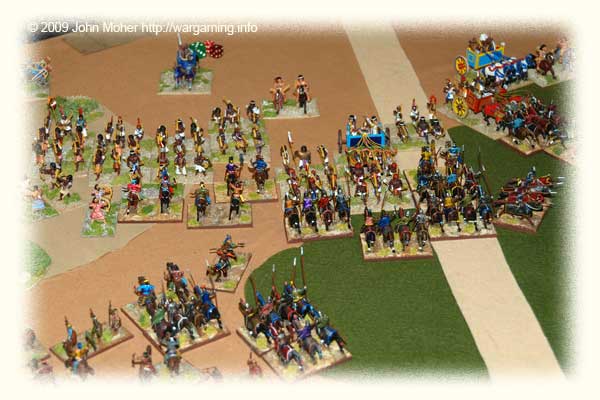
And then it was time – both sides had areas of success and failure, and although the Kushan army was a mess I think we were in a slightly stronger position, although the Kushites had a very good chance of getting a victory if we had had more time to play on – certainly Cam was not optimistic about a victory if we had had longer to play… The sandbagging of our Lh(S) by the delayed command had had a big impact on the game, and Cam believed it pretty much wrecked any chance of a decisive victory, but I’m not so sure – with more time and thanks to some hard fighting we still had a possibility of winning the game, certainly it was 50/50 or better odds – which was a much better situation than how it had appeared when the delayed command arrived, But we had also payed for my mix up with the PiPs and not doing the feigned flight immediately – we lost an extra couple of Chionites in the 2 bounds of combat before I triggered it, and ultimately the cunning Kushite deployment just had too many foot troops in rough going – which we just couldn’t combat them effectively except by risking the Lh(S) in there. The last 3 photos give you a pretty good idea of just how fragmented our Kushans ended up in this game.
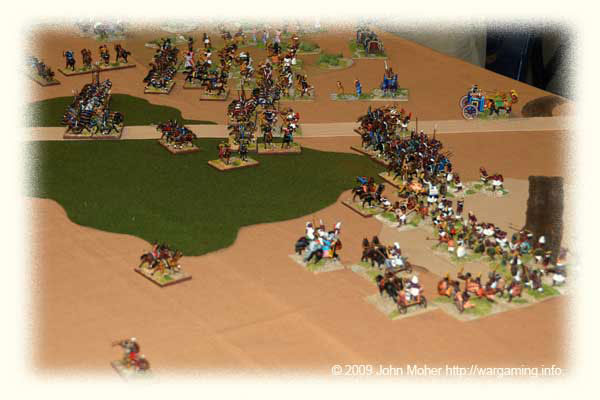
So the game ended 14-11 in our favour – it was a very hard won draw that went in our favour literally on the lack of a couple of elements, our losses being just enough less than Philip & Andrew’s to stay ahead of them. This left us finishing the tournament on a nice round 60 points, and 2nd place – John & Lance had been unable to hold off the Portuguese and had gone down to the latter’s third hard won victory, Ivan & Dickie finishing on 74.
Philip and Andrew meanwhile, having come close to defeating us were rewarded with a drop to 4th place (after having led for the first two rounds), thanks to a strong Draw achieved by Brett Preston-Thomas and Lawrence Antill with their Medieval Germans & Swiss, who finished on 51, two ahead of Philip & Andrew’s 49!
Continue to BC’09 Conclusion: Results & Aftermath.
