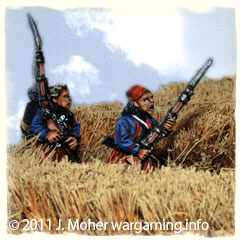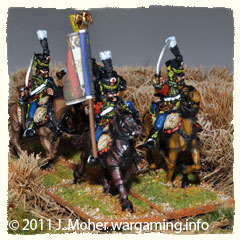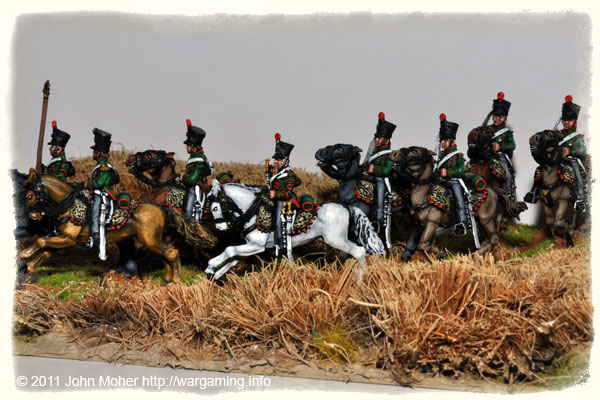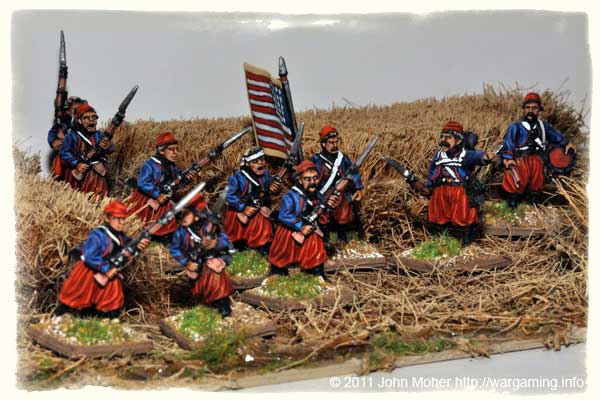
One of the terrain features both Kieran Mahony (6mm Wargaming) and I have in our collections are assorted fields, and one type is made from a straw mat. The following are some photos of the straw fields I have, these are part of a large batch Kieran made for he and I and a couple of other AWC Members. I’ve been asked a couple of times now about them in some of the photos so I thought I’d provide some clear photos of them and a basic outline of how Kieran constructed them. These are simple static fields and not the type designed to have sections removed to allow troops to be placed in them. Kieran designed them as partially harvested to leave enough room in most cases for troops to be placed in them without needing to bother with removable sections.
What You Need

The following is a general list of what you’ll need to make fields similar to the one’s pictured here:
- Plasticard, Plywood or MDF for the base,
- A ‘Straw’ Doormat (or 2) bought from your local hardware store*
- Selleys “No More Gaps” (or a similar filler & sealer or caulking compound, usually silicone based, and coffee or similarly light earth coloured if possible),
- Assorted Noch, MiniNatur, or Army Painter Grass Tufts (or similar),
- Static Grass (or similar grass strand ground covering – but not ground scatter),
- Woodland Scenics’ Realistic Water,
- PVA (White Glue),
- Spray Glue (or diluted PVA White Glue in Spray Bottle),
- Paint,
- Tin Snips or similar (to cut the door mats) & Stanley Knife.
* Be careful what sort of straw mat you buy – some are just ‘woven’ together and will disintegrate once you start cutting them up – you want the type that has the bottom soaked or coated with a glue or resin, or at worst set in thing rubber…
The Process
1. Cut your base material (Plasticard or Ply or MDF) to the desired sizes (e.g. with Stanley Knife & Steel Rule) and sand/smooth the edges, etc… Note most plasticard will snap cleanly if you cuy it about 2/3 the way through then carefully bend it over the straight edge of a table of bench.
2a. Get your straw doormat and cut off pieces of it to the desired size and shape to represent the areas of standing wheat or barley – save all your off-cuts and loose strands of the mat. Make sure you give some of them straight edges or square corners – so you can line them up with the edge or corner of your base (see the photos). Remember too you can always align or synchronise several bases so they will all fit together to make a larger field. You will probably need Tin Snips for this, or if you are careful turn it upside down on a suitable surface and use a Stanley Knife (by making multiple passes along the cut to gradually cut through the mat).
2b. To add extra detail to the ‘straw’ once your cut pieces of mat are ready give them firstly (1) a quick airbrush round the bottom edges a dark brown, to add extra darkness/shadow at ground level, then (2) a dry brush round the sides and across the top to help accentuate the upper detail – Kieran used the Folk-Art colours Camel & Parchment in successive layers to give the straw a layered 3 tone colour.

3. Once you have your pieces ready use the PVA to fix them in place – don’t forget to use some of the off cuts to put the odd smaller patch or tuft of the wheat slightly out on its own, so your crops don’t all have perfect clean edges. You’ll note in the photos Kieran has also made the edges of some a bit ‘scruffy’ to suggest broken or bent stalks that haven’t been harvested or completely trampled.
4a. Once you have let the above dry adequately it’s time to add a little texture. Use your Selleys No More Gaps or other basing material to smooth off round the edges of the pieces of straw-mat so you have a tidy join where the straw mat meets the field’s base. Also use this to make the shallow banks of a ditch – see the photos of the two larger fields on this page – this doesn’t need to be huge – just enough to pour the Woodland Scenics’ Realistic Water in (but make sure you close off each end so the Realistic Water cant’ run out). Finally spread a very thin uneven or coarse layer of the “No More Gaps” across the open area of the field’s base, this will give it an uneven texture and provide a coarse surface to paint.
If possible get yourself ‘coffee coloured’ No More Gaps or other caulking compound – this gives you a base colour that doesn’t need painting, so no having to try and get the paintbrush into obscure & difficult places to hide the white filler material!
4b. If you used coffee coloured No More Gaps or Caulking compound, you can now sprinkle on the loose static grass followed by the loose strands of straw you saved (see steps 6 & 7 below) – otherwise you’ll need to paint the base a basic colour (like Folk-Art Mushroom) before doing so (see step 5).
Either way you’ll need to leave it 24 hours after steps 4a and 4b (if you did 4b) for this to dry and completely set.
5. Now it’s time to paint the base – If You Used Coffee Coloured No More Gaps or Caulking Compound you will only need to paint and dry brush round the edges & where there is no ‘loose straw’, if not you’ll need to follow the full process – paint all the open areas (and the edges) your chosen base colour – typically you want a pale medium brown colour (as the field is being depicted as mid-late summer or autumn with mature crops), and then dry brush over this with a lighter shade of the brown colour to pick out your highlights – it doesn’t need to be perfect, just enough to create the sense of depth to the surface so it doesn’t look like a flat piece of board with brown paint on it! Finish off by painting the bottom of your ditch a greeny-brown colour – this is to give the water it’s tint (if you go and look in a few ditches you’ll note they aren’t clear or blue – in summer the water will be a dark greeny-blue colour from the foliage growing in it and the reflection of the green plants on the banks & the sky-blue sky; in winter typically more a brown-grey colour from the mud and lack of greenery on the banks, and the refection of dark wintery-grey skies).
The colours Kieran used for these fields, and incidentally also what I normally use for figure bases are Folk-Art Mushroom (for the base colour if needed); and Teddy-Bear Tan & Parchment for successiively lighter layers of dry-brushing to bring out 3D details.
6. Next – once the paint is all dry it’s time to detail the base with grass tufts and static grass – no field is free from weeds & grass and scrub, so scatter clumps of Noch, MiniNature, or similar grass tufts around the edges of the base, against the straw mat, and along the ditch and such (see the photos for ideas). While you are gluing those down with the PVA also spread some glue in a few irregular patches in the open areas of the base, and sprinkle static grass on (this will represent patches of normal grass around the edges of the field or growing in areas where the wheat wasn’t especially thick) – If you have used coffee coloured sealer as your base you can sprinkle the static grass straight on it in step 4b above instead (so will just need to glue the clumps of grass tufts on at this stage). Once dry make sure you shake off any excess static grass, etc, and brush the base down with an old paint brush to make sure it’s clean of loose material.

7. This is where you use all the loose strands and such you saved from the straw mat. If you have not used coffee coloured sealer for your base you want to spray the main open area of the field with the spray glue or some diluted PVA – don’t worry if some goes on some of the patches of static grass but try not to get too much on the grass tufts or any in the ditch (if you did one). You won’t need a lot just a light covering – now sprinkle the saved straw mat strands and loose pieces across the mat – you don’t need a thick covering – just a loose sparse covering to suggest stalks and such lying trampled or cut on the ground. If you used coffee coloured sealer for your base, you can do all this as part of step 4b above after the static grass. Eitherway let this dry then shake off the loose bits (saving them for your next field of course). You may or may not want to spray a second coat of glue over the top to help set them in place but don’t spray too much in one go (2-3 thin coats are better than 1 thick one to avoid glue build-up and whitening). We recommend you do this in some form – this will ‘seal’ the loose straw & static grass in place and toughen the surface for gaming wear & tear.
8. Finally if you did do the ditch, once all the above is complete and dry, pour a small amount of Woodland Scenics’ Realistic Water into the ditch – remember this needs to be done in thin layers and you should not need much – just pour enough to just cover the bottom of the ditch – once that’s dry pour another thin layer on top (if needed), and that should be done (but depending on the size of your ditch you may need a 3rd or 4th layer for a satisfactory result).
Hey presto – you should have yourself one or more very serviceable fields. This process is fairly easy and fast – so do 4-6 simultaneously and suddenly you have a whole batch of fields…
A Final Note
Don’t be scared to make your fields large (like 12” to 24″ or more on each side, especially if for 20mm to 28mm Troops) – one of the biggest mistakes wargamers make is they make lots of very small fields – which just isn’t what fields are like in real life in most eras and parts of the world. Some these fields Kieran made are actually too small individually, but you can combine 2-4 into a larger field (Kieran was endeavouring to cover all options for use in games from 15mm to 28mm scale so made some of the fields smaller). Remember, only in rare or unusual places do you find patchworks of very small fields…


