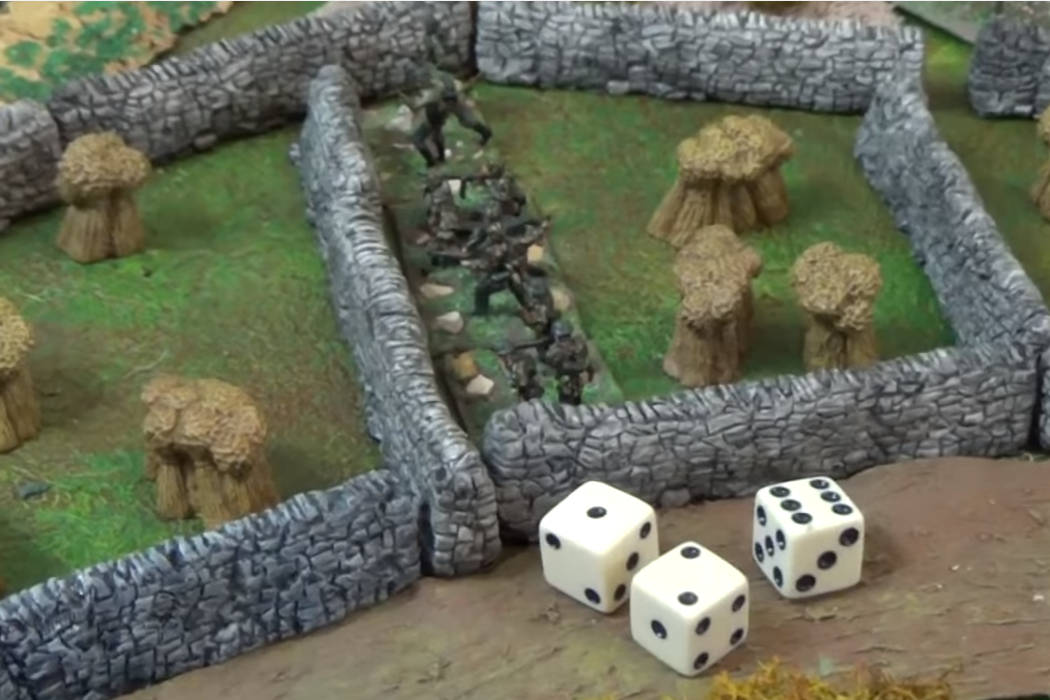
Following on from the “Operation Crossfire: Smoke & Close Combat” video is yet another useful introductory video by Nikolas Lloyd, covering How Not To Play Crossfire! This gives a quick introduction to what not to do tactically when playing Crossfire – the rules do not introduce artificial constraints such as arbitrary ranges, so you have to use real-life tactics to be successful… Continue reading “How Not To Play Crossfire Video”
Tag: FAQ
Crossfire Smoke & Close Combat Video
Following on from the “Crossfire: Movement & Reaction” video is another good introductory video by Nikolas Lloyd, covering Smoke and Close Combat in Crossfire. This gives a great quick introduction to basic infantry movement and reactive fire in Crossfire. Continue reading “Crossfire Smoke & Close Combat Video”
Crossfire Movement & Reaction Video

Following on from the “Operation Crossfire: Introducing Crossfire – World War Two Wargaming” video is another good introductory video by Nikolas Lloyd, covering Movement and Reaction in Crossfire. This gives a great quick introduction to basic infantry movement and reactive fire in Crossfire. Continue reading “Crossfire Movement & Reaction Video”
Crossfire Introduction Video

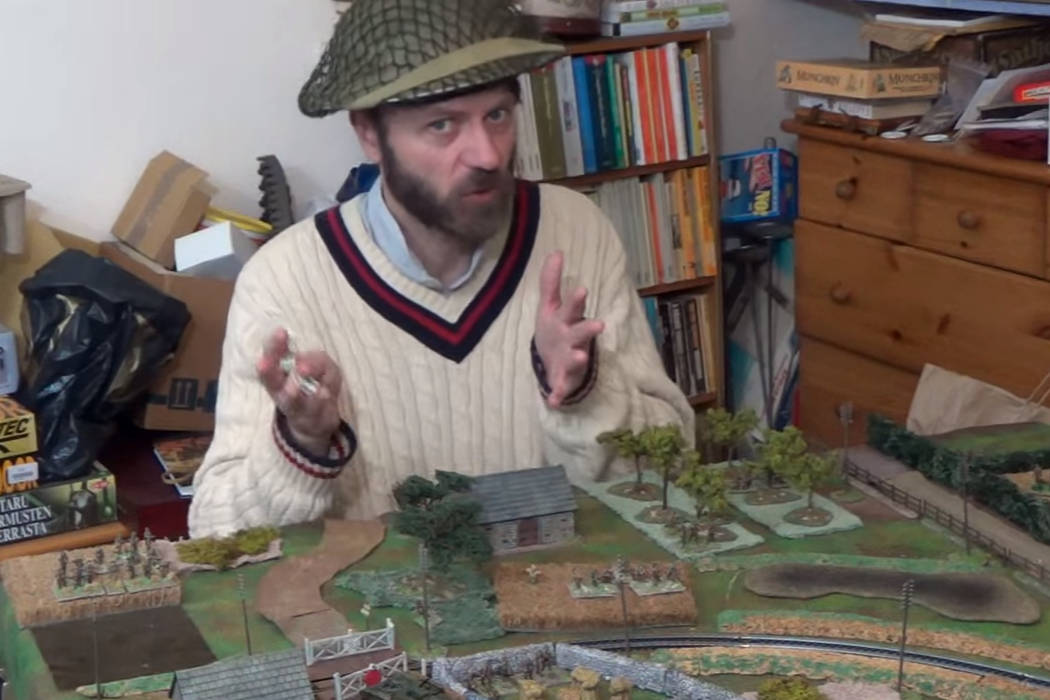
Operation Crossfire is a fantastic set of introductory and training videos for Crossfire – put together by long-time Crossfire gamer and aficionado Nikolas Lloyd. They are highly recommended to all, even experienced Crossfire gamers (as a nice to watch) – and if you have not seen them previously then be sure to take the time to watch them, especially if you have heard about Crossfire but not seen the game in action. Continue reading “Crossfire Introduction Video”
An Aquarium of Thorn Thickets

When BattleCry 2011 in Auckland was looming earlier this year I had promised Gerry from Castaway Arts to help with some Colonial TSATF demo & participation games (and provide the troops & terrain to save Gerry bringing it over from Cairns, Australia), and as part of that I wanted to try and have some new troops and terrain on table to add something fresh to the appearance. The troops were covered by the presence of the first of my Gunboats (which had just been completed for me by Kieran of 6mm Wargaming) and the inaugural outing of my British Infantry in Grey Uniforms (See the report of our third BattleCry 2011 TSATF Game). However terrain was a different story – as always I was leeching off Kieran for his Palm Trees – I do have my own, around 400 of them actually (and about 10 different types and sizes), but getting to basing and finishing them is a different story – but anyway, it otherwise was pretty much all standard stuff (well illustrated on this blog over the past few years). I needed something quick, easy, and cheap, to churn out a piece of quick new terrain…
Straw Doormat Wheat & Barley Fields

One of the terrain features both Kieran Mahony (6mm Wargaming) and I have in our collections are assorted fields, and one type is made from a straw mat. The following are some photos of the straw fields I have, these are part of a large batch Kieran made for he and I and a couple of other AWC Members. I’ve been asked a couple of times now about them in some of the photos so I thought I’d provide some clear photos of them and a basic outline of how Kieran constructed them. These are simple static fields and not the type designed to have sections removed to allow troops to be placed in them. Kieran designed them as partially harvested to leave enough room in most cases for troops to be placed in them without needing to bother with removable sections.
Ryan’s Basing & Painting Techniques

Ryan Davies is a member of the Crossfire Yahoo Group, and he recently put together a document detailing his techniques for painting and basing his 1/72nd scale figures – as a way to give something back to the wargaming internet community which he believes has helped him a lot over the years with his wargaming efforts. Ryan details how to cut bases from brass with a jewellers saw, his technique for labelling & indentifying his bases, and storing them.
Ryan then moves onto painting, especially soft plastic figures, covering how to paint, shade and seal them. He covers the merits of just brands of commonly available model paint, and the moves on to the actual techniques for basing the figures.
MMS Classic Models – Listing by Nation

One of the really great Model Manufacturers around is MMS Classic Models – they produce some really high quality World War 2 vehicles and guns for 20mm scale (I believe they are nominally very accurate 1/76th scale on par with Milicast and Cromwell – but don’t quote me on that). Anyway on their site they list all their packs numerically rather than by Nation or any other logical order – this drives me mad!
So I’ve done my own listing sorted by Nation and then logically within each Nation by type of pack.
Banzai – The Japanese are Coming!

I thought I’d throw up some preliminary photos of my 20mm Japanese troops – these are the bulk of a Battalion for Crossfire, along with some extra supports and an assortment of guns and tanks to represent most typical Japanese forces throughout the Pacific and Burma campaigns. The figures are mostly Eureka & Warmodelling (Fantassin), with a handful of Sgt. Major’s Miniatures chaps, a few SHQ Officers & NCOs (and a pair of 8cm Mortar Teams), and a couple of Combat Miniatures Officers and a few Scouts/Snipers (plus the Mounted Command Group).
The force represents a Japanese Battalion of 3 Rifle & 1 MG Company, with Regimental Support coming from a pair of 7cm Infantry Guns, and a single 7.5cm Mountain Gun, from the Regimental Gun Companies (visible in the background spray painted in grey primer).
Group Fire and Crossfire – How To?

Conducting Group and Cross-Fires in Crossfire can sometimes be a bit of a ‘trap for young players’ for the beginner. As a result I’ve endeavoured to provide a simple little graphic tutorial that hopefully will illustrate the process fairly clearly and help explain some of the benefits…
There are several common mistakes (or perhaps misreading of the rule’s text is a better term) so this basic example will attempt to step through the main points. In our example a German Platoon has somehow managed to enter a small orchard (or olive grove) encountering a single British Squad within. Both the British Squad and the entire German Platoon are fully within the terrain feature – this means they both gain the advantage of Light Cover, and both sides have clear line of sight to each other despite the trees (as there is no intervening terrain feature or obstacle). A German Squad was previously PINNED and the British Squad has just finished phasing fire at the Germans, managing to PIN a second Squad before losing the initiative to the Germans; as Pins are not sufficient to retain the initiative (a Suppression or better being required). We take things up in our example as initiative has just passed to the German Player…
Troop Scale in Crossfire

Something that Is not always generally recognised is that it is intended in CF that all (on table) vehicles and heavy weapons are modelled at a scale of 1:1 – i.e. 1 model of a tank, half-track, or gun is one real tank, half-track, or gun. While this seems logical to some, based on extrapolating the scale of Rifle Squads, HMGs, and Mortars to these, it is not always so to all players, however Arty has also stated this on a couple of occasions when asked… So in the interests of providing a clear guide from the author himself I have asked Arty again to reconfirm that this is what his original intent was, and we have had an ongoing discussion confirm & clarify this. As such the following is the key parts of a post and subsequent discussion on the Crossfire Yahoo Group, and Arty has also read and approved the main content prior to public posting so it can be considered as the closest to an official clarification there is likely to be on the subject.
Close Combat in Buildings & Hard Points

Close Combat in Buildings and Building Structures can sometimes be a little perplexing for players new to Crossfire. This page attempts to outline the process in clear logical steps to help walk the new player though the mechanics. While it may appear complex at first it is in fact relatively simple and will become second nature after a few combats.
General Concepts
In Crossfire, an individual building is generally intended to represent a single small to medium size dwelling or similar. It might also occasionally represent a small complex of 2-3 small buildings (like a small Eastern-European farmhouse with attached barn). As a rough guide, the playing area occupied is roughly about the same as what 4-6 squads would occupy.
Occasionally there will be exceptionally large buildings (such as the tractor factory in Stalingrad, or a row of adjoining terraced houses) – these are known as building complexes, and are treated as multiple ‘buildings’ with some special considerations (see page 6, Section 4.4.1a of the rulebook).