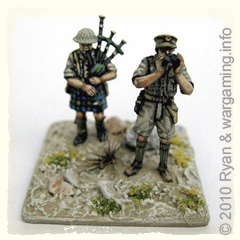
Ryan Davies is a member of the Crossfire Yahoo Group, and he recently put together a document detailing his techniques for painting and basing his 1/72nd scale figures – as a way to give something back to the wargaming internet community which he believes has helped him a lot over the years with his wargaming efforts. Ryan details how to cut bases from brass with a jewellers saw, his technique for labelling & indentifying his bases, and storing them.
Ryan then moves onto painting, especially soft plastic figures, covering how to paint, shade and seal them. He covers the merits of just brands of commonly available model paint, and the moves on to the actual techniques for basing the figures.

Ryan concludes his tips and techniques with sealing and detailing the bases. Ryan has a degree in fine art and is a smashingly good wargames painter, you can see this in some of the photos of his figures in his guide, which are quite stunning.
You can download Ryan’s guide here from Wargaming.info: ![]() Ryan’s Basing & Painting Techniques.
Ryan’s Basing & Painting Techniques.
Note the download is an approximately 3.1MB PDF.

Seriously cool site mate, hats off to you
Cheers Al – Appreciate the positive feedback! 🙂
I really like the article. I went out and bought a bunch of brass and plan on rebasing my figures but I will leave the magnet strip on my storage boxes instead of the bases as described in the article. I especially like the hit markers. How do they work?
Hi James – I know you are familiar with Crossfire – so in simple terms what you do is use 1 marker for a PIN (squad can’t move or pivot) or 2 markers for a SUPPRESSION (squad can’t do anything except try to rally). The markers are intended to represent small calibre shell bursts and dust & spray from small arms & MG fire striking the ground, etc… Ryan’s style of marker is very similar to my own, in my case I have used that style for nearly 25 years (mine were originally inspired by the WRG 1925-1950 2nd Edition Rules by Phil Barker in the UK that were released in 1988). If you look around the Crossfire Game Reports here at wargaming.info you’ll see my similar markers in use in many of the photos (and some of them really are 20 years old)! HTH.