Some of us at the Auckland Wargaming Club were inspired by Steve Winter’s campaign at the Colonial Angle website – so we grabbed Steve’s great idea, I tweaked it a little to suit me, and off we went! First thing I did was grabbed Steve’s Map and colourised it – the map below is the result. I am on the lookout for a new map long-term however and this one is now getting a bit congested due to my tweaking!
You can read the narrative and see how we get on with our first attempt at the campaign here… Further down the page (below the map) you will find notes and links to additional rules, changes to Steve’s original campaign, and additional material that we came up with.
Below is the map we are using (as mentioned it is a slightly modified version of Steve Winter’s Map) – feel free to save a copy if you wish to use it for your own attempt at Fire & Sword in the Sudan!

Our Fire & Sword Campaign Rules
As mentioned we came up with several additional rules and minor variations on Steve’s original campaign. Some of the main ones are:
Random Starting Locations
To provide a bit more ‘excitement’ I generated a simple (rather crude) random starting location table. For the Anglo-Egyptians once I knew how many units were present on map to start with I generated which units they were completely randomly, then used this table to decide where they were located.
You can download the process here…![]() 27KB
27KB
Depending on whether we replay this campaign in the future I may further modify the random tables once I have read more history on the politics and how the Egyptian Army operated in Sudan prior to 1885.
Exceptional Mahdist Leaders
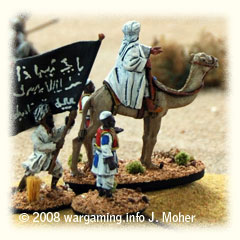
I felt that in the unusual cases where a large number of troops were present, the senior Mahdist Amir or Khalif commander should be upgraded to a notable leader (such as Al Mahdi himself, or in his absence El Khalifa, or Osman Digna when large numbers of Fuzzy-Wuzzies were present). To distinguish them from normal leaders I created some simple quick special rules for their presence (1 or 2 special abilities) which you can download here…![]() 28KB
28KB
Fanatical Beja Hadendowah “Fuzzy-Wuzzies“
We were using this rule from TSNS initially as well (although I think the idea at least, if not the rules, has also been tabled elsewhere on the web or in articles), the idea that random units of Fuzzy-Wuzzies may go fanatical if their leader is killed – to simulate the near suicidal bravery they showed in real life.
However it is superfluous if you use the optional modified D20 Morale below as this gives the Beja “Fuzzy-Wuzzies” better morale than normal Ansars anyway (which makes them surprisingly tough).
Reduced Machine-Gun (MG) Jam Risk
We also use TSNS Campaign rule that allows Machine Guns to avoid jams by firing with reduced effect (an alternative version may also have been detailed in an article somewhere in a magazine or on the web if I recall correctly). Effectively MGs can choose to shoot at reduced rate and not risk having to make a jamming roll (we play halve the total dice & round down and they also only expend ½ an increment of ammunition). Again if you don’t already own it you may want to get a copy of TSNS from TVAG…
Some Optional Rules
We are also experimenting with some of these rules in the first battles:
D20 Morale
We tried the D20 Morale system as provided in TSNS (The Sun Never Sets) Campaign Book. I have added some additional and/or slightly modified other values for it specifically for the Sudan to expand the troops covered. This allows more subtle variance between troop types & quality, and means experienced troops in a campaign can be upgraded (or given +1 to their values) without seriously upsetting the game balance. If you don’t already own one you will need a copy of TSNS which you can get from TVAG.
Update: We subsequently dispensed with the D20 Morale – it’s a nice idea but overall we felt it didn’t add enough to the game to be worth the extra complexity.
D20 Customised MG Jamming (& Fire Factors)
As with Morale we tried a customised D20 roll for the risk of an MG jam – this allows a more graduated scale of jamming representing the inherent differences in the MG designs and allowing more than just a generic 1 in 6 chance. My ratings using a D20 (based on the historical and technical info I could find and just arbitrarily ranking weapons based on their apparent historical propensity to jam), are that a jam will occur as follow, on a roll of:
17-20 (20%) for 4 or 5-barrelled Nordenfelts & any type of MG used by Natives or Untrained Crew.
18-20 (15%) for early 0.577″ (Martini-Henry) & 0.45″ Gatlings, 2 or 3-barrelled Nordenfelts, & 4 or 5-barrelled Gardeners.
19-20 (10%) for 0.65″ or later 0.303″ Gatlings & 1 to 3-barrelled Gardeners.
20 (5%) for any Maxim gun.
Gardeners trade dice for reliability in conjunction with this, Gardeners were much more reliable than Nordenfelts but in addition to better design & build this was partly due to them only being capable of a lower rate of fire which reduced the likelihood of a round insertion/extraction jam and meant it also took a bit longer for them to overheat (a common cause of round jamming in early MGs).
The various 0.45″ Gatlings suffered due to poor quality locally made ammunition, while the Royal Navy’s 0.65″ version worked well due to sourcing the ammo direct from Gatling, and with the change to 0.303″ in the mid-1880’s the ammo issue was resolved (but by then the first Maxims had appeared and rendered the Gatlings, Nordenfelts, and Gardeners obsolete overnight).
As a result my Maxims, Late .303″ Gatlings, and 4 or 5-barrelled Nordenfelts also get 4D/crewman instead of 3D, and the 1 to 3-barrelled Gardener’s only get 2D/crewman; with the single barrel Gardners also reduced to just 3 Crew instead of 4 (so just 6D total).
An optional rule I also have is Maxims (only) may opt to fire in an emergency with 5D/crewman by expending 2 allotments of ammunition but cannot do so two turns in succession, with if you don’t mind extra complexity a further optional rule that each additional time they utilise the above and fire with 5D/crewman (i.e. after the first) it increases their jam roll risk permanently by 1 – e.g. on the time they do it a third time it and all subsequent firing (normal or emergency) will risk a jam on a roll of 18-20 (i.e. 20 -2 for the two additional sessions of emergency firing).
All this may sound complicated but you will normally only have 1 or rarely 2 types of MG on table so only need to remember the factors & jam rolls for them… and it helps give the the main types of MG a little character so each is different (if you are like me and have models of most of the different types)…
Update: I have subsequently dispensed with the D20 Jam Rolls and reverted to the original jamming but with a minor customisation for the more reliable things like Maxims – I have kept the firepower customisation and will post an update about this later (and link to it here).
Read on to see our Fire & Sword Campaign Set Up and preparation for Turn One.
2 thoughts on “Our First Fire & Sword Campaign: Revolt in the Sudan”