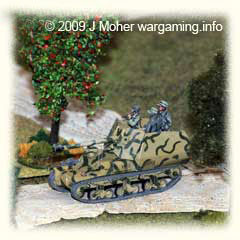
The following are summarised Game Situation Reports taken from those actually posted to the Crossfire Group during the course of World Crossfire Day on 04 April 2009.
The Allies today launched an operation designed to cut off retreating Germans in the central salient. Reports coming in are mixed:
Game 1 (New Zealand – 0600 Game Time)
A German force was able to inflict substantial casualties on a small British force holding the front in a surprise counter-attack, during which the Germans managed to recover a Tiger tank that had broken down in a depression. Though other Allied forces were within call, no reinforcements were summoned by the local British commander.
Game score: Germans +25 VPs.
You can read a Full Game Report here at Wargaming.info.
Figure Scale: 1/76th (20mm). People: 2. Host’s Website: Wargaming.info
Game 2 (New Zealand – 0630 Game Time)
An American scouting force was sent ahead and completely wiped out nearly two companies of German troops, and over-ran a German HQ and repair workshop. Better yet, a way around the enemy flank to the north was found when the Americans located an unmarked river crossing.
Game score: Allies +60 VPs. Campaign: Allies 60, Germans 25.
You can read a Full Game Report here at Wargaming.info.
Figure Scale: 1/76th (20mm). People: 3. Host’s Website: Whangarei Wargamers
Game 3 (Malaysia – 0800 Game Time)
Two German Tiger tanks found that they could not retreat over a bridge that was incapable of supporting them. Undaunted, the German local commander launched a fierce counter-attack with the troops at his disposal, and held off a British force trying to trap the Tigers. Gallant last-minute close action by the British destroyed one of the two Tigers, however, while the other escaped, along with most of the German infantry.
Game score: Germans +25 VPs. Campaign: Allies 60, Germans 50.
Figure Scale: 10mm. People: 6.
Game 4 (Hong Kong – 0930 Game Time)
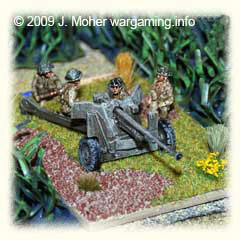
Reports just coming through tell of a successful British Paratroops’ capture of a strategic hill overlooking an enemy-occupied town. Enemy artillery units were over-run, but it also appears that a substantial German tank force has been sighted in the same area, and fighting is fierce. The Para landings on the hill overlooking the town were subjected to ferocious attacks from tanks, SS Stormtroopers, and heavy mortar attacks. The Paras suffered horrendous casualties, but held on to the bitter end. A well-led American advance threw back two companies of Heer troops, causing heavy casualties and suffering few in return. They were able to liberate the town, much to the jubilation of some of the inhabitants, these being the ones who didn’t live in the 30% of the town that burned down. Reports suggest that the fires were actually started by SS units abandoning the town in an appalling act of cowardly scorched-earth tactics. Though two Pz.IVs were knocked out, other tanks escaped, and the Allies suffered the loss of a M4 Sherman and M10 Tank Destroyer in return. Although aid was offered by two British tanks that had managed to get round on the German north flank, the local American commander declined their assistance. They have now moved on to another area of operations.
Game score: Allies +120 VPs. Allies 180, Germans 50.
Read the Full Game Report at the HKSW.
Figure Scale: 1/76th (20mm). People: 5. Host’s Website: Hong Kong Society of Wargamers
Game 5 (Malaysia – 1000 Game Time)
Elsewhere an Allied spearhead has reported difficult going in dense woodland. Things went ill for the Allies as the slow advance through dense countryside reported ran into a deadly German trap. The advance was held long enough for massive concentrations of German artillery to wreak havoc on the advance. Not all reports are in, but it seems that casualties were heavy, including one M4 Sherman, 5 Half-Track APCs and many men. The Germans in the area were mostly able to pull out unscathed. This disaster has slowed the allied advance significantly.
Game score: Germans +75 VPs. Campaign: Allies 180, Germans 125.
Figure Scale: 10mm. People: 6.
Game 6 (Great Britain – 1200 Game Time)
In a breath-taking lightning raid by elite chaps in woolly hats, a front-line aerodrome has been taken almost intact in a raid today. British commandos surprised the sleepy guards at the aerodrome and quickly became masters of the objective. Despite counter attacks from two units of fresh troops, and even an attack by an SS armoured column, the sharp daggers and wits of the men in khaki prevailed. Units of French resistance fighters threatened to spoil the raid, but these were persuaded to leave with a few well-chosen words. This aerodrome could prove invaluable in the race to trap the retreating Jerries, as it means that the turn-around time of Typhoons can be shortened by as much as half an hour.
Incredibly, these lightly-armed heroes were not only able to take the aerodrome, but also to capture several prisoners, including two officers, one the aerodrome’s commandant. But it doesn’t end there! In a feat of outrageous audacity, they even attacked and destroyed two Panther tanks, and although we are waiting for confirmation, it now seems likely that one of these tanks was the personal tank of SS Standartenführer Kaestner – the villain who earlier today set fire to the town he was supposed to be guarding. Its believed a charred body matching his description has been found.
Game score: Allies +143 VPs. Campaign: Allies 323, Germans 125.
Read the Full Game Report at Matakishi’s Tea-House.
Figure Scale: 28mm. People: 3. Host’s Website: Matakishi’s Teahouse
Game 7A (Great Britain – 1200 Game Time)
Despite a shattering defeat in Game #5, one shell-shocked and half deaf air liaison officer made it alive to join in (albeit a bit late) with Game #7A. Though initial news from the front is sketchy, this man has been mentioned in despatches. It seems that in one initiative he called in a pair of Typhoons just when a column of German armour was massed to break out and cross an intact bridge, and the results were somewhat decisive. Preliminary reports also suggest a victory for the Allies with a German telegraph office captured intact, and an intact bridge seized for the allied advance.
The most crushing defeat for the Germans yet! The British 1/35th regiment advanced with impressive rapidity despite well-organised resistance, and reached its target bridge in good time. It cut enemy communication lines, and captured a German military telegraph office almost intact, though the signallers themselves had fled.
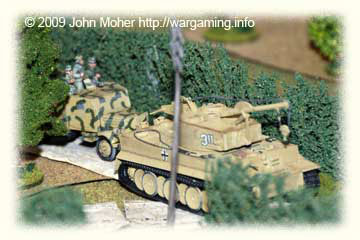
A very strong German column of 2 Jagdpanthers, 6 Pz.IVs, and 2 Light Tanks suddenly appeared on the British flank. You might think this force near unstoppable (the scenario writer certainly did!). It immediately destroyed the 6pdr ATG in front of it, and it had a solid still-standing bridge across which to charge. Two men stopped it. One was Sgt Eric Harrison VC (posthumous) who in his Cromwell, having already endured six direct hits from German ATG fire, turned his tank and placed it squarely across the road ahead of the German column. By gritting his teeth a lot and shouting, he managed to get his tank to destroy 2 Pz.IVs and a Pz.II Luchs Light Tank, and he then duelled with a Jagdpanther some three initiatives before finally succumbing to its 88mm. However, this was long enough for air-liaison officer Watts (DSO in the post) to whistle up two Typhoons which launched sixteen 8″ rockets (equivalent to two cruiser broadsides) which destroyed one Jagdpanther and 3 more of the Pz.IVs.
All German infantry were either killed or surrendered. Allied losses were moderate. A massive loss for the Germans!
Game score: Allies +232 VPs. Campaign: Allies 555, Germans 125.
Figure Scale: 1/35th (54mm). People: 3.
Although not available on a website, both games 07A and 07B were hosted by John Lander and played in 1/35th Scale – John’s Operation Goodwood CrossFire demo game & his models have previously been featured in Wargames Illustrated Magazine (issues 221 & 222 – March & April 2006).
Game 7B (Great Britain – 1200 Game Time)
Another set of reports says that a German counter-attack is hampering efforts to build a bailey bridge over a major river. US paratroopers are hard-pressed while holding the would-be bridgehead. Tempering this somewhat is the news just in of a gallant action by US Paratroopers and British Bridging Engineers who managed to construct a bailey bridge under fire and despite a well-equipped German counter-attack. It seems that a decisive victory has been snatched from the jaws of defeat.
There followed elsewhere a great action at a bailey bridge in the process of construction by British Engineers, guarded by American paratroopers. In the words of one eye-witness:
“Two full US Para companies held a wooded area to cover a bailey bridge being built by the British. The Germans attacked with an improvised Battle Group based around 2 depleted Infantry companies (1 armoured), and a tank unit of Pz.IIIs, Pz.IVs, and some Hotchkiss 7.5cm Pak 40 GW-39H Panzerjäger!”
“The Paras used their bazookas well, and stalked many an AFV, through the woods, while the Brits made good time on their bridge. The Germans then cleverly shoved a lot of the Americans aside, and bottled them up in a large wooded area, then sped on to the half-built bridge. A platoon of US Paras left to guard the work held on manfully, assisted by the British Engineers, who left the bridge work to fight for their lives!”
“When another platoon of Paras, accompanied by Mortar & 75mm Pack Howitzer FOs, broke out of the German cordon, they took the other German force in the flank, and this was destroyed. Then the Allied force dug in around the bridge again, and it was completed, albeit under fire.”
Losses: US Paras: 9 Squads; British Engineers: 1 Squad; Germans: 2 Pz.IIIs, 2 Pz.IVs, 3 PaK40 Hotchkiss 39 PzJgrs, and 12 Squads!
Game score: Allies +132 VPs. Campaign: Allies 687, Germans 125.
Figure Scale: 1/35th (54mm). People: 3.
Although not available on a website, both games 07A and 07B were hosted by John Lander and played in 1/35th Scale – John’s Operation Goodwood CrossFire demo game & his models have previously been featured in Wargames Illustrated Magazine (issues 221 & 222 – March & April 2006).
Game 8 (Great Britain – 1215 Game Time)
Reports of an Allied setback. Strong units of infantry were sent forward with Assault Engineers to clear a road of some ATG positions, and it seems that casualties have been high, and the road may still be in enemy hands. A crushing defeat for the Allies. The attempt to force a road, to open a new line of advance, has proven a failure. Despite numerical advantages in Infantry and support from veteran Assault Engineers, the Allies were thrown back from three strong points along the road with ruinous losses. Later, a German convoy was seen heading up this road unhindered.
Game score: Germans +113 VPs. Campaign: Allies 687, Germans 238.
You can read a Full Game Report in Steven Thomas’s balagan.
Figure Scale: 15mm. People: 2. Host’s Website: Steven’s balagan
Game 9 (Great Britain – 1230 Game Time)
Three waves of Allied troops attacked with the help of some British Shermans from Game #1, via Game #4. Neither Sherman was lost, and it is reasonable to suppose that without these Shermans the game would have been a decisive victory for the German defenders.
The Germans defenders were few in number but astonishingly tenacious, and held off three waves of out-numbering attackers, until (with 2 minutes left on the chess clock), the target pillboxes were seized, opening the road up for a flank march in game 10A.
This was an allied tactical victory, because the objectives were taken, despite their heavy losses. However, with scores like these, the Germans might be hoping for more allied victories like this!
Game score: Allies -5 VPs. Campaign: Allies 682, Germans 238.
You can read a Full Game Report here at Wargaming.info.
Figure Scale: 15mm. People: 4.
News of the World Commentary
Two M4 Shermans that were not called on in Game #1, and then when they arrived in Game #4 the decision to decline British aid on a flank by one American commander meant that they then went on to arrive fresh in Game #9 and played a decisive roll. Both tanks are still in working order. Who would have thought it?
Game 10A (North Carolina USA – 1430 Game Time)
Another report has reached us, and from the Allied point of view didn’t seem spectacular at first but the news is pretty remarkable.
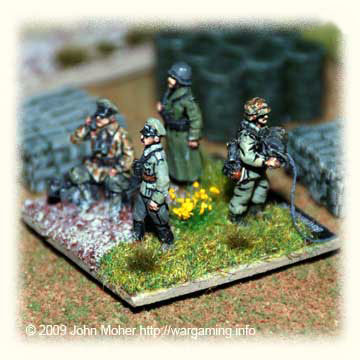
The actual engagement was a victory for the Allies, but far from decisive. The Allied advance lost two M4 Shermans. Some British troops heading for Game #17 passed through the area, and the American local area commander syphoned off one platoon of them to help him, while the rest continued on. Let’s hope that the commanders in Game #17 don’t miss that extra platoon too much!
After advancing steadily enough, the Allied commander assessed that the situation was difficult but manageable. He saw many of the opposing German troops pulling back, and he lingered to mop up resistance, and work his way around the south of the small city that was ahead of him.
The German commander did not just melt back into the city, however – he started evacuating the whole city! Aerial reconnaissance now reports that the roads heading east from the city are choked with civilians on foot, wheeling handcarts, wagons of various sorts, as well as some military traffic. Though it will make trouble for all units trying to make headway, it will slow down the retreating Axis forces and make them much easier to catch. Possibly this is the work of the SOE?
Game score: Allies +10 VPs. Campaign: Allies 692, Germans 238.
You can read a Full Game Report at Jakim Friant’s LittleSoldiers.net.
Figure Scale: 1/72nd (20mm). People: 4. Host’s Website: LittleSoldiers.net.
Game 10B (North Carolina USA – 1630 Game Time)
Three German AFVs had driven off-road to avoid Typhoon ‘Jagdbombers’ and had become bogged. The local infantry commander had gone over to help out, and his men were helping to dig out the floundering vehicles when two Companies of Americans turned up unexpectedly. Because the Radio Room at the HQ in Game #2, the Control Tower Radio in Game #6, and the Telephone Lines and Signal Office in Game #7A had all been destroyed, captured, or cut, there was no warning to the Germans of the approaching US Forces. An eye witness takes up the account:
“The Allied forces remained single-minded about reaching their objective to the north (off table). So they basically sent one company ahead while the second company engaged the Germans. They had trouble attacking initially wasted the element of surprise. Things improved when they managed to flank a counter-attack by the Germans, and wipe out the attacking platoon. Mortar fire on the Infantry working around a Pz.IV and a successful lose assault elsewhere caused most of the other casualties inflicted on the Germans.”
“On the other hand the Germans used the maximum number of troops they could to try and release the tanks. The balance remained hidden except for the squads actively fighting to keep the American attackers at bay. Once the tanks were freed, they immediately headed north to escape a feared encirclement and did not participate directly in any of the fighting. The Americans were the last to leave the field although they still had two platoons on the table, still pinned or suppressed with their Company Commander working on rallying them.”
The Germans had left the table in the possession of the Americans, but had left voluntarily and in relatively good order with their tanks – leaving the table occupied by American troops in need of rallying. The Americans left the table edge first, but the troops on-table had to rally and then catch up their fellows who had left for the North over an hour earlier in Game Time; so there would inevitably be a delay while the whole US Force regrouped and continued north to reach their objective.
Game score: Germans +1 VP. Campaign: Allies 692, Germans 239.
You can read a Full Game Report at Jakim Friant’s LittleSoldiers.net.
Figure Scale: 1/72nd (20mm). People: 4. Host’s Website: LittleSoldiers.net.
Game 11 (Great Britain – 1500 Game Time)
Another strangely pyrrhic victory for the Allies!
Elsewhere on the front today, a bold stroke was attempted, as Allied forces, backed up with heavy infantry tank support attempted to breach the strongly-held German front at a shallow river. The fighting was unusually bloody and casualties were high. The British lost an M10 Achilles, 3 Churchills, and a M4 Sherman, as well as 8 Rifle Squads. Eventually, however, showing superior bravery and initiative, the British forces were able to cross the river in sufficient strength to see off a German counter-attack and cause the Germans to pull back, leaving the British in possession of the field. German losses were comparatively light, but every tank they lose is twice as hard to replace as for the Allies! The advance continues elsewhere, but in this part of the operation, local forces were too weak to follow up their success.
Game score: Allies -14 VPs. Campaign: Allies 678, Germans 239.
Figure Scale: 15mm. People: 6. Host’s Website: Warwickshire Gamers Club
Game 12 (Spain – 1500 Game Time)
The Allies seem to be specialising in emulating Pyrrhus. This time, though, they managed a positive score.
In another scouting mission to find a route to close the neck of the salient quickly, American forces were sent to investigate a river and see if it could be forded. They advanced on quite a broad front, and encountered unexpectedly stiff opposition, including Artillery and 88mm FlaK guns on hilltops. They remembered their primary mission, however, and found the ford and reported it, and fell back in good order. The German Artillery and FlaK positions remain effective, but a useful route was discovered. Not realising the main mission of the Americans, the Germans sat back and defended their assets rather than aggressively interfere, so the reconnaissance of the river was finished in an impressively fast one hour and 15 minutes!
Game score: Allies +36 VPs. Campaign: Allies 714, Germans 239.
Figure Scale: 1/72nd (20mm). People: 2.
Game 13 (Canada – 1630 Game Time)
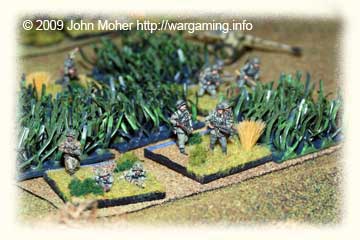
Hastily occupying a town with both a railhead and a major German Headquarters, the BC of the recently arrived Infantry Battalion was primarily concerned about getting work on a secret German weapon out of a warehouse in the town and onto a train especially provided for its transport. Allied bombers had however recently passed over and destroyed the railway lines leading out of the town! Even worse, French Resistance Fighters (from Game #6) had sabotaged the Railway Engine and Wagon that was being loaded with the secret weapon and its research material! On top of that the BC still had to deploy his Battalion to hold off the fast approaching Allied forces as well!
The Germans delegated one-third of their infantry as labourers to the onerous task of repairing the bomb damaged railway, while the remainder of the Battalion deployed forward of the town in a heavily wooded area. They only had time to hastily occupy temporary positions (with no time to dig in or be concealed due to the bailey bridge in Game #7B being completed so rapidly) before the appearance of Allied Tanks and a full Battalion of Canadian Infantry through the woods. An armoured reserve was held in the town consisting of a Tiger (that had escaped in Game #3) and a pair of StuGs. Just as the fighting began a neighbouring Luftwaffe manned 88mm gun abandoned its position and retired, depriving the defenders of a valuable asset! In fact the BC had been so busy repairing the railway & train and deploying his defences he forgot to commandeer the Luftwaffe Gun & Crew (but it did mean that 88mm later contributed to Game #16)!
The Canadians tentatively advanced through the wood feeling out the German positions, and the Tiger moved up from the town into the woods in support – it then stumbled upon a reconnaissance detachment in a Daimler Armoured Car (that had come from the reserves not committed in Game #1) – the Daimler bounced a 40mm 2pdr round off the Tiger before itself exploding into a million pieces when the Tiger’s 88mm round hit! Elsewhere in the wood the Canadian Infantry and supporting M4 Shermans (who had got there on time thanks to several bridges & river crossings taken intact in earlier games) were hotly engaging the defending German Infantry.
A British FO (spotting for the artillery that were able to set up on the hill held by the British Paras in Game #4) began pounding the German defence and a lucky shot destroyed a PaK40 ATG set to enfilade the advancing M4 Shermans. The Canadians used the artillery barrage’s suppression of the defenders to right push past them and down the right flank, past a German CC’s command post, and into the first building of the town – a large hotel overlooking the railway! The slow German repairs to the rail line now slowed considerably as the repair teams came under fire from the Canadians in the Hotel. More Canadian Infantry and an M4 Sherman Troop redeployed and enlarged the penetrated on the right flank. Brutal urban fighting erupted, with one Sherman crushing a German FO in his vehicle, while dodging Infantry Panzerfaust rounds and eliminating a PaK40 AT crew with its MG. As the first part of the town was secured the above Sherman then headed out the other side and into the woods, following the Tiger’s trail (or rather the calls for help on the radio). Coming up behind it a lucky first shot penetrated the turret ring, lifting the turret off and destroying the German behemoth in a massive ammunition explosion!
On the right Canadian infantry successfully rushed several German positions and the breakthrough allowed the Carrier Platoon to lead the advance into the factory that commanded the railhead and secure it after a brief but vicious fight. The repair crews on the railroad were slowly being whittled away, and although ordered to continue working and not take up their weapons some disobeyed and fought back ineffectually, further undermining the repair efforts! One of the StuGs then attempted to move through the town and was quickly disabled by a close range PIAT shot from a Canadian PC. Elsewhere the second StuG had been able to come up on the heroic Sherman from above – drilling it with its first shot, and killing the heroic Tank Commander and his Crew instantly. However with the railhead secure and the Canadians flooding into the town the German BC, terrified the Canadians in the hotel would attack the Headquarters in the adjacent church at any moment, fired the building in a panic. All the vital papers, plans, and maps, could not be removed in time but at least they did not fall into the Canadians’ hands. Although 4 German Platoons were still effective in the woods outside the town, the town itself was successfully secured, along with the train, and a decisive victory by the Canadians.
Losses: Canadians – 1 Squad, 1 M4 Sherman, 1 Daimler (actually Staghound) A/car. Germans: 4 Squads, 1 CC, 1 PC, 2 FOs for Mortars, 2 PaK40 ATGs, 1 Tiger, plus 1 88mm Flak that withdrew without orders.
Game score: Allies +106 VPs. Campaign: Allies 820, Germans 239.
Read the Full Game 13 Report at Tim Marshall’s Website.
Figure Scale: 1/76th (20mm). People: 5. Host’s Website: Tim’s Toys
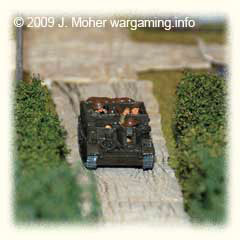
Note: Game 14 didn’t exist due to having been renumbered to 10B to accommodate another Game 14 (i.e. the Twentieth Game) which was then cancelled quite late in the planning and neither 7B nor 10B were renumbered to avoid a major last minute reshuffle that might have caused confusion.
Game 15 (UK – 1700 Game Time)
German counter-attack – The Germans regulars arrived with enough forces to take a village occupied by a smaller number of exhausted (counting as Green) British troops. If the Germans failed to capture the village quickly, their morale suffered, and after a while, fresh American veteran troops would start to arrive in dribs and drabs (the Allied player had the option of storing the dribs and most of the drabs in an off-table pool rather than bringing them on to the table immediately). A chess clock was used, and when a clock’s flag fell, the clock was reset with a new time. Each time a flag fell, that side’s morale was degraded one level (i.e. Veterans became Regulars, Regulars became Green, and Green troops became spent and were removed). Eventually, as troops degraded from Green to Spent they would be forced to retreat. Report of the action from an eyewitness:
The Germans failed to get village!
The Germans were doing well initially with a right flank attack on the village and were slowly taking house by house with some stunning Close Combats. They had just lined up on the Church when the Americans fell upon the German Platoon’s rear – they were lined up along the road with the Church graveyard to their front but no cover behind them. Thompsons and Bars cut down the German PC and then two of the squads in the platoon stopping the planned assault in it’s tracks.
This proved to be the turning point, when another German platoon assaulted the church they were mowed down by the British within it. It then went down hill for the Germans and a bold American platoon hit the rear of the German lines and a final brave assault by the now (degraded to) green troops failed once again to get into the building (but only just).
A tough fought game but the Germans withdrew and the gaming ending as the Germans agreed they were a spent force…
Game score: Allies +40 VPs. Campaign: Allies 860, Germans 239.
Figure Scale: 15mm. People: 6. Host’s Website: Warwickshire Gamers Club
Note: Game 16 turned out to be the climax of the campaign so is presented last after Games 17 and 18.
Game 17 (Canada – 1730 Game Time)
For this game the Allies and Germans both had troops potentially arriving from different previous games as reinforcements, these included for the Allies 1 M4 Sherman from Game #3 (which arrived okay), 2 M4 Shermans from Game#5 (only 1 arrived), a Company of Infantry from Game #10A (only two platoons arrived), and some mines from Game #8 (which didn’t arrive – although ironically the Allied force would have had loads of time to lay the mines if he’d had them)!
The Germans had the potential for receiving some Nebelwerfers and several Pz.IVs from Game #7A (but got only 1 Nebelwerfer with only 2 Fire Missions left, and 1 Pz.IV, because the rest of the Nebelwerfers and Panzers were all disabled, destroyed, or lost in Game #7A plus most of the Nebelwerfer ammo had been fired off in that game. The German player also had no knowledge of the existing German minefields laid on the table! The following is an eye witness account:
“The Germans used their one tank as a fire-base in the centre of the table and overloaded their right flank. From there they tried to steal down the side line to the town. Although they were slowed somewhat be reactive fire, they did indeed make it to the hill to the north of the crossroads. Using smoke for cover, they then invested the north and west sections of town, which they found mostly empty.”
“The British called on one of their two available tanks. It manoeuvred to the south of the town, but was kept out of effective action for fear of coming under the fire of the Pz.IV. The British commander neglected to call for his two other platoons of infantry until it was too late. With the loss of 9 out of the 12 buildings in the town, the British morale cracked and they retired a safe distance to the west.”
Losses: British: 3 Squads, 1 PC, and a 3″ Mortar Section; Germans: 6 Squads, 1 PC, and the FO from 8cm mortar Section.
Game score: Germans +75 VPs. Campaign: Allies 860, Germans 314.
See Photos and additional Game Report.
Figure Scale: 15mm. People: 5. Host’s Website: Edmonton Wargame Group
Game 18 (California USA – 1830 Game Time)
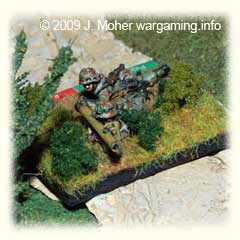
In the second of the climactic conclusions to the campaign the Germans had retreated to the fortified head of a steep valley. Here they had emplaced a very well-camouflaged ‘88’ that was picking off Allied vehicles along the main road beyond. The British had to send in men to find it and destroy it and could draw on fresh troops and resupply infinitely. How long would the Germans be able to hold out and prevent the final encirclement? The first two British Companies were greeted by a valley with a stream and a road meandering along its length, dotted with several woods, and ridges along either side. The centre was dominated by a burnt out farmhouse surrounded by stone walls and fields, and at the far end of the west ridge, about a company’s worth of motor transport could be discerned, hastily camouflaged.
On the west ridge the British established their Mortar OP, FAC, and BC when a platoon of hidden Germans appeared from the nearby scrub and stormed the position. A desperate combat ensued and disaster was only averted for the British by the arrival of ‘3’ Platoon in the nick of time to drive off the Germans. Not an auspicious start. The British commander decided that the farm field had to be taken, and sent a Company in, who were immediately hit by heavy Small Arms and HMG fire. The FAC managed to get a Typhoon off the cab-rank, and dealt with the bunker containing the HMG.
Germans Mortar fire hit the first Company preventing them resuming the attack as a couple of Sdkfz 251s approached via the farmyard. The second Company attempted to take over the advance near the road but was hit by more HMG fire and the appearance of more Sdkfz 251s. with both Companies bogged down the British Mortars laid smoke across the front of the Farm to cover their withdrawal, but only for fresh Small Arms fire from the Woods to the east to hit the first Company who were but eliminated (only 2 Squads remained and no leaders)!
A third British Company had arrived and it was now decided storming the Farm was suicidal. Instead a Platoon was sent east to screen the woods there and all the rest of the Company would go west assault the Woods there. The Company was immediately caught in cross fires from the various woods and a third HMG in a Bunker, while the detached Platoon suffered heavy fire from some of the Sdkfz 251 Half-Tracks. The British BC requested immediate armoured support, and while waiting for their arrival the third managed to occupy a central wood and be in a position to partially flank the Farm. The remnants of the first Company also completed their withdrawal from the battlefield.
As a fourth British Infantry Company arrived, they moved up to support the second Company along the road, as a troop of M4 Sherman’s finally appeared advancing up the road, before the first immediately staggered to a halt and smoke immediately started pouring from second – a well camouflaged Marder III down the valley had picked off both immediately they came into view. Determined fire from the second Company Platoon in the Central Wood meanwhile stopped some German troops from redeploying out of the farm, and the FAC finally succeeded in re-establishing contact with his air support and a Typhoon swooped in up the valley and took out the Marder. The German Commander elected to withdraw the Half-Tracks from the Farm (due to the Armour & Smoke Screen) and the third Sherman followed up, but only going a short way before it burst into a ball of fire, being picked off by a camouflaged Sdkfz 251/22 mounting a PaK40. The British BC threw his hat down and stomped on it on it in disgust.
A fresh British infantry attack only saw the second Company reduced to just 2 Surviving Squads, while the fourth Company also took heavy fire and losses. Weight of numbers then finally began to tell, another Typhoon strike took out one of the HMG Bunkers, the western woods were cleared, and the few surviving troops of the German Motorised Panzergrenadier Company quickly withdrew to their transport and drove off up the valley… As the British Mortars zeroed in on and suppressed the Sdkfz 251/22 PaK40, the CC of the German Gepanzert (Armoured) Panzergrenadier Company also decided it was time to depart, his final act being to order the FlaK ‘88’ on the ridge to beat a hasty retreat, the Sdkfz 251/22 rallying and following suit.
Losses: British: 25 Squads, 2 HMGs, 5 PCs, 1 CC, 3 Shermans. Germans: 13 Squads, 2 HMGs, 1 Marder III, plus abandoned 3 Hard Points.
Game score: Allies -29 VPs. Campaign: Allies 831, Germans 314.
Read an expanded Game Report with photos here at Wargaming.info.
Figure Scale: 15mm. People: 2.
Game 16 (Canada – 1730 Game Time)
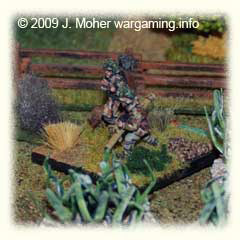
With the campaign reaching it’s climax the Germans were faced with a bottle neck (e.g. bridge over river), with a lot (46 in the end) bases of vehicles and troops dotted about the place, representing troops who were hiding from the RAF and USAAF, and just want to get away over the bridge. Each of these stands represented up to a full Platoon (not a Squad) of troops. These men were sitting about, eating, chatting, sleeping in the sun, cooking, smoking etc. rather than being active combat units. Each German initiative, the inactive units got a random number of move actions to move towards the bridge. How many men would be taken prisoner and how many would escape?
The active German combat units would have to make sure that the British didn’t swoop in and net them all as prisoners. The British had some carriers, and these had the potential to help the British quickly bag many prisoners.
Thanks to Game #12 the Allies could enter from two, not one, table edge. The Germans had one defensive minefield, and this was a minefield that the Allies didn’t know about in advance (the map showing it had got burned to ashes in Game #06). The German’s +2 BC who could have been there to organise the defence and lead the troops wasn’t as he was dead (Game #06 as well)!
“The British were not in a strong position to keep the rest of the Germans from fleeing. The British were basically limited to shooting at the fleeing Germans from the perimeter. The British had lost their HMGs early so their shooting effectiveness was greatly reduced.”
“One exciting feature was a Sherman flanked the Panther which it could see over the hedge. The Panther traversed its turret and the Sherman shot and destroyed it. The British player rolled a Sherman into the hamlet (without infantry support) and was shot in the back with a Panzerfaust and destroyed for his troubles.”
“A cemetery turned out to be a key defensive feature for the Fallschirmjäger. It is now the resting place for a platoon of them. One pinned Infantry Squad still held it against a final British close assault attempt and a Sherman who had poured fire into them.”
The Germans got 31 of the 46 bases of retreating troops over the bridge, and still had 17 active combat stands (including 1 PaK40) engaged in the bridge’s defence, along with 5 trapped inactive stands, at the battle’s end.
Losses: British: 11 Squads, 2 HMGs, 1 PC, a FO, 1 M4 Sherman. Germans: 5 Squads, 2 HMGs, 2 PaK40s, 1 Sdkfz 251/22 (PaK40), 1 Panther, and 10 inactive retreating stands (5 from aerial bombing and 5 from British fire).
Game score: Germans +370 VPs. Campaign: Allies 831, Germans 684.
See Photos and additional Game Report.
Figure Scale: 10mm. People: 5. Host’s Website: Edmonton Wargame Group
Campaign Conclusion
An Allied Victory overall – despite the German’s getting some significant victories at the end – although perhaps not as decisive as it could have been. Not only did the Allies win 12 Games vs. the Germans 7 (i.e. 63%) but they outscored them (831 vs. 684) accumulating 55% of the awarded Victory Points – but in the end it wouldn’t be enough to ‘end the war by Christmas‘.
Read more on World Crossfire Day 2009 here.
One thought on “WCFD Campaign Summary”