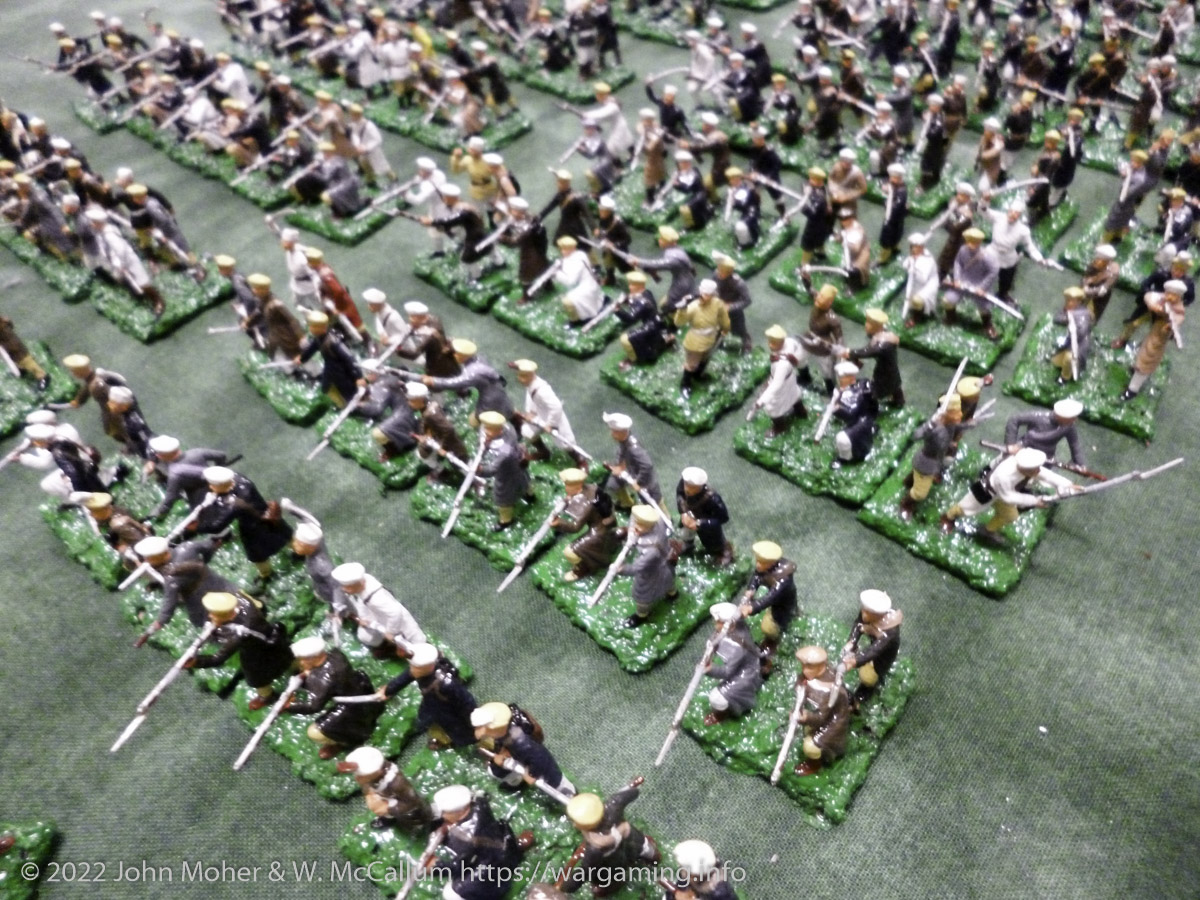
Following on from my post a few days ago about some photos I had found of a colonial Anglo-Zulu War game in the mid-1980’s, my friend who provided the armies then still has them! And as it turns out recently he had had them out of their storage containers for the first time in a long while to check their condition and do a bit of a review. He even took photos, so with his generosity, here’s some photos of the full 1/72 plastic colonial wargaming army collection we used for games in the mid-1980’s through to the very early-90’s.
Continue reading “Eighties Colonial War Game Armies”Tag: Field Guns
Anglo-Zulu War Eighties Wargame
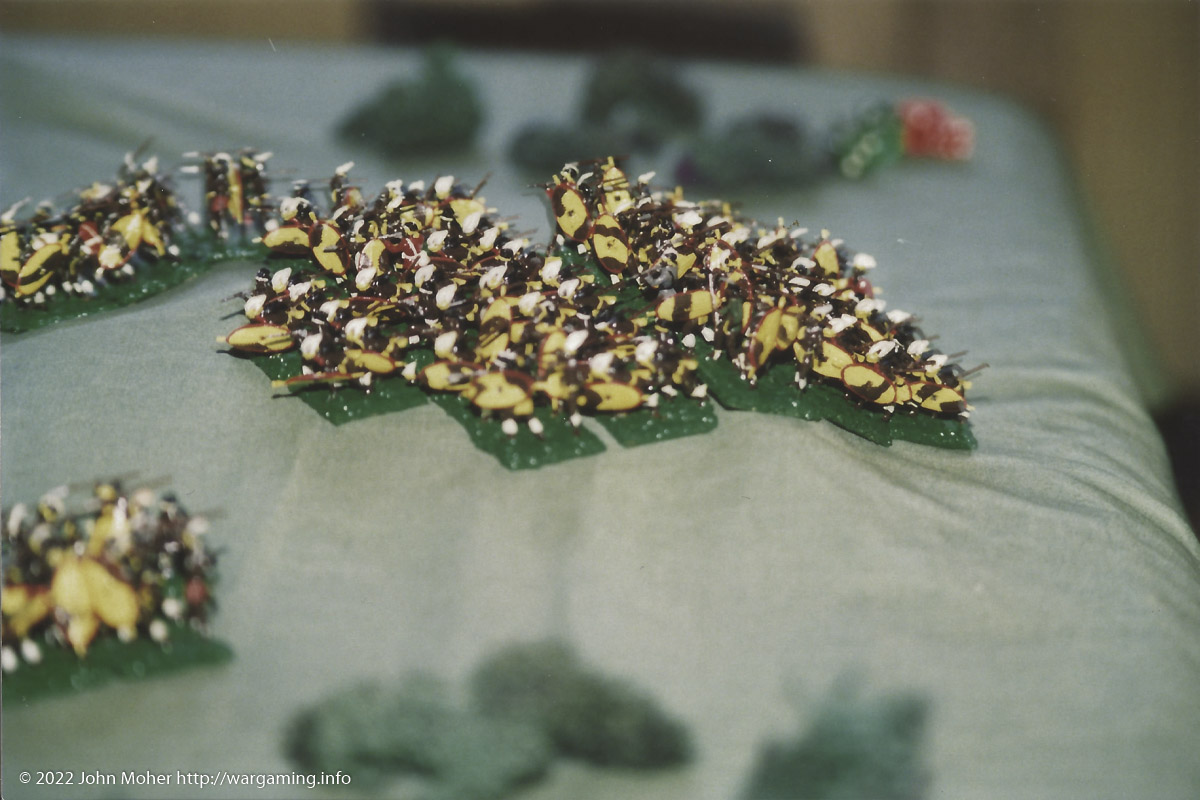
Recently I dug out some very old photos – some of my very first records of wargaming and they included these Anglo-Zulu War game photos played with my good friend Wayne in the mid-1980’s (probably 1985 or possibly 1986). We used 1/72 ESCI figures primarily (as their 1879 British & Zulu Figures, along with the Crimean War Russian Infantry & Artillery, had just been released). We started out with the Anglo-Zulu war (including a multi-player campaign at one point) and then expanded to the Sudan and the North-West Frontier. However this is possibly one of our very first games, and is from the Anglo-Zulu war.
Continue reading “Anglo-Zulu War Eighties Wargame”Fire & Sword Battle 06: The Gardner’s Jammed & The Yorks Vanquished
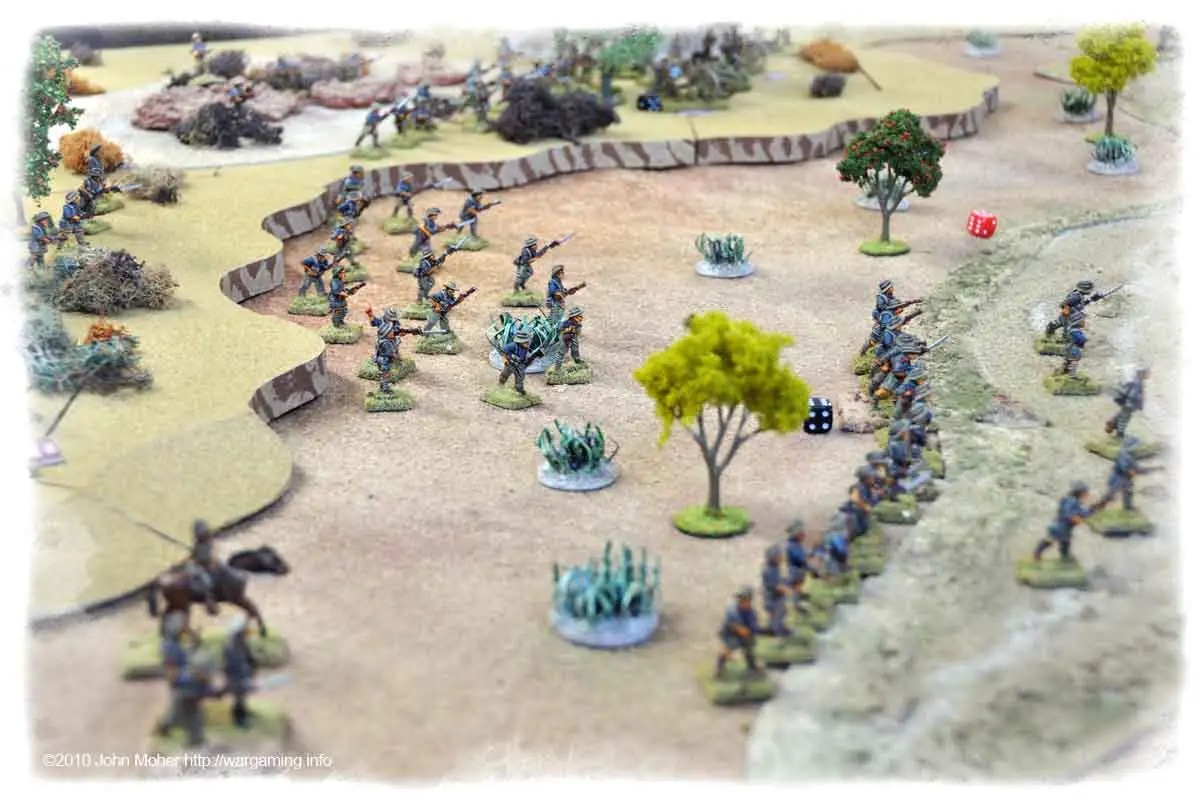
As described in Fire & Sword Turn 04: February 1884 Sir Henry’s column continued South towards Dongola, and at the 3rd Cataract is met by the first supply steamer to have made it beyond the 2nd Cataract. It resupplies his column and brings welcome reinforcements in the form of the 2nd Company, 19th Yorkshire Regiment (who are also wearing the freshly issued and newly designed Grey Serge Uniforms intended for the expedition), as well as the 1st MG Section, The Naval Brigade (operating Gardner Guns). The reinforced column is soon in Kerma and quickly continues on to Dongola, conscious of the possibility of European hostages or prisoners being held there. As it finally approaches the town Sir Henry is surprised with a sudden onslaught by the defending Dervish forces!
Continue reading “Fire & Sword Battle 06: The Gardner’s Jammed & The Yorks Vanquished”Fire & Sword Battle 05: Because We’re ‘ere Yuzbashi! Nobody Else. Just Us.
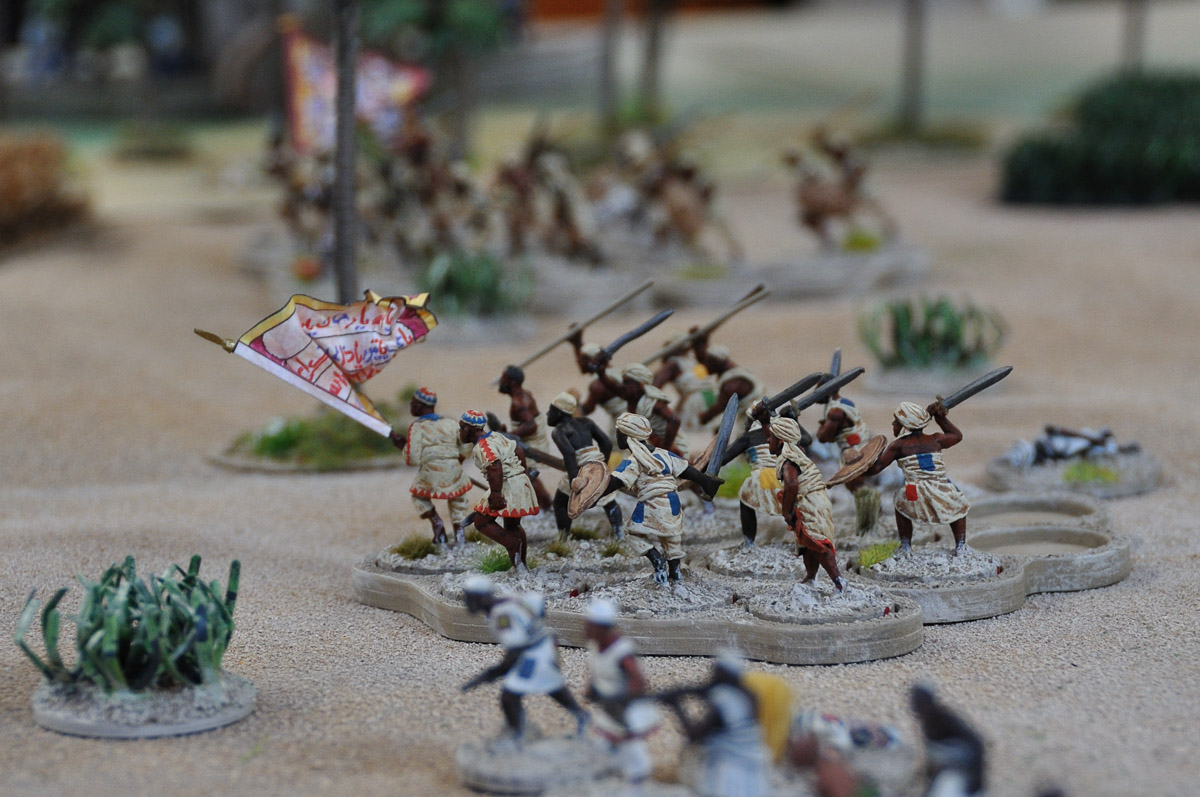
Akhtar Pasha had just spent the last few weeks trekking along the caravan trail from Suakin to Berber. When he left Suakin the Eastern Sudan was quiet and unchanged despite the violent rebellion raging in Northern & Southern Sudan – however things had now changed, the Eastern Sudan had erupted into rebellion behind him and he was now deep in enemy territory, with a column of troops in need of water and supplies, and lacking any mounted force for reconnaissance or foraging! Akhtar’s plan was to march rapidly on Berber, this was the closest reasonable sized town that was both likely to have plentiful stocks of supplies, and be fortifiable once occupied – but it was also small enough that hopefully it would not have a strong Mahdist rebel presence, and they would not have heavily fortified the place thereby making access impractical. Around the middle of February Akhtar Pasha’s force arrived at Berber, and prepared to assault the town…
Continue reading “Fire & Sword Battle 05: Because We’re ‘ere Yuzbashi! Nobody Else. Just Us.”Fire & Sword Battle 04: Sally at Abu Hamed
As referred to in Revolt in the Sudan Turn 03: January 1884, at Abu Hamed Sayed Bey decides to sally forth from the town and endeavour to temporarily break the siege. While Abu Hamed is now plentifully supplied with resources (it has over 6 months of supplies on hand) Sayed Bey determines to take the opportunity to procure more, and while he has a relatively fresh & strong force available to hopefully inflict a defeat on the local Mahdist forces. Unbeknown to Sayed Bey, he sallies forth only two days after Sir Henry’s victory over the Dervish force at Baqah al-Garbiyyah Oasis, intent on breaking the siege of Abu Hamed…
Continue reading “Fire & Sword Battle 04: Sally at Abu Hamed”Don’t Let Them Get The Commissariat’s Train!
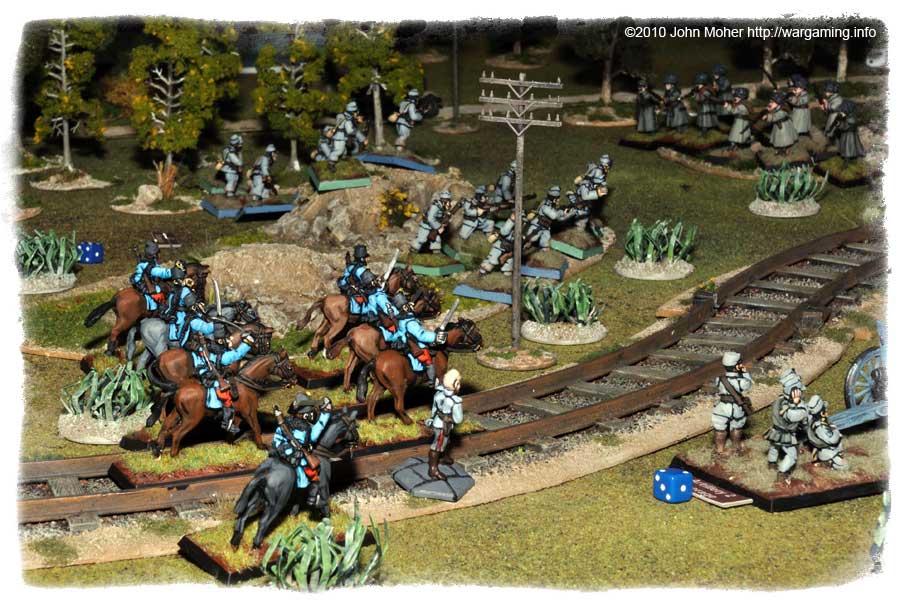
Somewhere in Galicia in sight of the Carpathians, 1916 – the Brusilov offensive is in full swing and the Austro-Hungarian front line has temporarily collapsed – The Russian forces are pouring into and across Galicia rapidly and in huge numbers… Brusilov has achieved a stunning success (advancing up to 40 miles on a wide front in just a few weeks)… The Austro-Hungarians are in turmoil, and Archduke Josef Ferdinand has only just escaped Lutsk by the skin of his teeth as the speed of the Austro-Hungarian line’s disintegration meant Cossacks had already entered the city before the Austro-Hungarian Army Command realised the extent of the breakthrough!
Continue reading “Don’t Let Them Get The Commissariat’s Train!”World War 1 Russian Artillery

As things slowly progress with my 28mm World War 1 forces for TSATF the Russian Artillery Battery is now complete and awaiting basing. It consists of 3 (what I believe to be are) 7.62cm Putilov Field Guns. However the long barrels on the Battle Honors models are a bit of a mystery as the standard M1902 model had a relatively short barrel (you can see some good images of the M1902 at the Landships Website). Each model represents 2 actual real guns, so this represents a battery of 6 actual guns (the Russians actually had 8 gun batteries in their Infantry Division Artillery Brigades, but I think 4 models in a typical TSATF game is getting a bit hardcore). Anyway here is an assortment of photos of my artillery battery (along with a General)…
I have not decided whether the General shall be my Russian C-in-C, Infantry Battalion Commander, or (as depicted here) the Artillery Battery Commander…
The Carpathians Will Rumble

The Russians and Austro-Hungarians arrive!
The latest addition to my World War I stable has been both Russians & Austro-Hungarians – which will be ideal for not only the Carpathian Campaigns & Brusilov Offensive; but also the Russians will also serve for Caucasian Campaigns against the Turks; and as allies for my long planned Rumanian Troops which the Austro-Hungarians will provide opposition for! I’ve taken some quick preliminary photos of these chaps to get a basic gallery up until such time as I have reorganised them and/or played a game and taken photos…
As mentioned in previous articles I’ll be using the TSATF (The Sword and the Flame) for my 28mm WW1 gaming and as such troops will be organised into Infantry Companies of 20 figs each, Cavalry in Squadrons of 12 figs each, and MGs & Artillery in Platoons, Companies, or Batteries of 1-3 guns (each model representing 2 real life guns).
A Wadi near Chunuk Bair
As the morning fog cleared the companies of Australian & British Troops moved into the wadi below the height known as Chunuk Bair – their mission to secure the hills on the far side for the following battalions to assault the mastiff itself. The good news was little or no Turkish resistance was expected – no troops had been sighted in the area as this was not the point where the main assault had occurred the first 2 days…
Continue reading “A Wadi near Chunuk Bair”Johnny Turk & the ANZACs

For quite some time I’ve been wanting to get into some Great War gaming in 28mm using TSATF. As such I have a small force of German Schutztruppe for Africa that can double as pre-WW1 Colonial forces or the German East or West African forces in WW1 (such as von Lettow-Vorbeck’s). A chance purchase on EBay of some Middle East/African theatre WW1 British in Sun Helmets (for use as opponents to the above) led to me acquiring a large force of Turks & ANZACs suitable for Gallipoli & Palestine – so as a result I have now kick-started by 28mm WW1 forces enmasse!
The figures came from the author of a TSATF Great War variant (Andrew Champion) and are available on the Side Shows of the Great War Yahoo Group – Australian visitors may recognise them from a large Gallipoli game staged at CANCON in 2007 by Andrew.
Fire & Sword Battle 03: The Battle of Baqah al-Garbiyyah Oasis
As Sir Henry’s Column advanced South towards Akasha, he received word of a large Dervish Force from ostensibly friendly locals (but more likely disgruntled Mahdists with a score to settle against the Mahdist force’s commander). As this force was reported a few miles inland from the Nile, at a minor watering hole, Sir Henry felt obliged to turn and approach the Mahdist forces – he could ignore them, being but a day and half’s march from the town of Akasha, but that would allow them to remain behind him on his Lines of Communication, and potentially block reinforcements from reaching him. As a result he turned inland, and his plucky column headed into the desert…
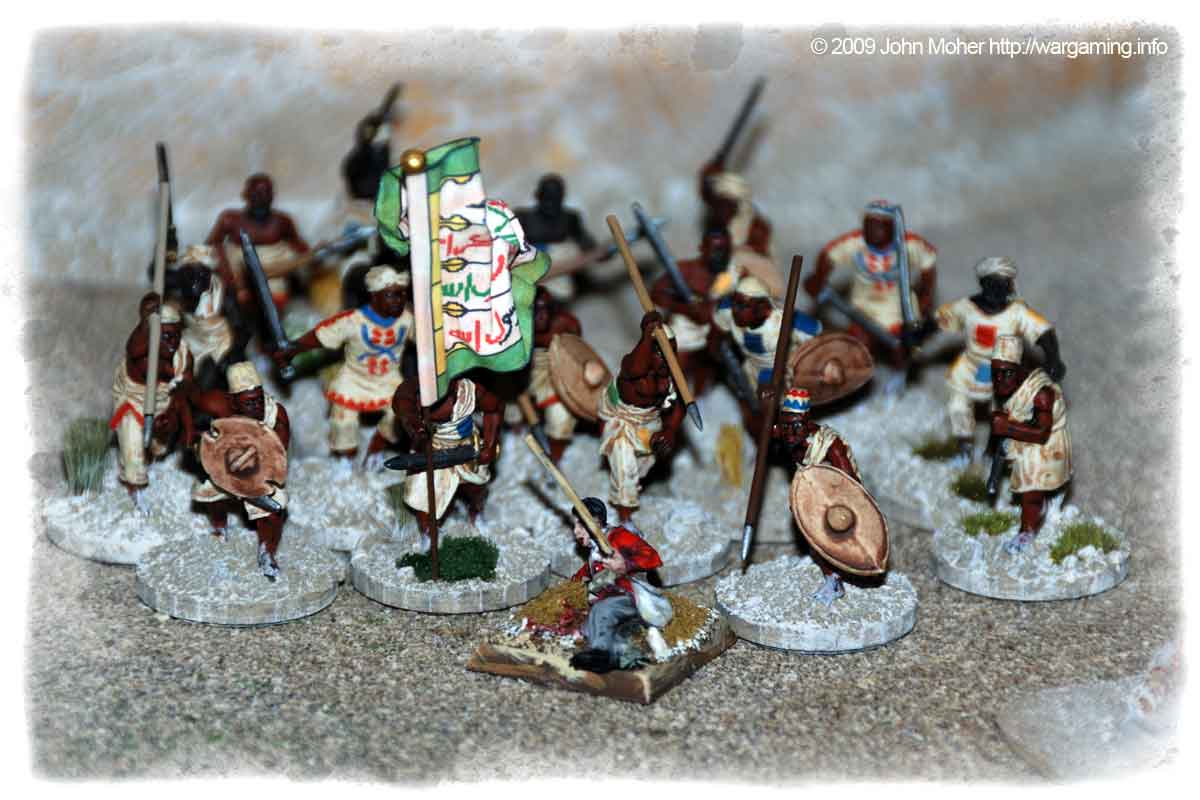
Continue reading “Fire & Sword Battle 03: The Battle of Baqah al-Garbiyyah Oasis”The Egyptian Army: Sudanese Infantry
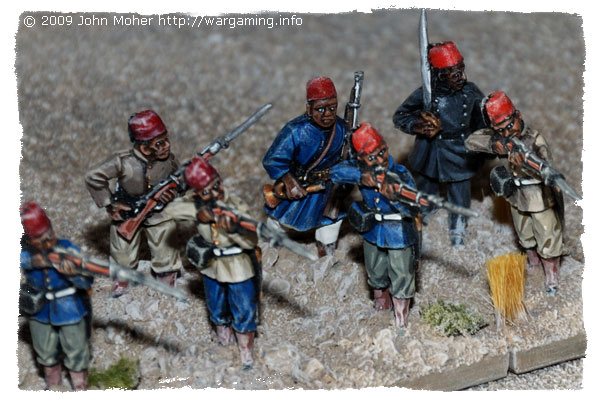
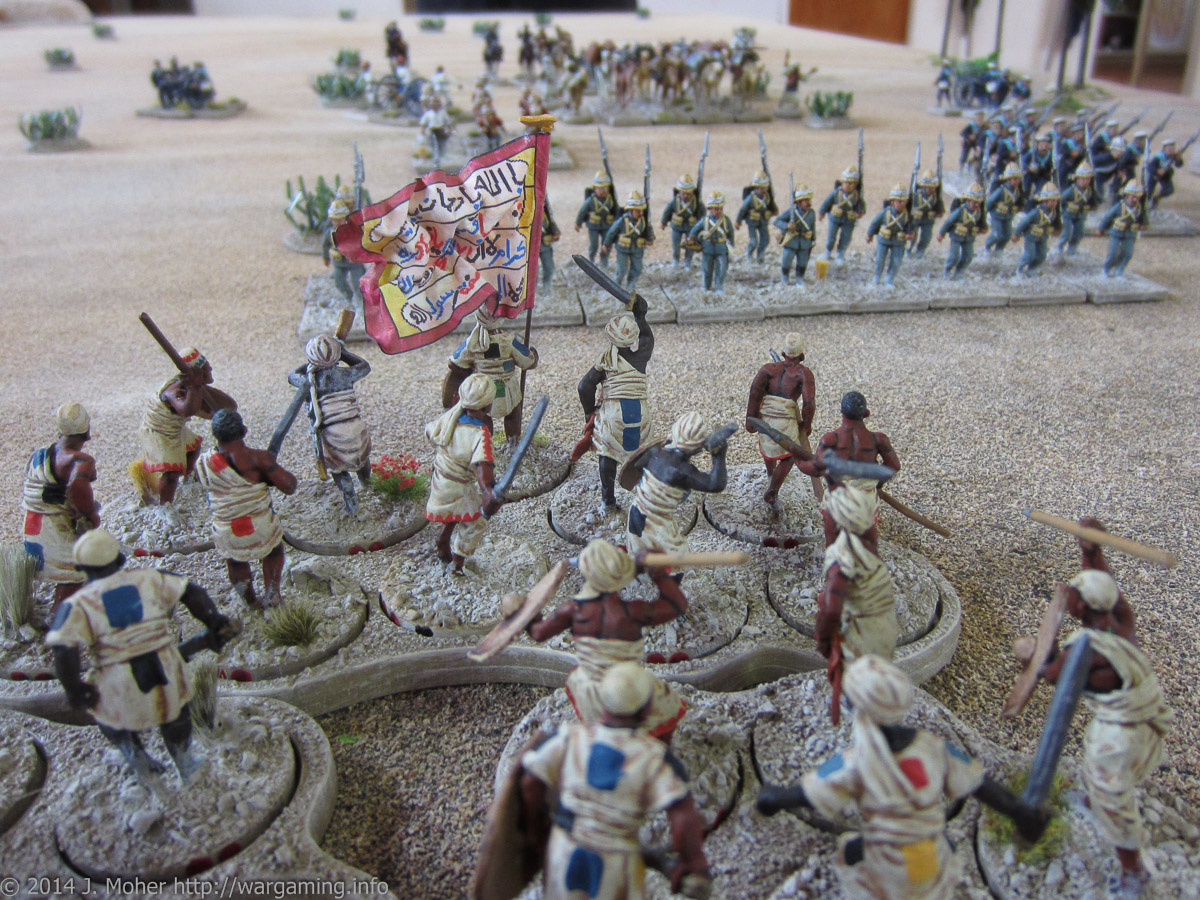
A Sudanese Infantry Company (the 1st as you can tell by the Blue Company Flag) – they mostly wear blue uniforms as per the Egyptian winter uniform (or perhaps they are from the XIIth Sudanese who wore a ‘Gendarme’ blue uniform). The Company NCO is in charge of the standard and there is an Egyptian Lieutenant or Captain (or Agha), while the Company Bugler is in somewhat non-regulation dress (he’s actually been requisitioned from the Perry’s Bazinger command pack). The Sudanese Infantry Battalion HQ features a mounted Egyptian Colonel (or Bey); a Veteran Sudanese NCO (or perhaps a trusted irregular scout – with Revolver & Sword and a non-regulation uniform – he’s actually a Perry’s Bazinger figure), an Egyptian Ensign with the Battalion Standard, and the Battalion Musician (another Egyptian, this time a Drummer), the latter two wear Sudan manufactured Brown (or perhaps dark khaki) uniform. Continue reading “The Egyptian Army: Sudanese Infantry”